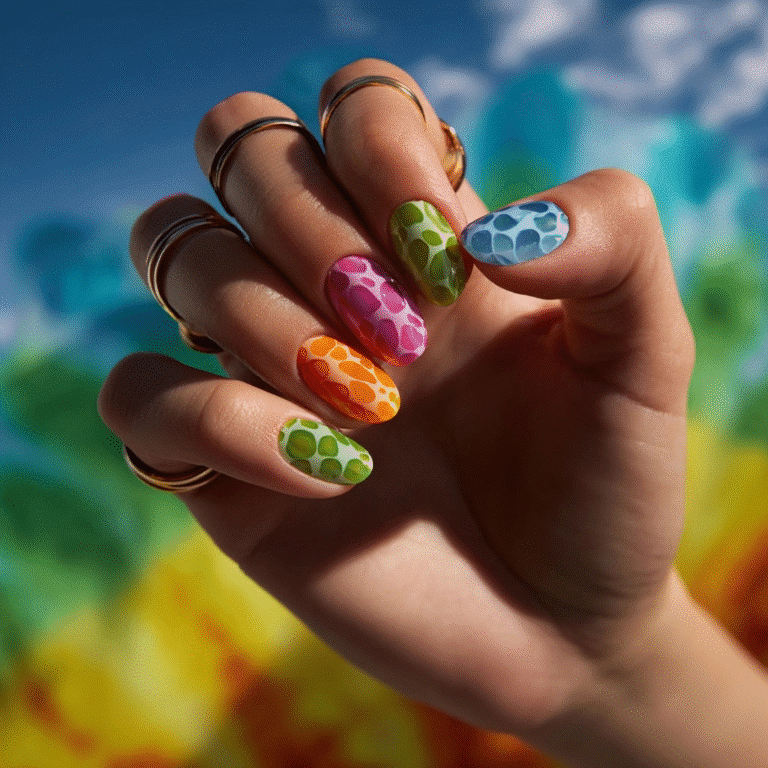
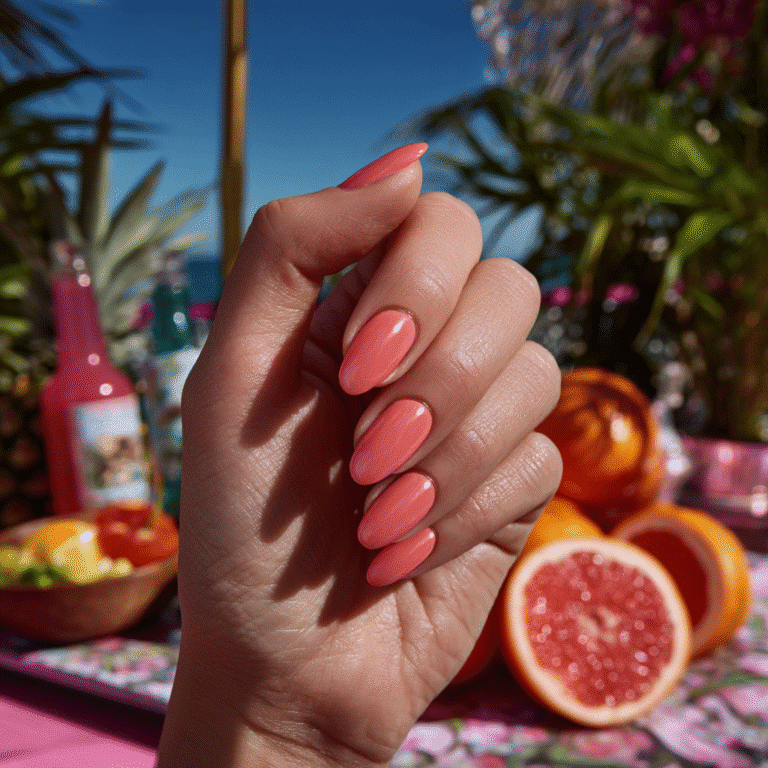
Color and Calm: Beach-Inspired Nail Designs for a Luminous Summer
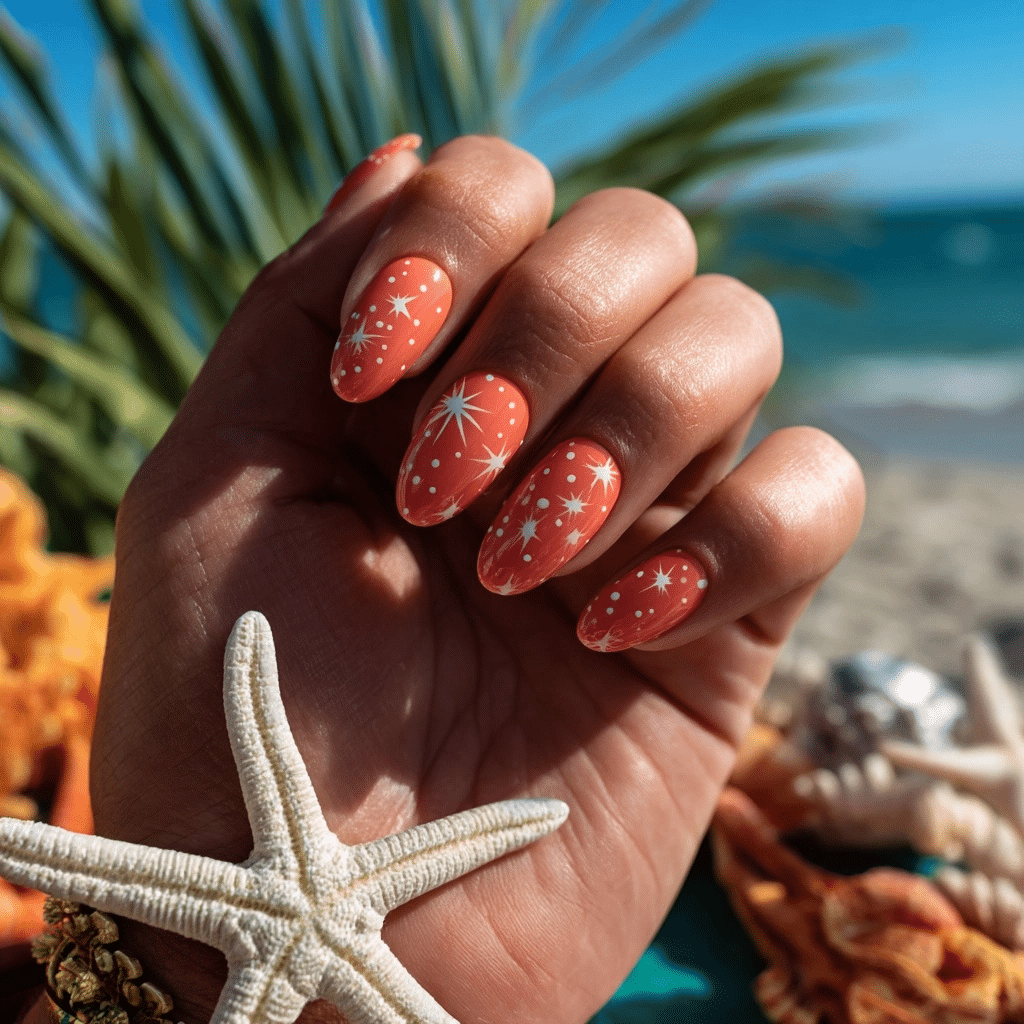
There’s something effortlessly joyful about beachy summer nails. They’re not just about color—they’re about energy, rhythm, and a sense of escape. In 2025, colorful coastal-inspired nail designs are taking center stage with looks that capture everything from crashing waves to warm, golden light. These aren’t loud designs—they’re vibrant, yet grounded in nature.
Think of gentle ombrés that mimic the sky, palm-framed sunsets, or shimmer that catches the light like sea foam. The result? Nail designs that make every gesture feel like a mini vacation.
Why I Love It
I love beachy nail designs because they don’t just look beautiful—they feel like a breath of fresh air. These styles are calming, carefree, and creatively expressive. From ocean blues to soft pinks and sandy neutrals, the colors blend so naturally and always remind me of warm skin, salty air, and simple joy.
They also work well across skin tones and outfits. Whether you’re in linen by the water or grabbing coffee downtown, these nails carry a lightness that just feels right for summer.
15 Beachy Summer Nail Colorful Designs Guide
These 15 beachy summer nail colorful designs for 2025 capture the vibrant, serene essence of coastal summers, from crashing waves to tropical blooms. Each design is bold, multi-tonal, and inspired by the ocean’s beauty, offering glossy, matte, or shimmering finishes. Detailed steps, tools, and variations ensure accessibility for all skill levels, embodying summer’s coastal vibrancy. The term “uncovered” is used for base polishes to align with sensitivity guidelines.
Ocean Wave Tips
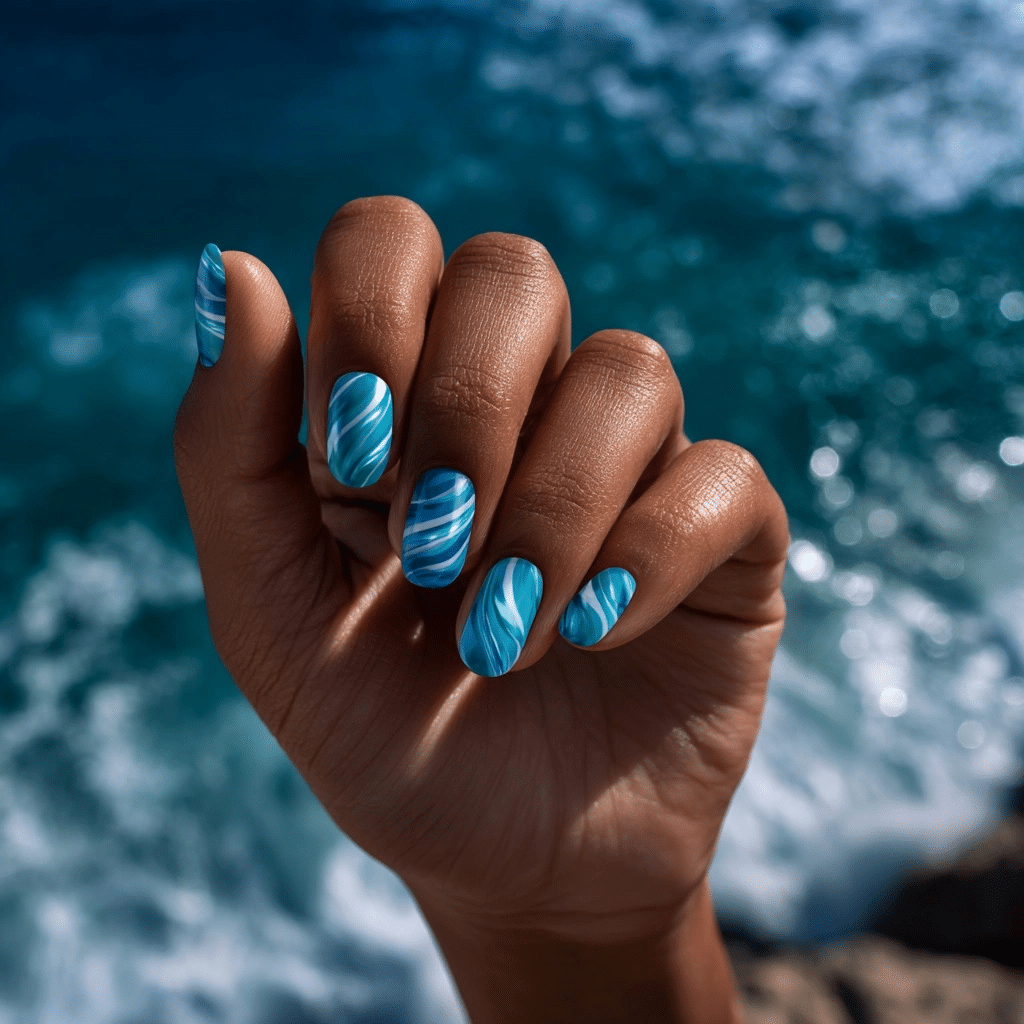
Ocean Wave Tips feature glossy uncovered nails with wavy tips in layered blue, aqua, and white, offering a dynamic, summery look. Ideal for beach outings or coastal parties, this design radiates oceanic energy.
Description and Inspiration
This design mimics the frothy, layered waves crashing onto the shore, with blue, aqua, and white tips creating a vibrant contrast against a glossy uncovered base. It’s perfect for evoking the rhythm of the ocean during summer beach adventures.
Tools Needed
- Uncovered base polish
- Blue, aqua, and white nail polishes
- Thin detail brush
- Base coat and glossy top coat
- Nail file
- Acetone for cleanup
Step-by-Step Guide
- File nails to a medium-length, square shape for a clean look; apply a base coat and let dry.
- Paint nails with uncovered polish as a base; apply two coats for a glossy finish and let dry.
- Using a thin detail brush, paint wavy blue lines across the tips of each nail.
- Layer aqua waves over the blue, slightly overlapping for depth.
- Add white wave accents to mimic foam, keeping lines fluid and varied.
- Clean excess polish with acetone.
- Seal with a glossy top coat for a wave-like shine.
Complementary Design Suggestions
- Subtle Pop: Add silver glitter along the wave tips.
- Bold Contrast: Pair with a teal accent nail.
- Soft Glow: Incorporate a seashell decal on one nail.
Tips for Success
- Use a fine brush for precise wave lines.
- Practice wave patterns on paper first.
- Apply thin layers to avoid clumping.
- Use a glossy top coat for vibrancy.
Creative Variations
- Apply a matte top coat for a frosted wave effect.
- Use neon blue for bolder waves.
- Create a full-nail wave pattern.
- Add a tiny starfish decal for charm.
This design pairs with blue outfits or silver jewelry, radiating summer intensity. Maintain by refreshing the top coat. Ocean Wave Tips is a striking vacation choice.
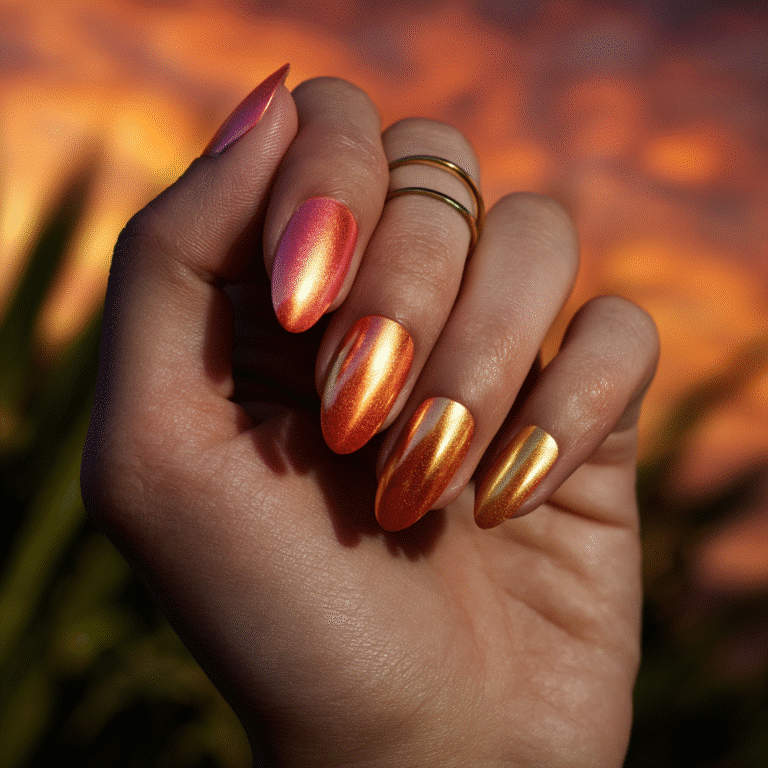
Sunset Fade Ombré
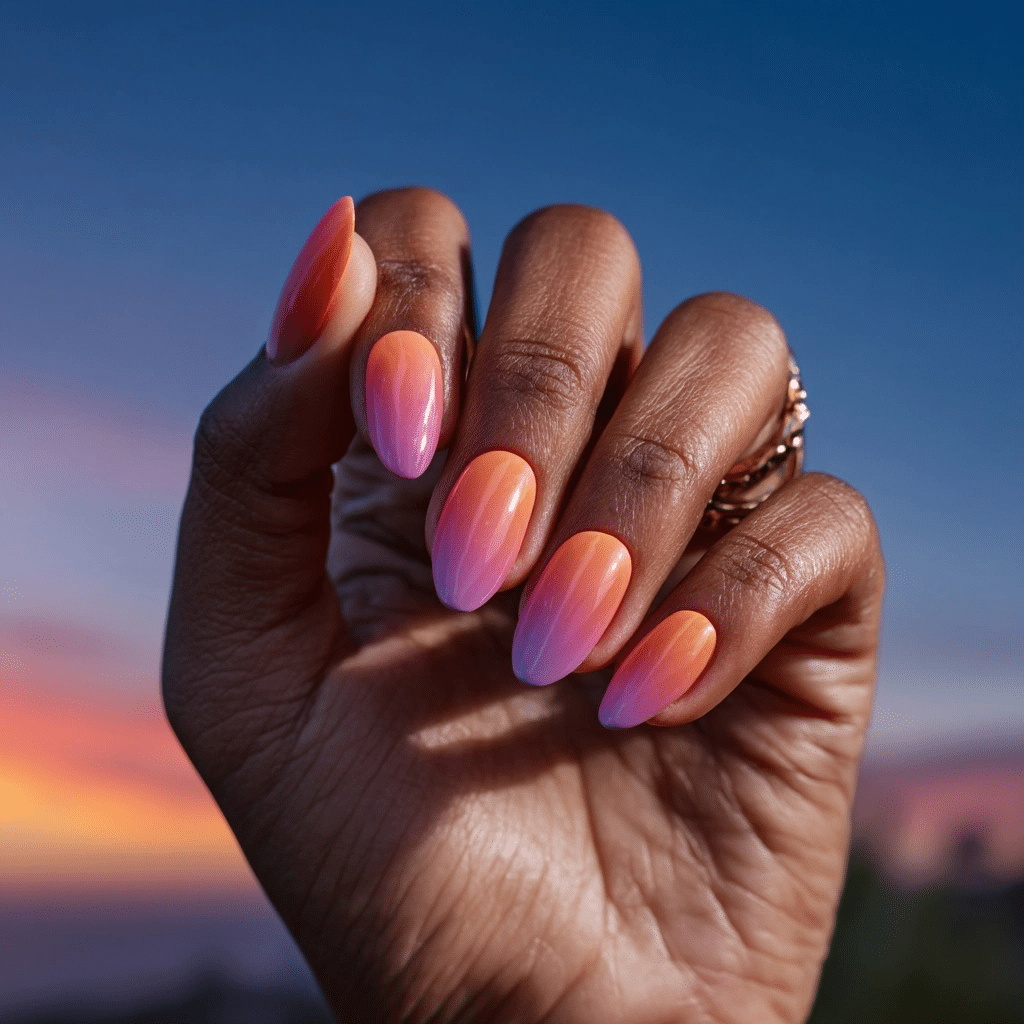
Sunset Fade Ombré features gradient nails blending coral, pink, and lavender, like a beachy sky, offering a romantic, summery look. Ideal for beach sunsets or tropical evenings, this design radiates warm vibrancy.
Description and Inspiration
This ombré design captures the soft, colorful hues of a coastal sunset, with coral fading into pink and lavender for a dreamy effect. It’s perfect for romantic summer evenings by the shore.
Tools Needed
- Coral, pink, and lavender nail polishes
- Makeup sponge
- Base coat and glossy top coat
- Nail file
- Acetone for cleanup
Step-by-Step Guide
- File nails to a medium-length, almond shape for a soft look; apply a base coat and let dry.
- Paint nails with a clear base; let dry.
- Dab coral, pink, and lavender polishes onto a makeup sponge in a gradient pattern.
- Press sponge onto nails, blending colors for a sunset ombré; repeat for opacity.
- Clean excess polish with acetone.
- Seal with a glossy top coat for a radiant finish.
Complementary Design Suggestions
- Shimmer Pop: Add gold glitter at the tips.
- Bold Contrast: Pair with a navy accent nail.
- Soft Glow: Incorporate a sun decal on one nail.
Tips for Success
- Use a sponge for seamless blending.
- Apply thin layers to avoid clumps.
- Practice gradient on paper first.
- Use a glossy top coat for vibrancy.
Creative Variations
- Apply a matte top coat for a soft sunset effect.
- Use neon coral for a bolder fade.
- Create a vertical ombré design.
- Add a palm tree silhouette decal.
This design pairs with coral dresses or gold jewelry, radiating summer romance. Maintain by refreshing the top coat. Sunset Fade Ombré is a stunning vacation choice.
Mini Seashell Art
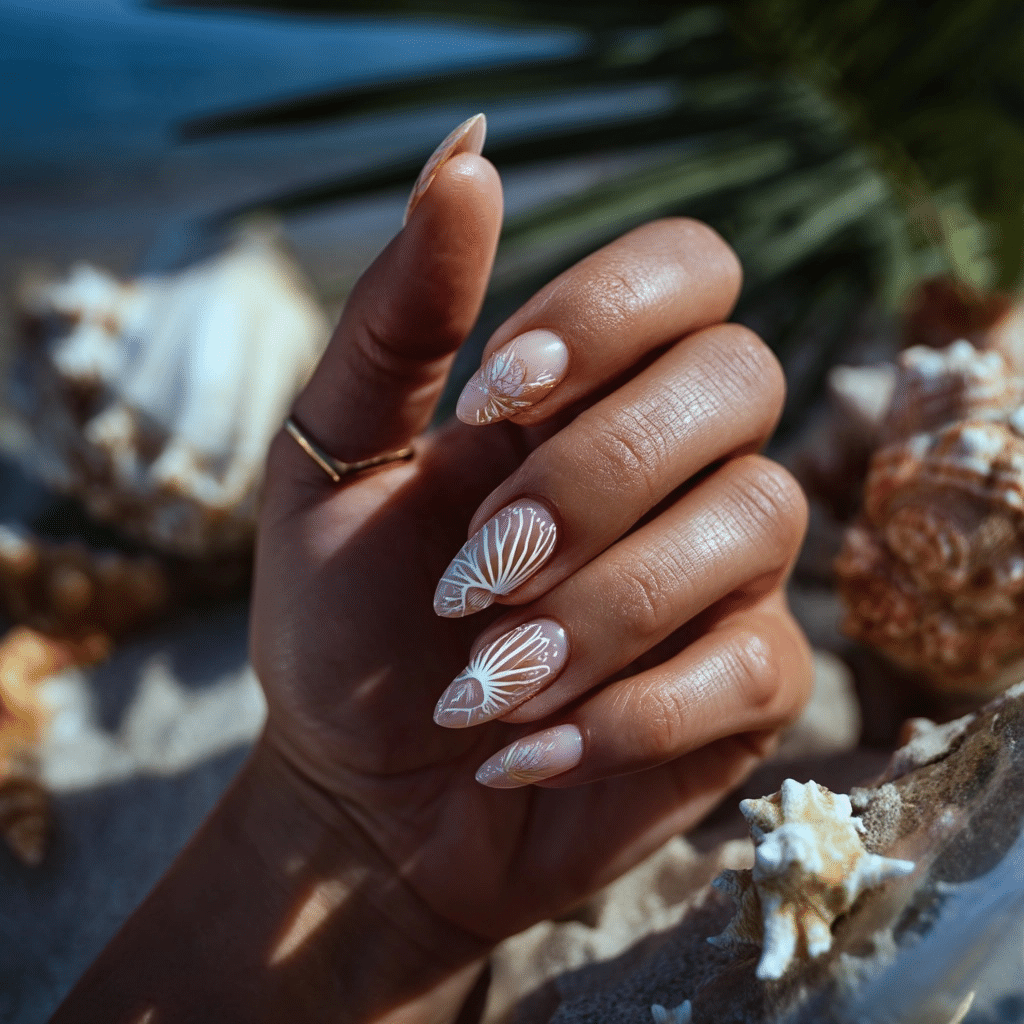
Mini Seashell Art features a soft beige or pearl base with delicate shell designs in white or gold, offering an elegant, summery look. Ideal for beach weddings or coastal soirées, this design radiates refined charm.
Description and Inspiration
This delicate design evokes seashells scattered on the shore, with tiny white or gold shell art over a soft beige or pearl base. It’s a sophisticated choice for a polished beachy aesthetic.
Tools Needed
- Beige or pearl base polish
- White or gold nail polish
- Thin detail brush
- Base coat and glossy top coat
- Nail file
- Acetone for cleanup
Step-by-Step Guide
- File nails to a medium-length, stiletto shape for elegance; apply a base coat and let dry.
- Paint nails with beige or pearl polish as a base; apply two coats for opacity and let dry.
- Using a thin detail brush, paint small seashell shapes (spirals or scallops) in white or gold on accent nails.
- Add tiny dots for texture, mimicking shell ridges.
- Clean excess polish with acetone.
- Seal with a glossy top coat for a pearlescent shine.
Complementary Design Suggestions
- Metallic Pop: Add gold foil flecks around shells.
- Soft Glow: Pair with a white accent nail.
- Bold Contrast: Incorporate a teal seashell design.
Tips for Success
- Use a fine brush for precise shell shapes.
- Practice shell designs on paper first.
- Apply designs sparingly for elegance.
- Use a glossy top coat for durability.
Creative Variations
- Apply a matte top coat for a soft shell effect.
- Use silver polish for shell art.
- Create a full-nail shell pattern.
- Add a pearl stud for extra glamour.
This design pairs with white dresses or pearl jewelry, radiating summer elegance. Maintain by refreshing the top coat. Mini Seashell Art is a luxurious vacation choice.
Seafoam Green Swirl Nails
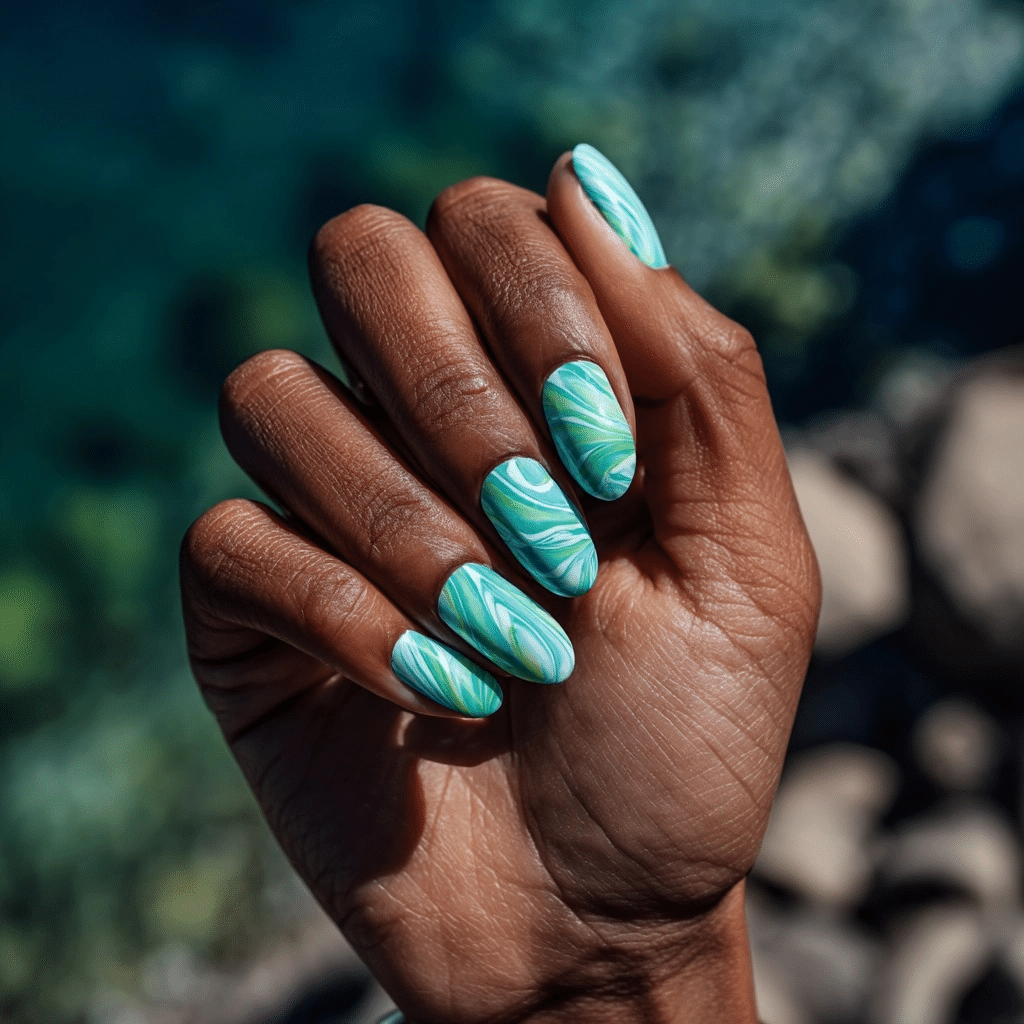
Seafoam Green Swirl Nails feature abstract swirls in mint and turquoise over a translucent base, offering a vibrant, summery look. Ideal for beach festivals or tropical outings, this design radiates artistic energy.
Description and Inspiration
This design captures the fluid motion of tidepools, with mint and turquoise swirls blending over a translucent base for a fresh, oceanic vibe. It’s perfect for creative summer beach adventures.
Tools Needed
- Translucent base polish
- Mint and turquoise nail polishes
- Thin detail brush
- Base coat and glossy top coat
- Nail file
- Acetone for cleanup
Step-by-Step Guide
- File nails to a medium-length, oval shape for a fluid look; apply a base coat and let dry.
- Paint nails with translucent polish as a base; let dry.
- Using a thin detail brush, paint wavy mint swirls across each nail.
- Add turquoise swirls, overlapping slightly for depth.
- Clean excess polish with acetone.
- Seal with a glossy top coat for a sea-like shine.
Complementary Design Suggestions
- Shimmer Pop: Add silver glitter within swirls.
- Bold Contrast: Pair with a coral accent nail.
- Soft Glow: Incorporate a white wave decal.
Tips for Success
- Use a thin brush for precise swirls.
- Work quickly to blend colors smoothly.
- Practice swirls on paper first.
- Use a glossy top coat for vibrancy.
Creative Variations
- Apply a matte top coat for a frosted effect.
- Use neon turquoise for bolder swirls.
- Create tighter, spiral swirls.
- Add a tiny seashell decal.
This design pairs with turquoise outfits or silver jewelry, radiating summer artistry. Maintain by refreshing the top coat. Seafoam Green Swirl Nails is a lively vacation choice.
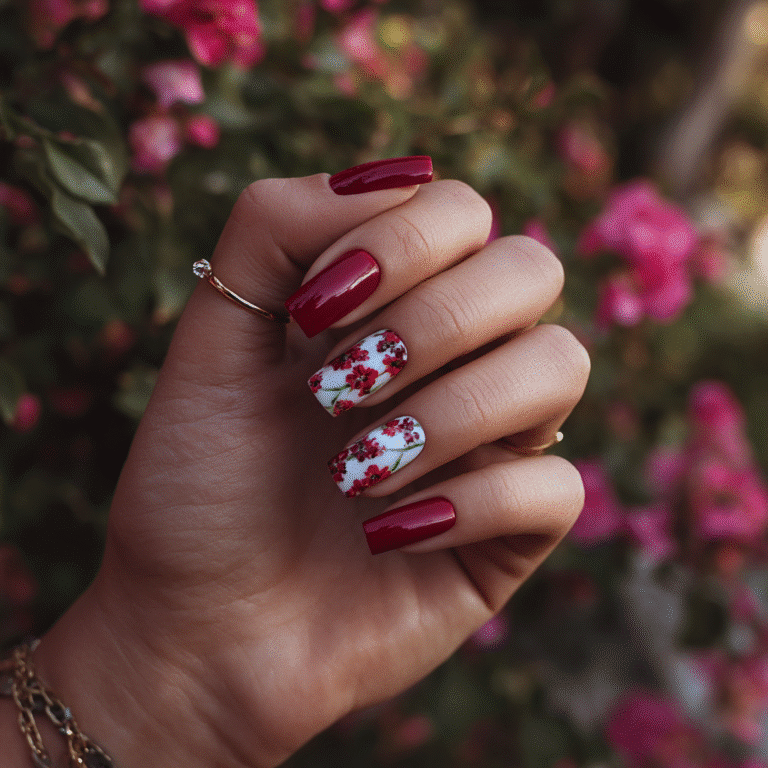
Tropical Floral Accents
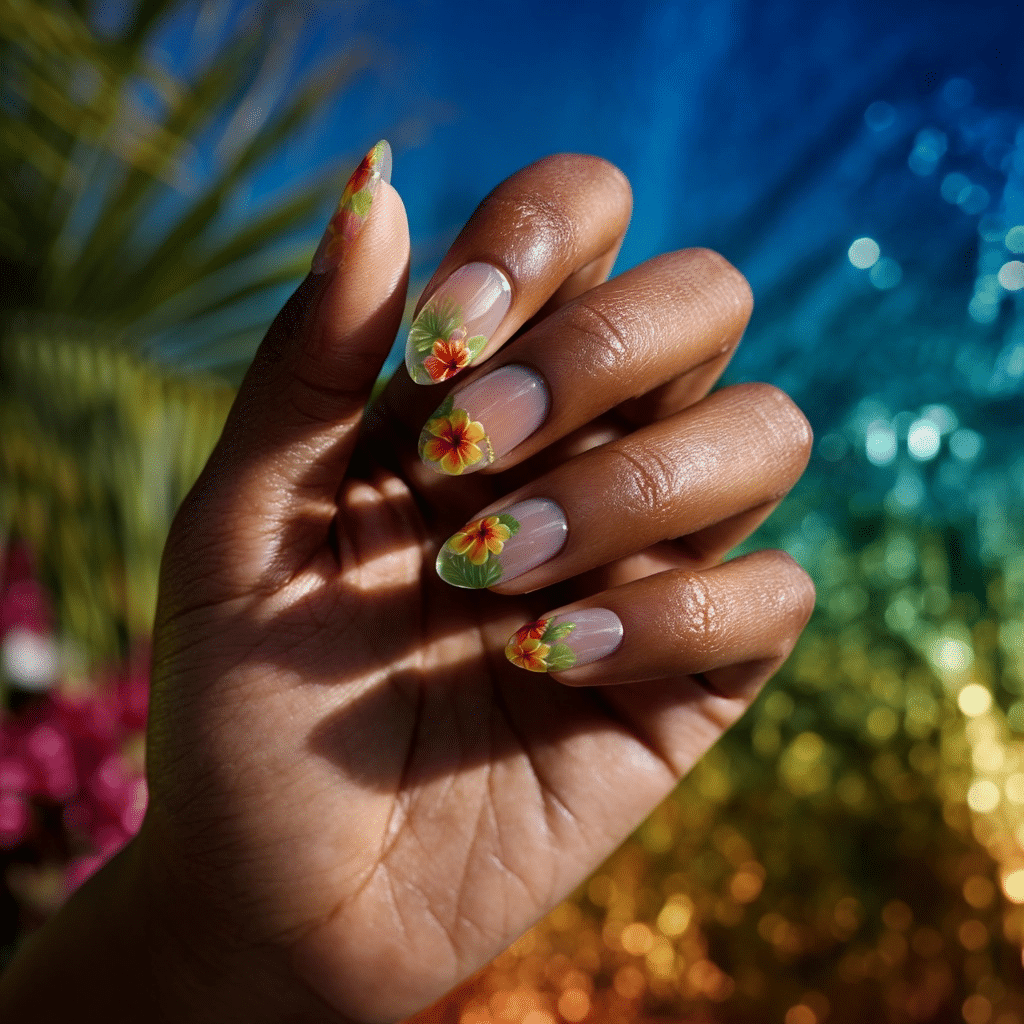
Tropical Floral Accents feature hibiscus or plumeria flowers painted over clear or pale pink polish, offering a vibrant, summery look. Ideal for beach parties or tropical getaways, this design radiates floral charm.
Description and Inspiration
This design evokes vibrant tropical blooms, with hibiscus or plumeria flowers in bright colors over a clear or pale pink base. It’s a playful, summery choice for coastal festivities.
Tools Needed
- Clear or pale pink base polish
- Red, yellow, and green nail polishes
- Thin detail brush
- Dotting tool
- Base coat and glossy top coat
- Nail file
- Acetone for cleanup
Step-by-Step Guide
- File nails to a medium-length, oval shape for a playful look; apply a base coat and let dry.
- Paint nails with clear or pale pink polish as a base; let dry.
- On accent nails, use a detail brush to paint hibiscus (red petals, yellow center) or plumeria (white petals, yellow center).
- Add green leaves with the brush and a yellow dot with a dotting tool for flower centers.
- Clean excess polish with acetone.
- Seal with a glossy top coat for a floral shine.
Complementary Design Suggestions
- Floral Pop: Add white petal outlines for depth.
- Shimmer Pop: Apply gold glitter around flowers.
- Bold Contrast: Pair with a teal accent nail.
Tips for Success
- Use a fine brush for precise flower shapes.
- Practice floral designs on paper first.
- Apply designs sparingly for balance.
- Use a glossy top coat for vibrancy.
Creative Variations
- Apply a matte top coat for a soft floral effect.
- Use neon pink for bolder flowers.
- Create a full-nail floral pattern.
- Add a tiny leaf decal for charm.
This design pairs with floral dresses or gold jewelry, radiating summer joy. Maintain by refreshing the top coat. Tropical Floral Accents is a delightful vacation choice.
Coral Reef Color Mix
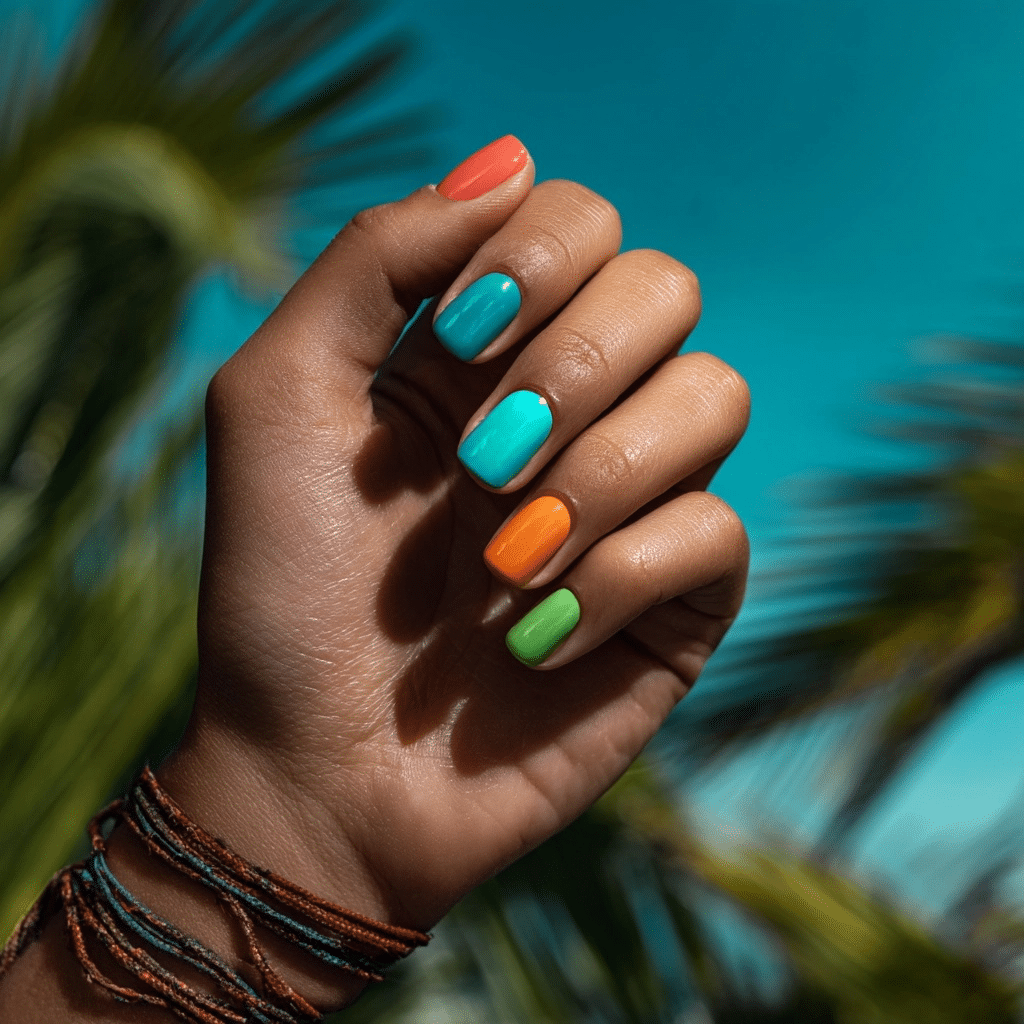
Coral Reef Color Mix features alternating nails in coral, bright teal, and seafoam green, offering a vibrant, summery look. Ideal for beach raves or tropical parties, this design radiates oceanic vibrancy.
Description and Inspiration
This bold design mimics the colorful diversity of coral reefs, with alternating nails in coral, teal, and seafoam green for a lively, coastal vibe. It’s perfect for summer beach adventures.
Tools Needed
- Coral, bright teal, and seafoam green nail polishes
- Base coat and glossy top coat
- Nail file
- Acetone for cleanup
Step-by-Step Guide
- File nails to a medium-length, square shape for a bold look; apply a base coat and let dry.
- Paint nails in an alternating pattern: coral, teal, and seafoam green, using two coats for opacity; let dry.
- Ensure even, vibrant coverage for a reef-like effect.
- Clean excess polish with acetone.
- Seal with a glossy top coat for a radiant finish.
Complementary Design Suggestions
- Shimmer Pop: Add silver glitter to one nail.
- Soft Glow: Pair with a white accent nail.
- Bold Contrast: Incorporate a yellow accent nail.
Tips for Success
- Use high-opacity polishes for bold colors.
- Apply thin layers to prevent streaks.
- Clean cuticles for a polished look.
- Use a glossy top coat for vibrancy.
Creative Variations
- Apply a matte top coat for a soft reef effect.
- Add a tiny coral decal for charm.
- Create a gradient with reef colors.
- Dust with holographic glitter for shimmer.
This design pairs with colorful outfits or silver jewelry, radiating summer intensity. Maintain by refreshing the top coat. Coral Reef Color Mix is a striking vacation choice.
Palm Tree Silhouette Design
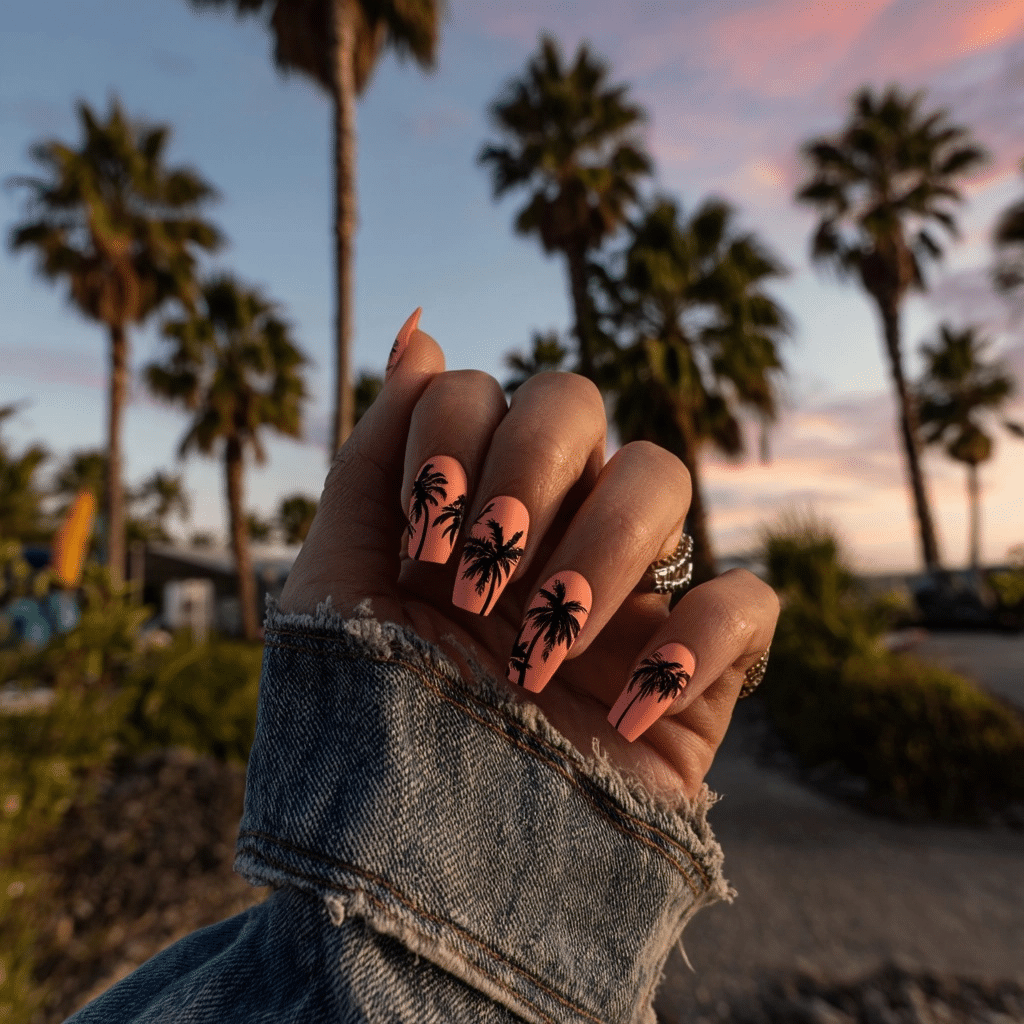
Palm Tree Silhouette Design features a matte sunset base with black palm trees on one or two accent nails, offering a dramatic, summery look. Ideal for beach sunsets or tropical evenings, this design radiates bold artistry.
Description and Inspiration
This design captures a tropical sunset, with a matte coral or peach base and black palm tree silhouettes evoking a serene coastal evening. It’s a striking choice for summer nights by the shore.
Tools Needed
- Coral or peach base polish
- Black nail polish
- Thin detail brush
- Base coat and matte top coat
- Nail file
- Acetone for cleanup
Step-by-Step Guide
- File nails to a medium-length, coffin shape for drama; apply a base coat and let dry.
- Paint nails with coral or peach polish as a base; apply two coats and let dry.
- On one or two accent nails, use a thin detail brush to paint black palm tree silhouettes (trunk and fronds).
- Ensure clean, sharp lines for the silhouettes.
- Clean excess polish with acetone.
- Seal with a matte top coat for a soft sunset effect.
Complementary Design Suggestions
- Shimmer Pop: Add gold glitter to the sunset base.
- Bold Contrast: Pair with a teal accent nail.
- Soft Glow: Incorporate a sun decal on one nail.
Tips for Success
- Use a fine brush for precise silhouettes.
- Practice palm tree designs on paper first.
- Apply base polish evenly for a smooth finish.
- Use a matte top coat for contrast.
Creative Variations
- Use a glossy top coat for a vibrant sunset.
- Paint silhouettes in white for a softer look.
- Create a gradient sunset base.
- Add a tiny bird decal for charm.
This design pairs with sunset-hued dresses or gold jewelry, radiating summer drama. Maintain by refreshing the top coat. Palm Tree Silhouette Design is a bold vacation choice.
Neon Beach Stripe Tips
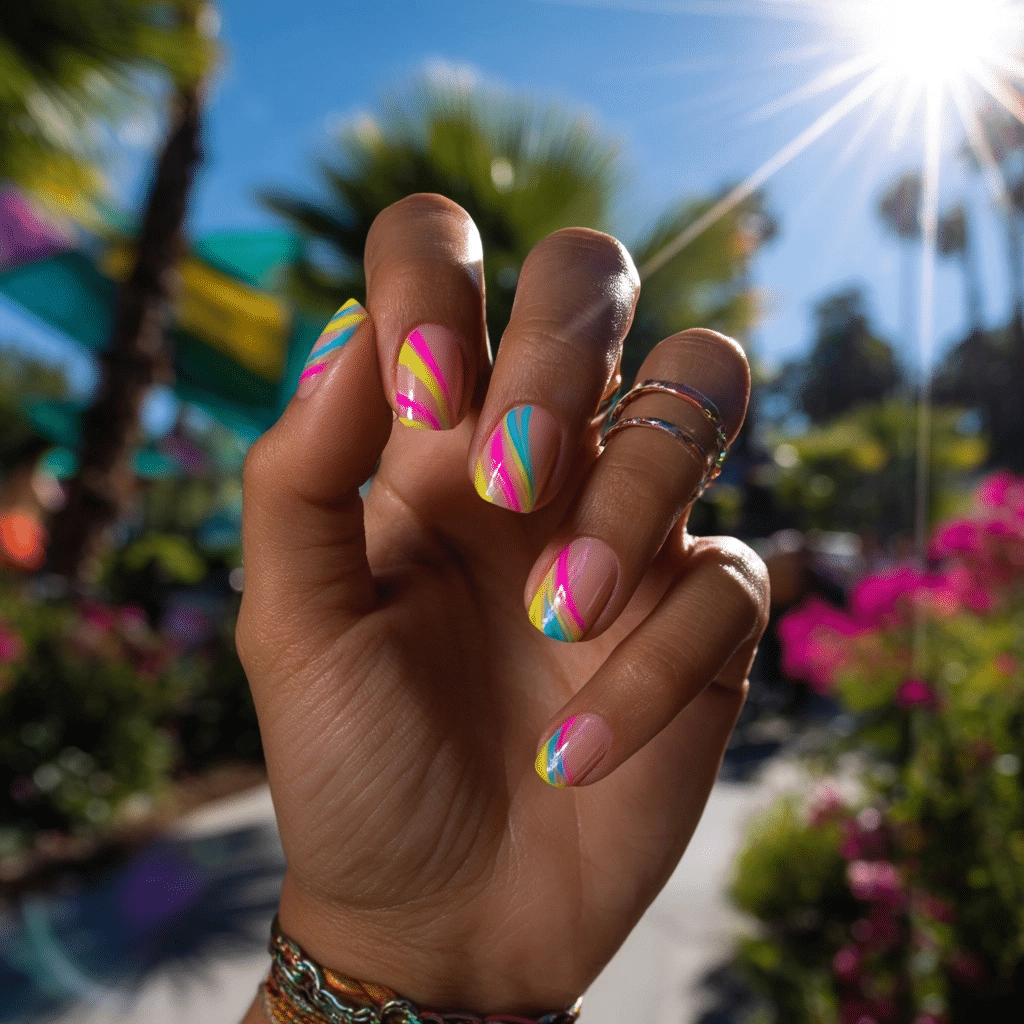
Neon Beach Stripe Tips feature clear nails with bold diagonal tips in hot pink, yellow, and turquoise, offering a vibrant, summery look. Ideal for beach raves or tropical festivals, this design radiates playful energy.
Description and Inspiration
This design captures the bold vibe of beach parties, with neon pink, yellow, and turquoise diagonal stripes on the tips of clear nails. It’s a fun, energetic choice for summer coastal celebrations.
Tools Needed
- Clear base polish
- Hot pink, yellow, and turquoise nail polishes
- Thin striping tape
- Base coat and glossy top coat
- Nail file
- Acetone for cleanup
Step-by-Step Guide
- File nails to a medium-length, square shape for a bold look; apply a base coat and let dry.
- Paint nails with clear polish as a base; let dry.
- Apply striping tape diagonally across the tips to create three sections.
- Paint each section with hot pink, yellow, or turquoise polish; remove tape carefully.
- Clean excess polish with acetone.
- Seal with a glossy top coat for a vibrant shine.
Complementary Design Suggestions
- Shimmer Pop: Add silver glitter along the stripes.
- Bold Contrast: Pair with a black accent nail.
- Soft Glow: Incorporate a white stripe design.
Tips for Success
- Apply tape precisely for clean lines.
- Remove tape before polish dries.
- Use high-opacity polishes for vibrancy.
- Use a glossy top coat for durability.
Creative Variations
- Apply a matte top coat for a soft neon effect.
- Use vertical stripes for a different look.
- Create a full-nail stripe pattern.
- Add a tiny heart decal for charm.
This design pairs with neon outfits or silver jewelry, radiating summer fun. Maintain by refreshing the top coat. Neon Beach Stripe Tips is a trendy vacation choice.
Tidepool Marble Nails
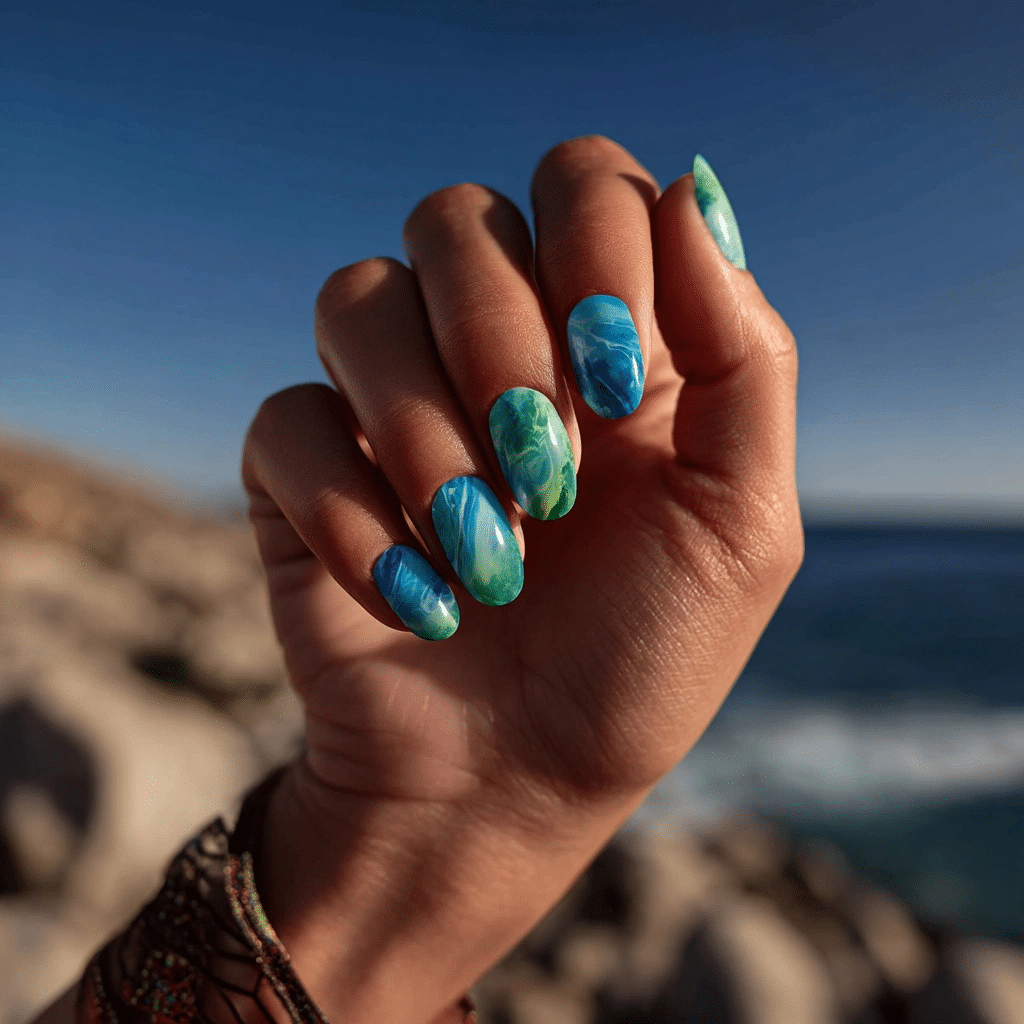
Tidepool Marble Nails feature swirled blue and green polish mimicking coastal rock pools, offering a vibrant, summery look. Ideal for beach adventures or tropical outings, this design radiates oceanic artistry.
Description and Inspiration
This design evokes the swirling hues of tidepools, with blue and green polish marbled together for a fluid, coastal effect. It’s a creative choice for summer beach explorations.
Tools Needed
- Blue and green nail polishes
- Clear base polish
- Small cup of water
- Toothpick
- Base coat and glossy top coat
- Nail file
- Acetone for cleanup
Step-by-Step Guide
- File nails to a medium-length, oval shape for a fluid look; apply a base coat and let dry.
- Paint nails with clear polish as a base; let dry.
- Fill a cup with room-temperature water; drop blue and green polish onto the surface.
- Use a toothpick to swirl the colors into a marble pattern.
- Dip each nail into the pattern, holding briefly; remove excess with acetone.
- Seal with a glossy top coat for a tidepool shine.
Complementary Design Suggestions
- Shimmer Pop: Add silver glitter within the marble.
- Bold Contrast: Pair with a coral accent nail.
- Soft Glow: Incorporate a white starfish decal.
Tips for Success
- Work quickly to keep polish fluid in water.
- Use acetone to clean cuticles immediately.
- Practice marbling on paper first.
- Use a glossy top coat for vibrancy.
Creative Variations
- Apply a matte top coat for a frosted tidepool effect.
- Use turquoise and teal for a bolder marble.
- Create a single-nail marble design.
- Add a tiny seashell decal.
This design pairs with blue outfits or silver jewelry, radiating summer artistry. Maintain by refreshing the top coat. Tidepool Marble Nails is a lively vacation choice.
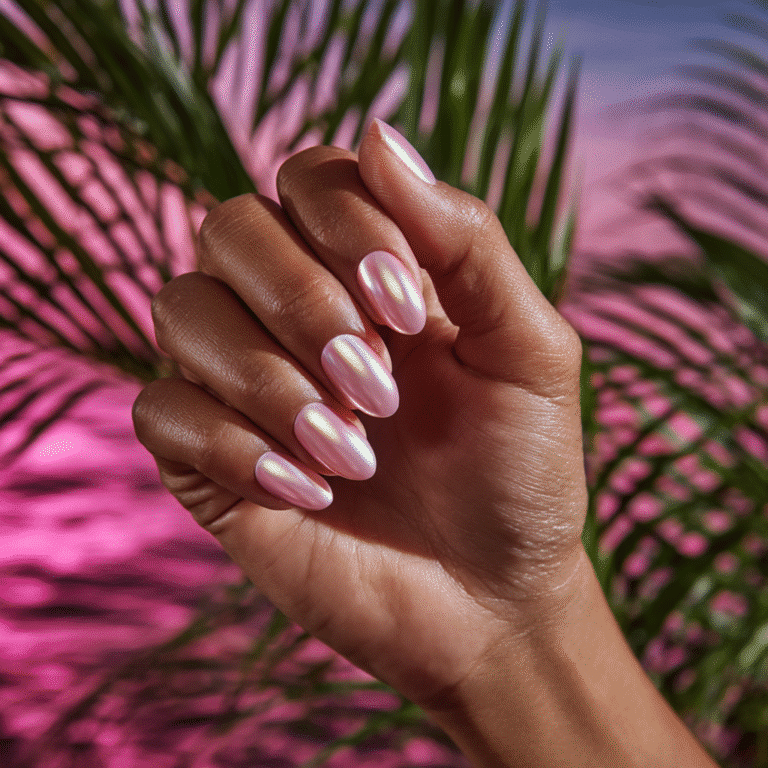
Shell Pink with Gold Foil
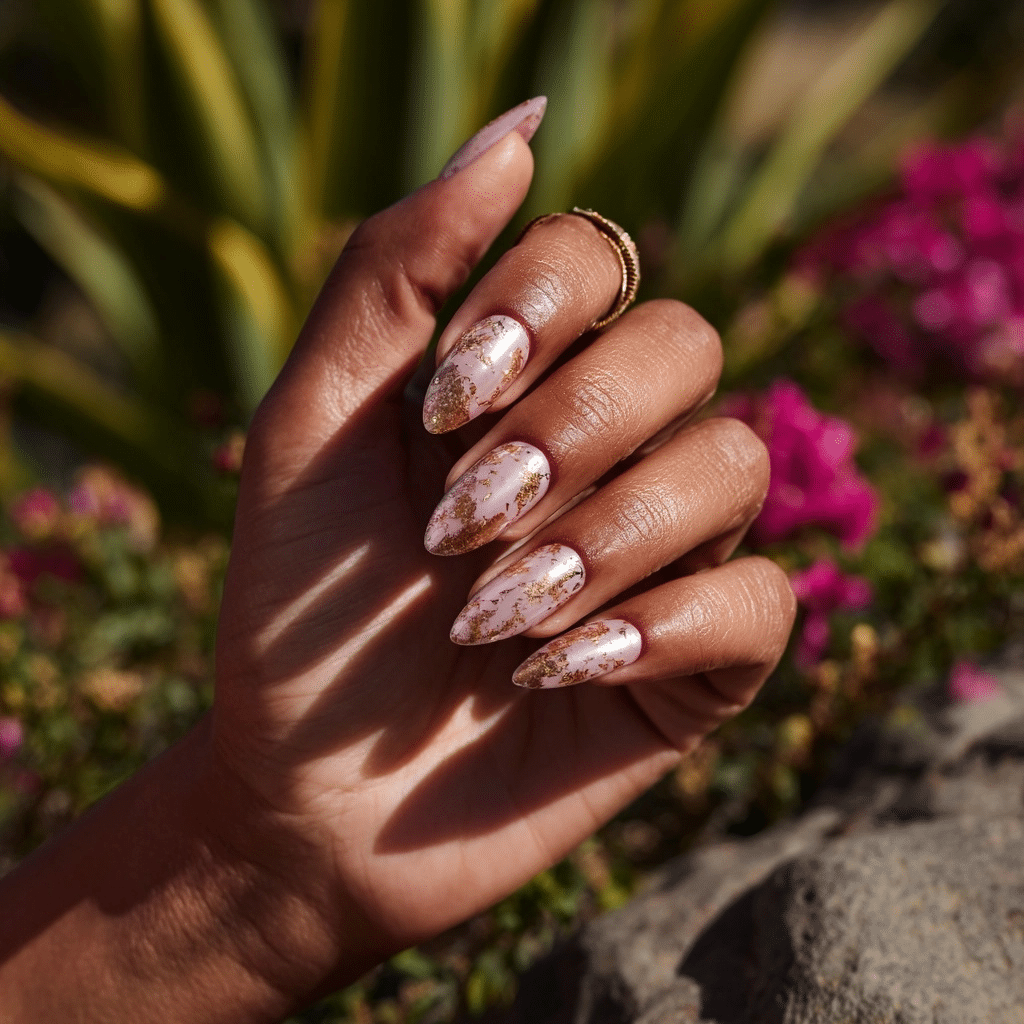
Shell Pink with Gold Foil features pearly pink polish with soft flecks of foil for a sun-kissed shimmer, offering an elegant, summery look. Ideal for beach weddings or coastal soirées, this design radiates luxurious charm.
Description and Inspiration
This design mimics the soft glow of seashells, with pearly pink polish enhanced by gold foil flecks for a radiant, coastal vibe. It’s a glamorous choice for summer beach elegance.
Tools Needed
- Pearly pink nail polish
- Gold foil flakes
- Base coat and glossy top coat
- Nail file
- Acetone for cleanup
- Tweezers
Step-by-Step Guide
- File nails to a medium-length, stiletto shape for glamour; apply a base coat and let dry.
- Paint nails with pearly pink polish; apply two coats for opacity and let dry.
- Using tweezers, place small gold foil flakes randomly across each nail.
- Press gently to adhere the foil; avoid over-application for a delicate look.
- Clean excess polish with acetone.
- Seal with a glossy top coat for a shimmering finish.
Complementary Design Suggestions
- Metallic Pop: Add a pearl stud on one nail.
- Soft Glow: Pair with a white accent nail.
- Bold Contrast: Incorporate a teal foil design.
Tips for Success
- Use tweezers for precise foil placement.
- Apply foil sparingly for elegance.
- Ensure base polish is fully dry before adding foil.
- Use a glossy top coat for durability.
Creative Variations
- Apply a matte top coat for a soft shell effect.
- Use silver foil for a cooler shimmer.
- Create a foil French tip design.
- Add a tiny seashell decal.
This design pairs with pink dresses or gold jewelry, radiating summer glamour. Maintain by refreshing the top coat. Shell Pink with Gold Foil is a luxurious vacation choice.
Bright Beach Ball Stripes
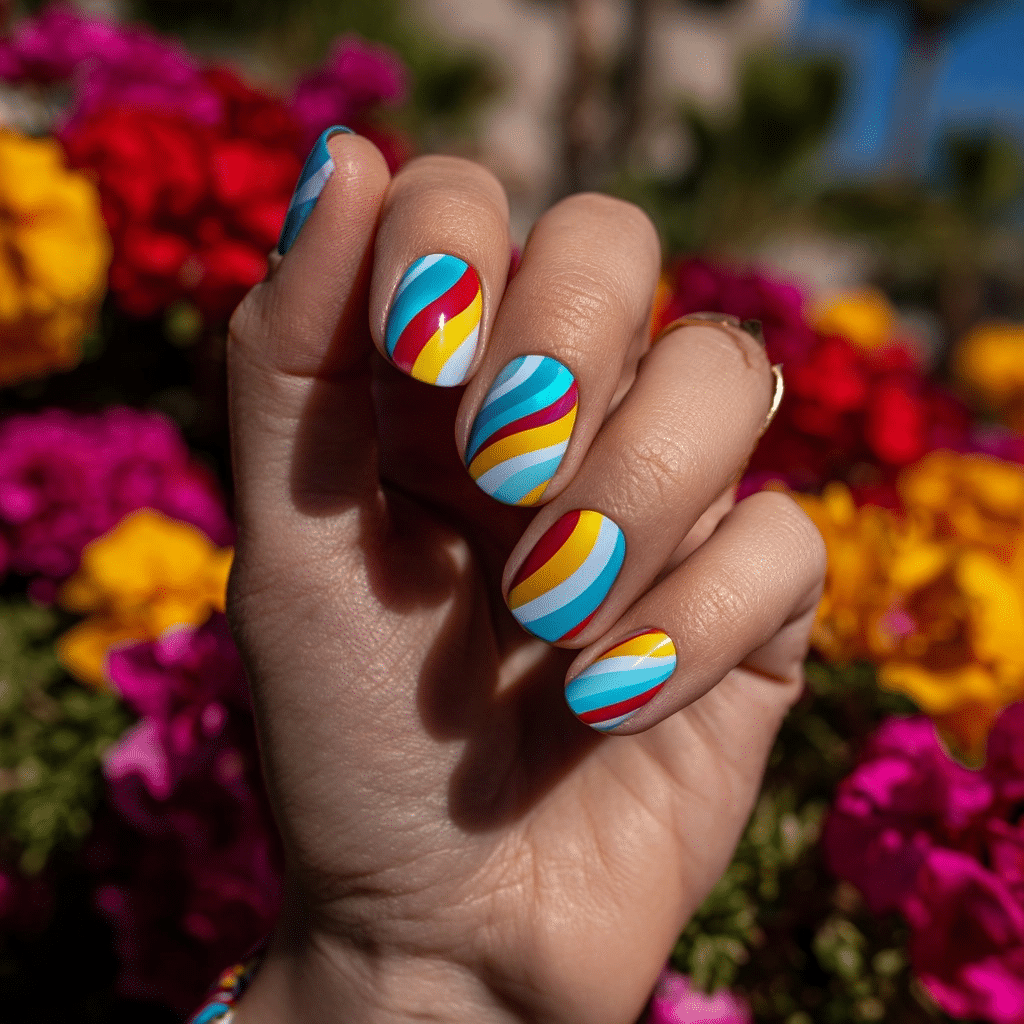
Bright Beach Ball Stripes feature multicolored curved stripes like classic beach toys, offering a playful, summery look. Ideal for beach picnics or summer festivals, this design radiates vibrant fun.
Description and Inspiration
This design captures the colorful joy of beach balls, with curved red, yellow, blue, and white stripes over a clear or white base. It’s a cheerful choice for summer coastal celebrations.
Tools Needed
- Clear or white base polish
- Red, yellow, blue, and white nail polishes
- Thin striping tape
- Base coat and glossy top coat
- Nail file
- Acetone for cleanup
Step-by-Step Guide
- File nails to a medium-length, square shape for a playful look; apply a base coat and let dry.
- Paint nails with clear or white polish as a base; let dry.
- Apply striping tape in curved patterns to mimic beach ball segments.
- Paint each segment with red, yellow, blue, or white polish; remove tape carefully.
- Clean excess polish with acetone.
- Seal with a glossy top coat for a vibrant shine.
Complementary Design Suggestions
- Shimmer Pop: Add silver glitter along stripes.
- Bold Contrast: Pair with a black accent nail.
- Soft Glow: Incorporate a tiny beach ball decal.
Tips for Success
- Apply tape precisely for clean curves.
- Remove tape before polish dries.
- Use high-opacity polishes for vibrancy.
- Use a glossy top coat for durability.
Creative Variations
- Apply a matte top coat for a soft beach ball effect.
- Use neon colors for bolder stripes.
- Create a single-nail stripe design.
- Add a tiny star decal for charm.
This design pairs with colorful outfits or silver jewelry, radiating summer joy. Maintain by refreshing the top coat. Bright Beach Ball Stripes is a delightful vacation choice.
Underwater Glitter Accent
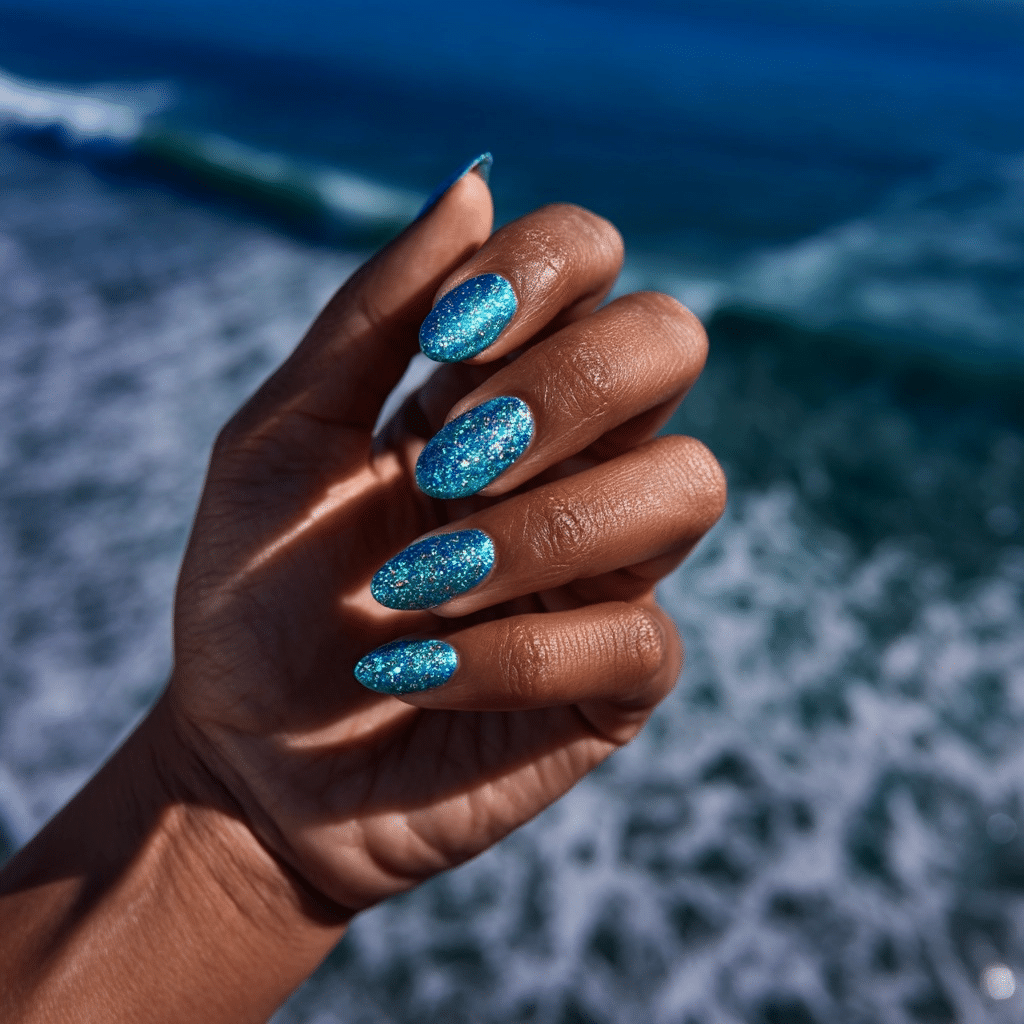
Underwater Glitter Accent features aqua polish with sparkling blue and green glitter accents, offering a vibrant, summery look. Ideal for beach parties or tropical raves, this design radiates oceanic sparkle.
Description and Inspiration
This design evokes the shimmering depths of the ocean, with aqua polish enhanced by blue and green glitter for a dazzling, coastal vibe. It’s a bold choice for summer beach festivities.
Tools Needed
- Aqua nail polish
- Blue and green glitter polish
- Base coat and glossy top coat
- Nail file
- Acetone for cleanup
Step-by-Step Guide
- File nails to a medium-length, oval shape for a fluid look; apply a base coat and let dry.
- Paint nails with aqua polish; apply two coats for opacity and let dry.
- Apply blue and green glitter polish sparingly on accent nails or as a gradient from the tips.
- Ensure glitter is evenly distributed for a sparkling effect.
- Clean excess polish with acetone.
- Seal with a glossy top coat for a radiant finish.
Complementary Design Suggestions
- Shimmer Pop: Add silver glitter for extra sparkle.
- Bold Contrast: Pair with a coral accent nail.
- Soft Glow: Incorporate a white wave decal.
Tips for Success
- Use a high-opacity base polish for vibrancy.
- Apply glitter sparingly to avoid clumping.
- Shake glitter polish before use for even distribution.
- Use a glossy top coat for durability.
Creative Variations
- Apply a matte top coat for a frosted glitter effect.
- Use holographic glitter for a bolder shine.
- Create a full-nail glitter design.
- Add a tiny seashell decal.
This design pairs with aqua outfits or silver jewelry, radiating summer intensity. Maintain by refreshing the top coat. Underwater Glitter Accent is a striking vacation choice.
Soft Sand & Sea Combo
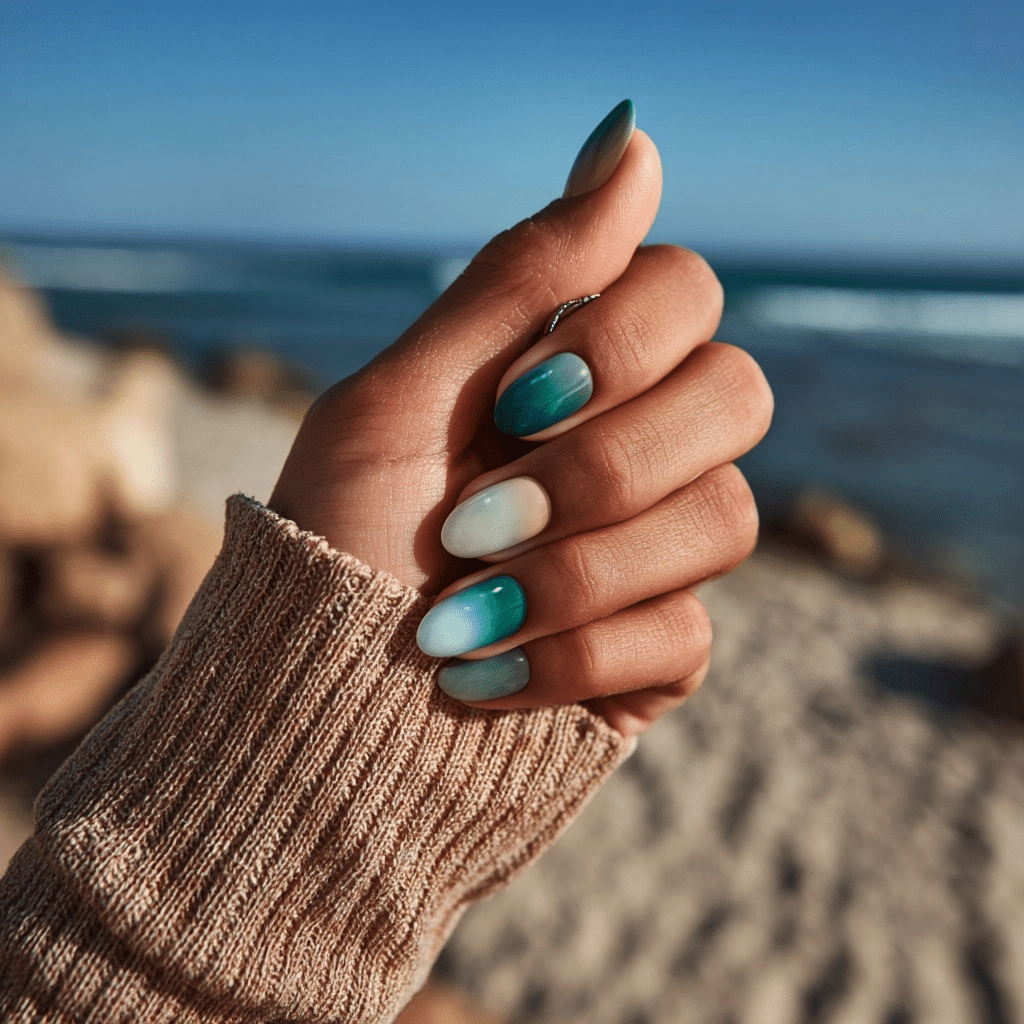
Soft Sand & Sea Combo features beige and teal alternating nails for a grounded yet breezy look, offering a subtle, summery design. Ideal for coastal walks or summer brunches, this design radiates serene elegance.
Description and Inspiration
This design blends the earthy tones of sandy beaches with the vibrant hues of the sea, with alternating beige and teal nails for a balanced, coastal vibe. It’s a chic choice for summer simplicity.
Tools Needed
- Beige and teal nail polishes
- Base coat and glossy top coat
- Nail file
- Acetone for cleanup
Step-by-Step Guide
- File nails to a medium-length, almond shape for a sleek look; apply a base coat and let dry.
- Paint alternating nails with beige and teal polish, using two coats for opacity; let dry.
- Ensure even, vibrant coverage for a balanced effect.
- Clean excess polish with acetone.
- Seal with a glossy top coat for a polished finish.
Complementary Design Suggestions
- Shimmer Pop: Add gold glitter to beige nails.
- Soft Glow: Pair with a white accent nail.
- Bold Contrast: Incorporate a coral accent nail.
Tips for Success
- Use high-opacity polishes for bold colors.
- Apply thin layers to prevent streaks.
- Clean cuticles for a polished look.
- Use a glossy top coat for vibrancy.
Creative Variations
- Apply a matte top coat for a soft sand effect.
- Add a tiny seashell decal to teal nails.
- Create a gradient with beige and teal.
- Dust with silver glitter for shimmer.
This design pairs with neutral outfits or silver jewelry, radiating summer calm. Maintain by refreshing the top coat. Soft Sand & Sea Combo is a chic vacation choice.
Starfish Dot Art

Starfish Dot Art features coral nails with tiny white star and dot details across the surface, offering a playful, summery look. Ideal for beach picnics or summer festivals, this design radiates coastal charm.
Description and Inspiration
This design evokes starfish scattered on coral reefs, with white star and dot patterns over a vibrant coral base. It’s a fun, summery choice for coastal adventures.
Tools Needed
- Coral nail polish
- White nail polish
- Dotting tool
- Base coat and glossy top coat
- Nail file
- Acetone for cleanup
Step-by-Step Guide
- File nails to a medium-length, oval shape for a playful look; apply a base coat and let dry.
- Paint nails with coral polish; apply two coats for opacity and let dry.
- Using a dotting tool, apply white star shapes (five small dots in a star pattern) and random dots across each nail.
- Vary dot sizes for a natural, scattered effect.
- Clean excess polish with acetone.
- Seal with a glossy top coat for a vibrant finish.
Complementary Design Suggestions
- Shimmer Pop: Add gold glitter around stars.
- Soft Glow: Pair with a white accent nail.
- Bold Contrast: Incorporate a teal star design.
Tips for Success
- Use a dotting tool for precise stars and dots.
- Practice patterns on paper first.
- Apply designs sparingly for balance.
- Use a glossy top coat for vibrancy.
Creative Variations
- Apply a matte top coat for a soft coral effect.
- Use yellow dots for a bolder look.
- Create a single-nail star pattern.
- Add a tiny seashell decal.
This design pairs with coral dresses or silver jewelry, radiating summer joy. Maintain by refreshing the top coat. Starfish Dot Art is a delightful vacation choice.
Clear Base with Floating Color Dots
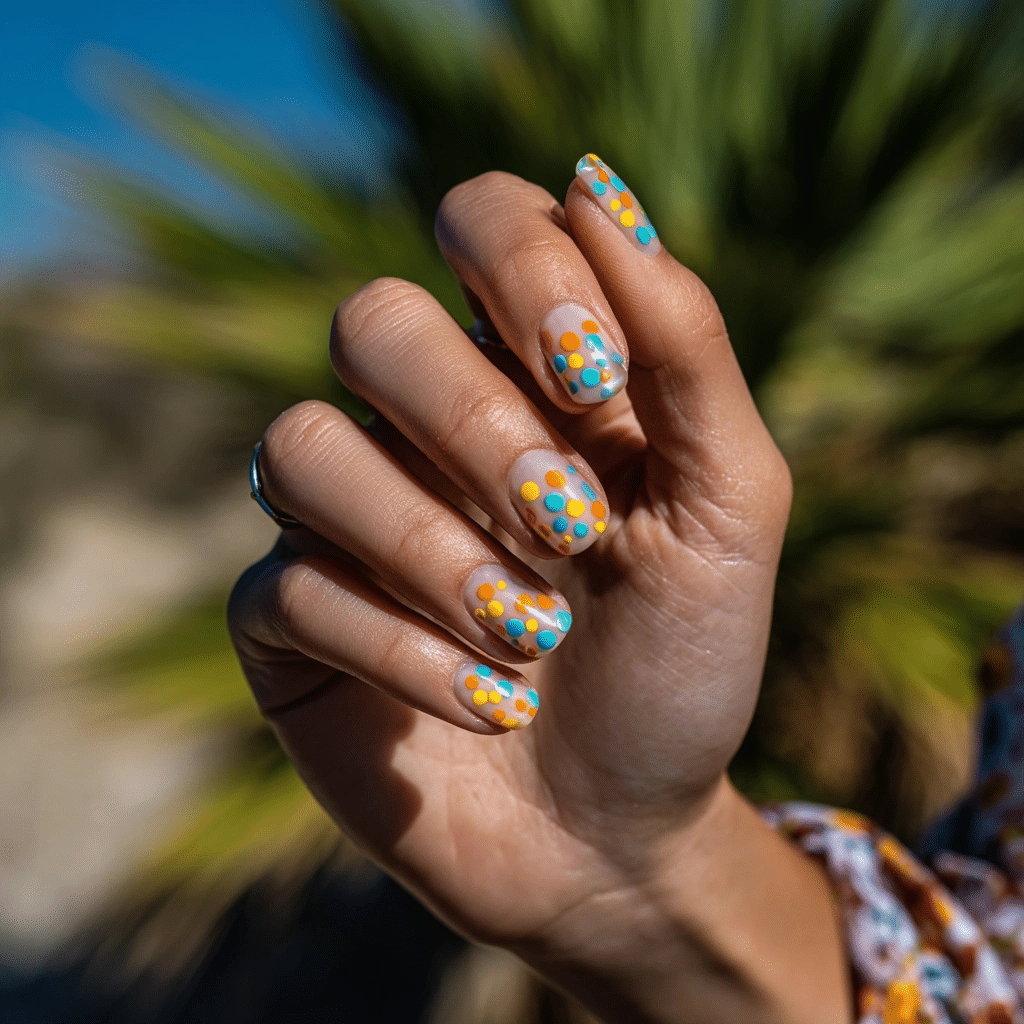
Clear Base with Floating Color Dots features a translucent base with mini colored dots in beachy brights like tangerine, lemon, and ocean blue, offering a playful, summery look. Ideal for beach parties or tropical festivals, this design radiates vibrant fun.
Description and Inspiration
This design mimics colorful sea glass floating in clear water, with tangerine, lemon, and ocean blue dots scattered over a translucent base. It’s a cheerful choice for summer coastal celebrations.
Tools Needed
- Translucent base polish
- Tangerine, lemon, and ocean blue nail polishes
- Dotting tool
- Base coat and glossy top coat
- Nail file
- Acetone for cleanup
Step-by-Step Guide
- File nails to a medium-length, square shape for a playful look; apply a base coat and let dry.
- Paint nails with translucent polish as a base; let dry.
- Using a dotting tool, apply tangerine, lemon, and ocean blue dots in a random, scattered pattern.
- Vary dot sizes for a floating, sea glass effect.
- Clean excess polish with acetone.
- Seal with a glossy top coat for a vibrant shine.
Complementary Design Suggestions
- Shimmer Pop: Add silver glitter around dots.
- Bold Contrast: Pair with a black accent nail.
- Soft Glow: Incorporate a white dot design.
Tips for Success
- Use a dotting tool for precise dots.
- Apply dots sparingly to avoid overcrowding.
- Practice patterns on paper first.
- Use a glossy top coat for vibrancy.
Creative Variations
- Apply a matte top coat for a soft sea glass effect.
- Use neon colors for bolder dots.
- Create a single-nail dot pattern.
- Add a tiny wave decal for charm.
This design pairs with colorful outfits or silver jewelry, radiating summer joy. Maintain by refreshing the top coat. Clear Base with Floating Color Dots is a trendy vacation choice.
Beachy colorful nail designs for 2025 are about more than matching the season—they embody it. They bring together the best parts of summer: movement, light, and natural beauty. With designs that feel fresh and effortless, you don’t need to be by the sea to channel its peace and playfulness.
So this season, let your nails echo the ocean breeze and tropical tones. Whether you choose waves, florals, or abstract color pops, bring the coast to your fingertips and carry a little bit of beach with you, wherever you go.

