Celebrating the Soft Elegance of Spring Nail Trends
With the arrival of spring, a new mood begins to emerge—not just in nature, but in the way we present ourselves. The transition from winter’s dark, cozy tones to spring’s lighter, airier palette invites creativity and renewal in all aspects of personal style, especially in our nail aesthetics. Spring nails aren’t just about seasonal colors—they’re about evoking elegance, freshness, and the subtle beauty that defines this time of year.
This season offers the perfect opportunity to explore nail designs that balance sophistication with charm. It’s less about loud statements and more about delicate artistry: soft gradients, gentle swirls, and barely-there details that echo the blossoms and breezes of springtime. Whether it’s the tender pastel of a blooming hyacinth or the dewy sheen of morning light, spring nail trends embrace refinement with a modern twist.
Why I Love Elegant Spring Nails
There’s something uniquely graceful about spring nails that capture both polish and personality. I love how these designs offer a moment of visual calm in an often chaotic world—each nail a tiny canvas of thoughtful detail and seasonal expression. What draws me most to elegant spring styles is their versatility. A barely-pink nude polish can feel as suitable for a brunch with friends as it does for a professional meeting or a formal event. Designs like micro-French tips, clear bases with pressed florals, or fine linework manage to be creative without overwhelming.
Beyond aesthetics, spring nails are a celebration of transitions. They subtly nod to the earth’s return to life, echoing its softness and grace. I find that choosing an elegant nail design in the spring is an act of self-care and artistic expression, one that allows personal style to align with the season’s lightness and optimism.
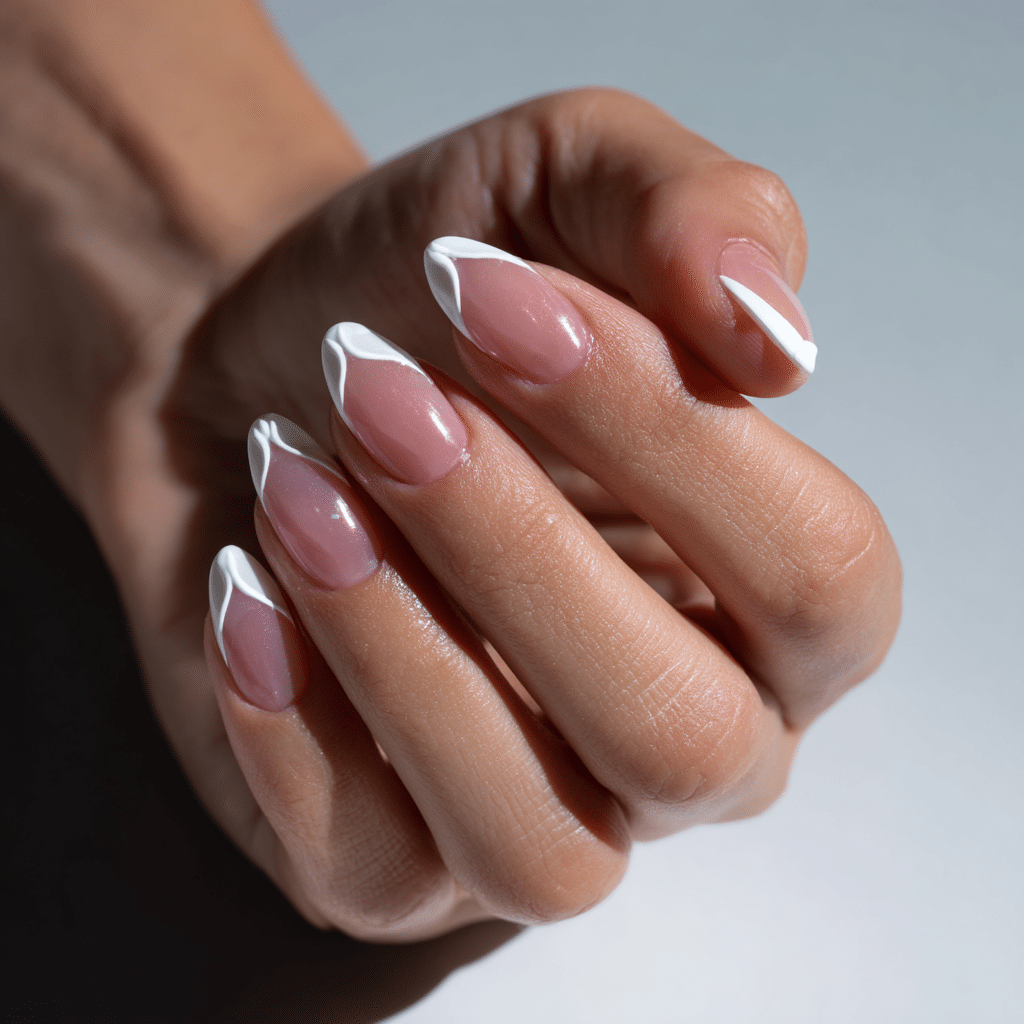
Sheer Pink with White Micro French Tips
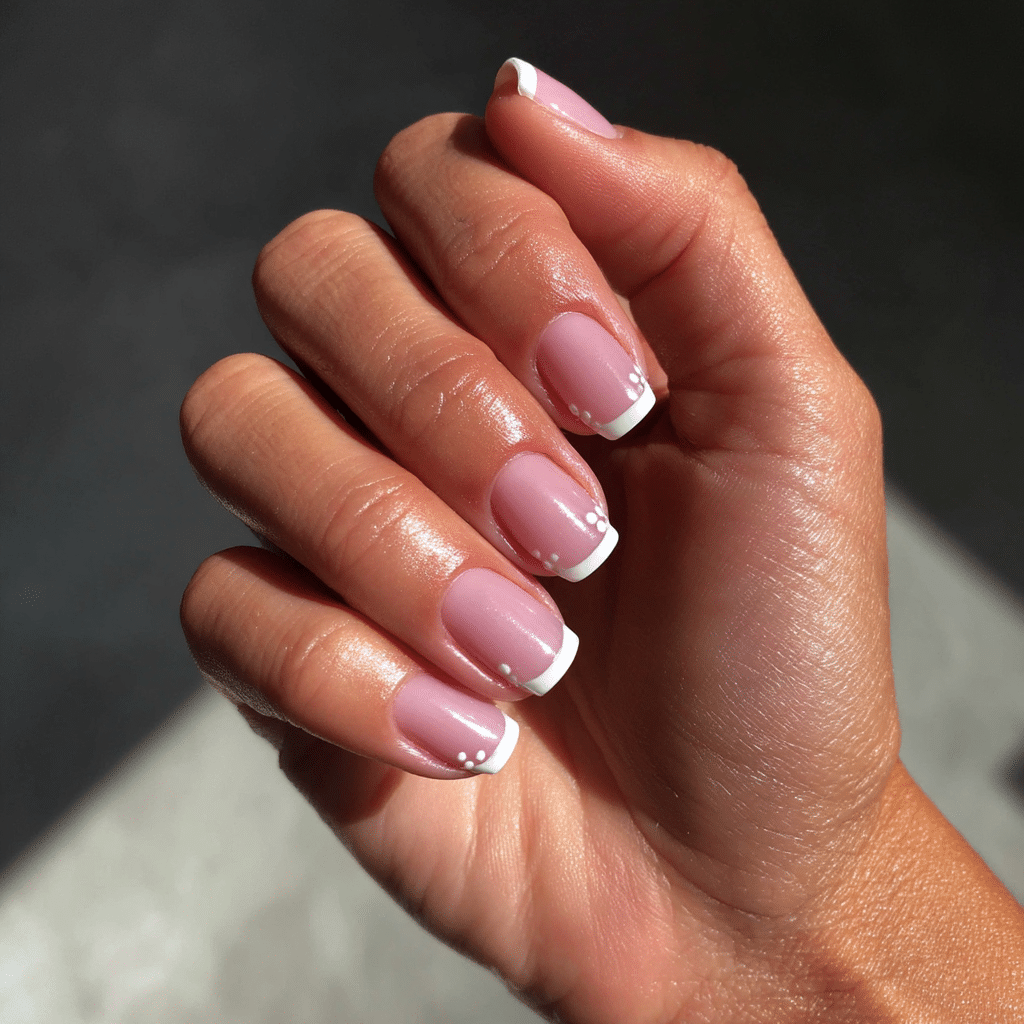
Sheer pink nails with ultra-thin white tips exude delicate elegance, ideal for spring weddings or minimalist chic. This clean, polished look enhances natural beauty with a subtle seasonal touch.
Tools Needed
- Sheer pink nail polish
- White nail polish
- Fine nail art brush or striping tape
- Base coat and glossy top coat
- Acetone for cleanup
Step-by-Step Guide
- Apply a base coat to protect nails and let dry.
- Paint nails with sheer pink polish, using 2-3 thin coats for a translucent effect; let dry.
- Using a fine brush or striping tape, create a thin white line across the very edge of each nail tip.
- Ensure lines are even and precise for a micro French tip look.
- Clean excess polish with acetone and a brush.
- Seal with a glossy top coat for a glass-like finish.
Color Suggestions
- Classic Elegance: Blush pink with crisp white tips.
- Warm Glow: Peachy pink with ivory tips.
- Cool Tone: Baby pink with pearl white tips.
Tips for Success
- Use a steady hand or tape for precise tip lines.
- Apply thin polish layers to maintain translucency.
- Practice tip placement on paper for consistency.
- Use a quick-dry top coat to prevent smudging.
Creative Variations
- Add a single rhinestone at the base of one nail.
- Use a shimmer top coat for subtle sparkle.
- Create double micro tips for a layered effect.
- Paint tips on accent nails only for minimalism.
This design is timeless and versatile, perfect for spring’s refined aesthetic. See Glamour for French manicure inspiration.
Muted Lilac with Gold Cuticle Accents
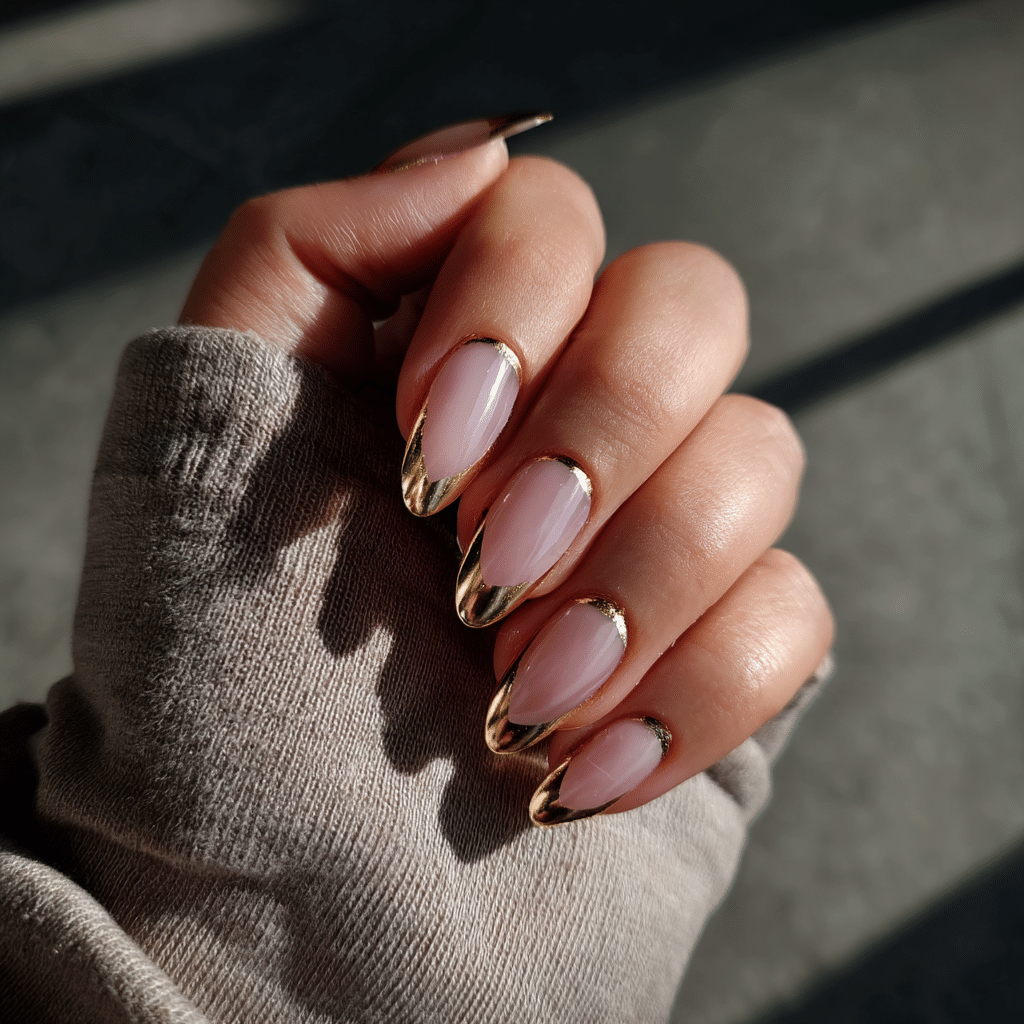
Muted lilac nails with delicate gold lines near the cuticle offer a regal, sophisticated look. This design balances soft color with luxurious metallic accents, ideal for spring’s fresh vibe.
Tools Needed
- Muted lilac nail polish
- Gold nail polish or foil
- Fine nail art brush
- Base coat and top coat
- Acetone for cleanup
Step-by-Step Guide
- Apply a base coat and let dry.
- Paint nails with muted lilac polish, using two coats for opacity; let dry.
- Using a fine brush, paint a thin, arched gold line near the cuticle of each nail.
- Ensure lines are clean and symmetrical for a polished look.
- Clean excess polish with acetone.
- Seal with a glossy top coat.
Color Suggestions
- Regal Charm: Soft lilac with gold accents.
- Warm Twist: Pale lavender with rose gold lines.
- Bold Contrast: Lilac with silver lines.
Tips for Success
- Practice line shapes on paper for precision.
- Use a thin brush for fine gold lines.
- Apply polish sparingly to avoid smudging.
- Use a glossy top coat to enhance shine.
Creative Variations
- Add a tiny rhinestone near the gold line.
- Create double gold arches for depth.
- Use a matte lilac base for contrast.
- Extend gold lines into geometric shapes.
This design is elegant and understated, perfect for spring events. Explore Byrdie for metallic accent ideas.
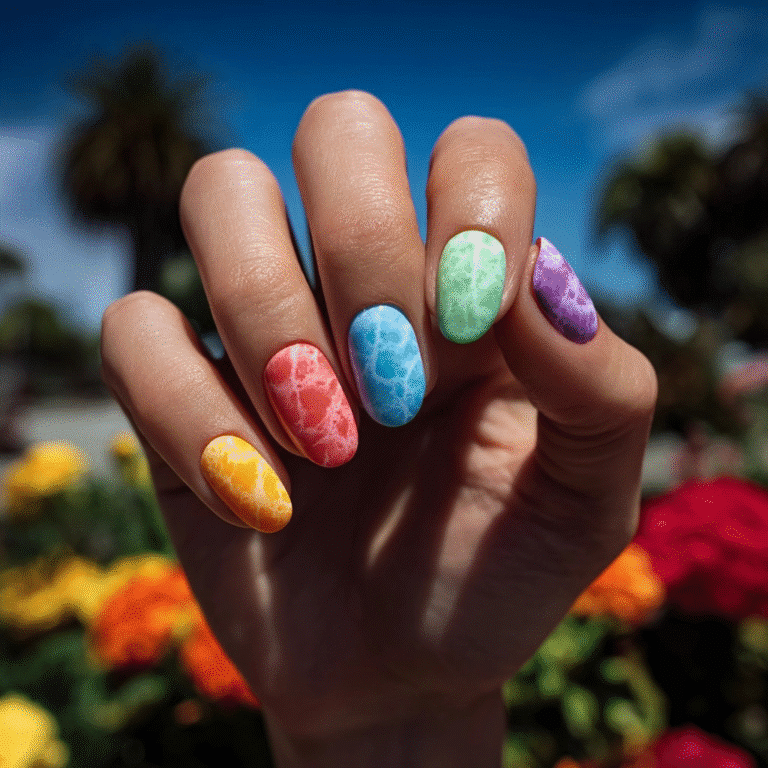
Pastel Color Blocking
Pastel color blocking uses muted tones in clean, diagonal or vertical blocks, creating a fresh yet mature look. This design is modern and playful, embodying spring’s vibrant energy.
Tools Needed
- Pastel nail polishes (e.g., mint, lavender, peach)
- Striping tape or nail vinyls
- Base coat and top coat
- Acetone for cleanup
Step-by-Step Guide
- Apply a base coat and let dry.
- Place striping tape or vinyls on nails to create diagonal or vertical block patterns.
- Paint each section with a different pastel polish (e.g., mint on one side, lavender on the other).
- Carefully remove tape or vinyls before polish dries.
- Let dry and clean excess polish with acetone.
- Seal with a glossy top coat.
Color Suggestions
- Soft Palette: Mint, lavender, and peach.
- Cool Tones: Baby blue, lilac, and pale pink.
- Warm Blend: Coral, pastel yellow, and nude.
Tips for Success
- Use tape for sharp, clean lines.
- Apply thin polish layers to avoid bleeding.
- Practice block patterns on paper.
- Use a glossy top coat for a sleek finish.
Creative Variations
- Create triangular or curved blocks.
- Add metallic lines between blocks.
- Use negative space for a minimalist look.
- Apply blocks on accent nails only.
This design is chic and customizable, perfect for spring. Check Glamour for color block inspiration.
Pale Green with Tiny White Daisies
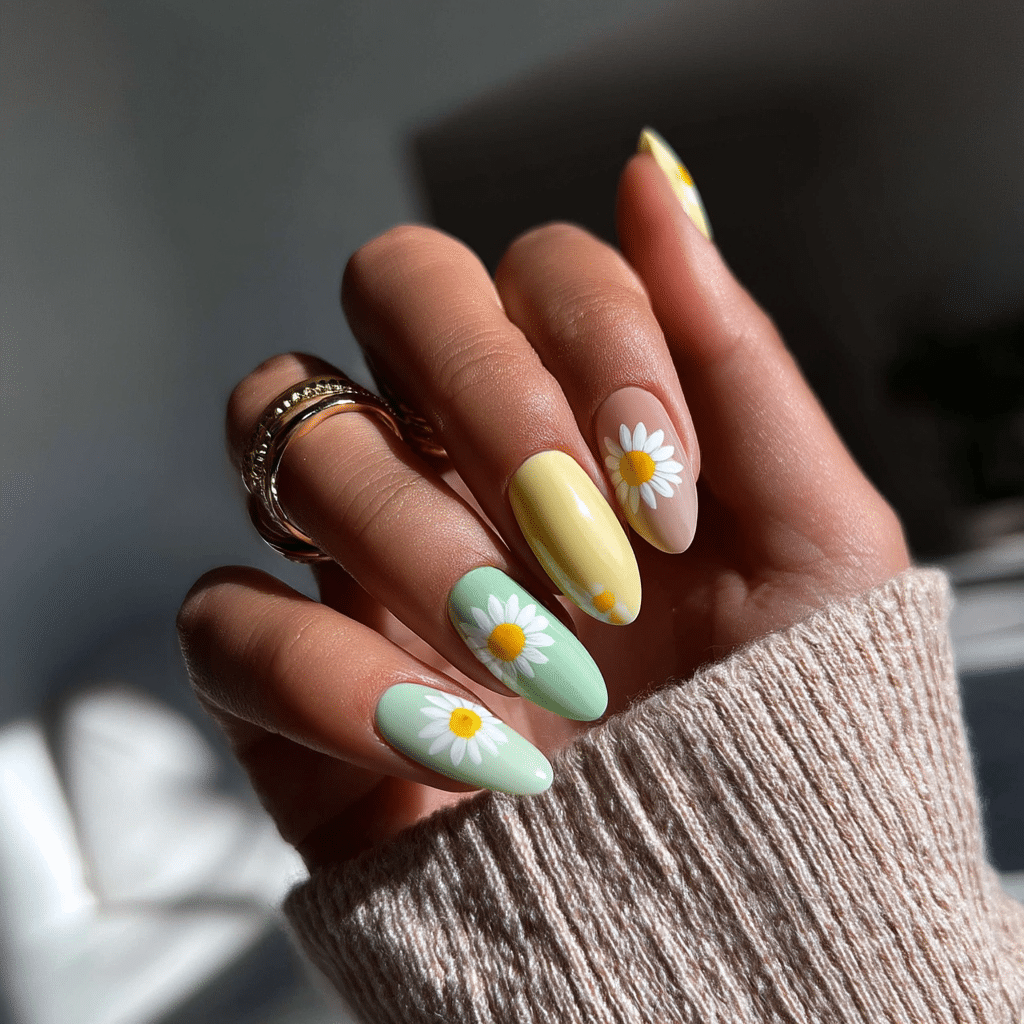
Pale green nails with dainty white daisies combine whimsical charm with polished elegance. This design evokes spring’s blooming landscapes while maintaining a neat, refined look.
Tools Needed
- Pale green nail polish (sage or mint)
- White nail polish
- Dotting tools and fine nail art brush
- Base coat and top coat
- Acetone for cleanup
Step-by-Step Guide
- Apply a base coat and let dry.
- Paint nails with pale green polish, using two coats; let dry.
- Select one or two accent nails for daisies.
- Use a dotting tool to create a small yellow dot for the flower’s center.
- Add white petal dots around the center with a larger dotting tool.
- Optionally, add green leaves with a fine brush.
- Clean excess polish with acetone.
- Seal with a glossy top coat.
Color Suggestions
- Classic Spring: Mint green with white daisies.
- Soft Contrast: Sage green with ivory daisies.
- Bright Pop: Pale green with yellow daisies.
Tips for Success
- Practice daisy shapes on paper.
- Keep daisies small for elegance.
- Use thin polish layers to avoid smudging.
- Apply a top coat for durability.
Creative Variations
- Add glitter to daisy centers.
- Use a matte green base for contrast.
- Place daisies on all nails for a fuller look.
- Incorporate negative space around flowers.
This design is charming and polished, ideal for spring. See Mylee for floral tutorials.
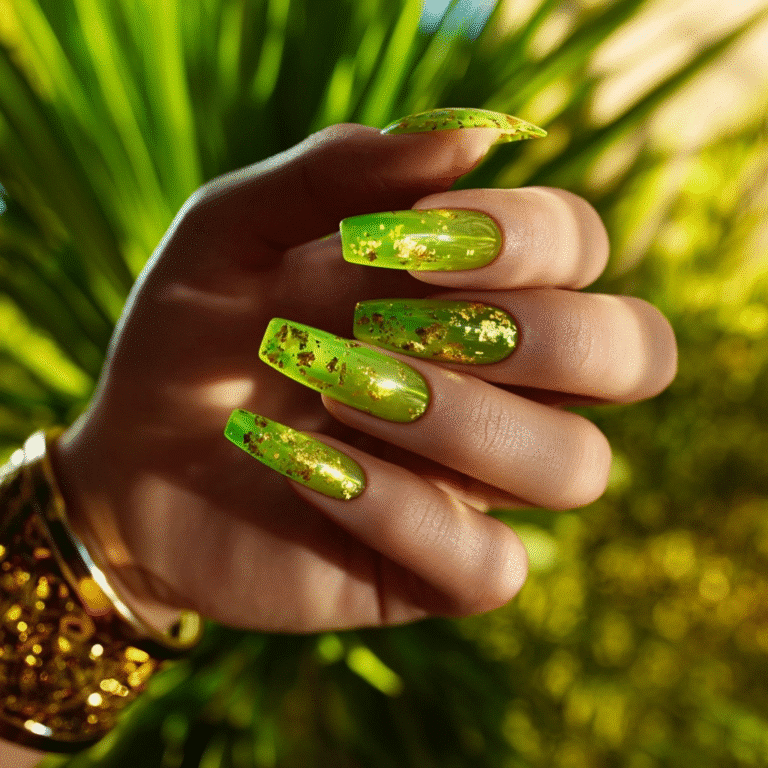
Nude Base with Silver Foil Flakes
Nude nails with silver foil flakes create an ethereal, light-catching look that’s versatile and elegant. This design is perfect for spring’s soft, airy aesthetic.
Tools Needed
- Nude nail polish
- Silver foil sheets and foil glue
- Tweezers
- Base coat and top coat
- Acetone for cleanup
Step-by-Step Guide
- Apply a base coat and let dry.
- Paint nails with nude polish, using two coats; let dry.
- Apply a thin layer of foil glue randomly or in patterns on nails.
- Wait until glue is tacky, then press silver foil onto the glue using tweezers.
- Gently peel back foil to reveal the design.
- Clean excess polish or glue with acetone.
- Seal with a glossy top coat.
Color Suggestions
- Neutral Elegance: Beige nude with silver foil.
- Warm Glow: Peachy nude with gold foil.
- Cool Tone: Pinkish nude with rose gold foil.
Tips for Success
- Apply foil glue sparingly for delicate designs.
- Practice foil placement on paper.
- Use a glossy top coat to enhance shine.
- Avoid overhandling foil to prevent tearing.
Creative Variations
- Use foil in geometric shapes.
- Apply foil to accent nails only.
- Pair with a matte nude base for contrast.
- Add tiny rhinestones near foil.
This design is luxurious and understated, perfect for spring. Explore Byrdie for foil ideas.
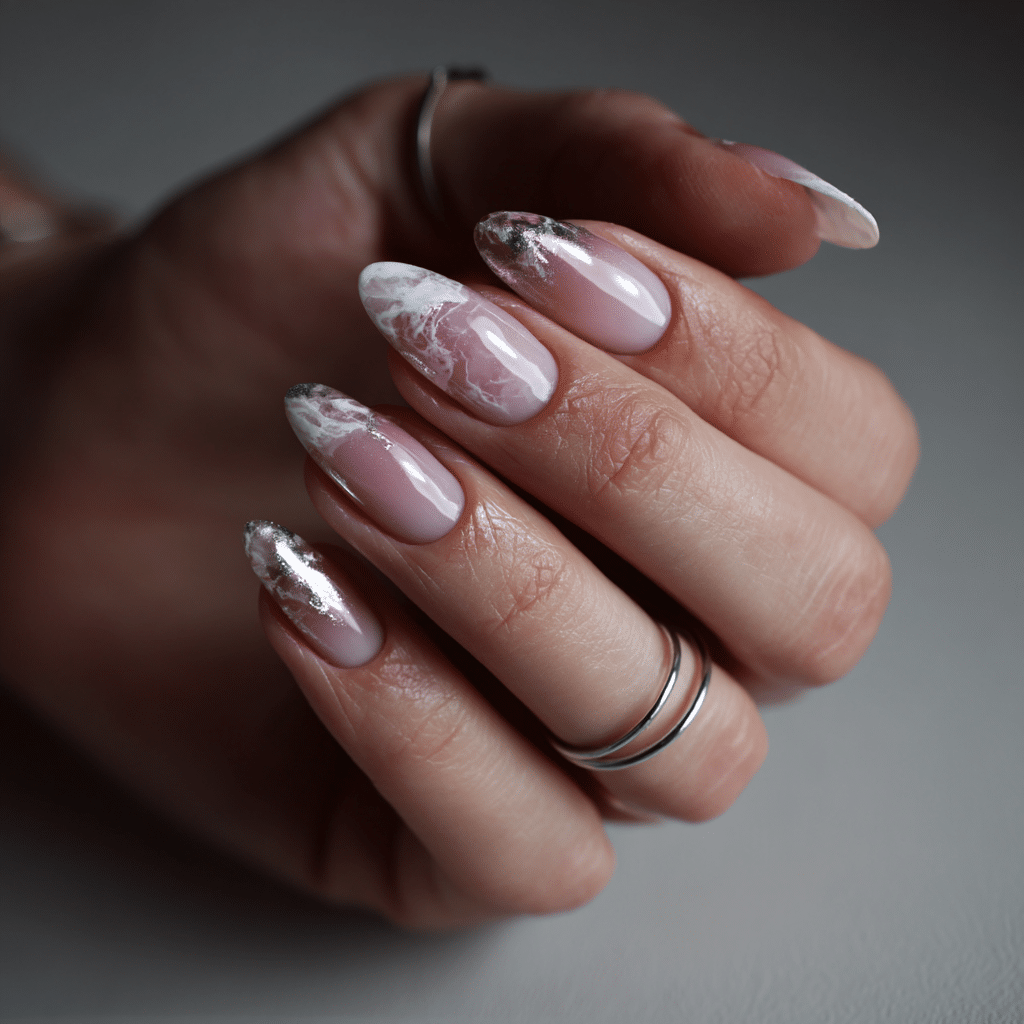
Ivory and Rose Quartz Marble
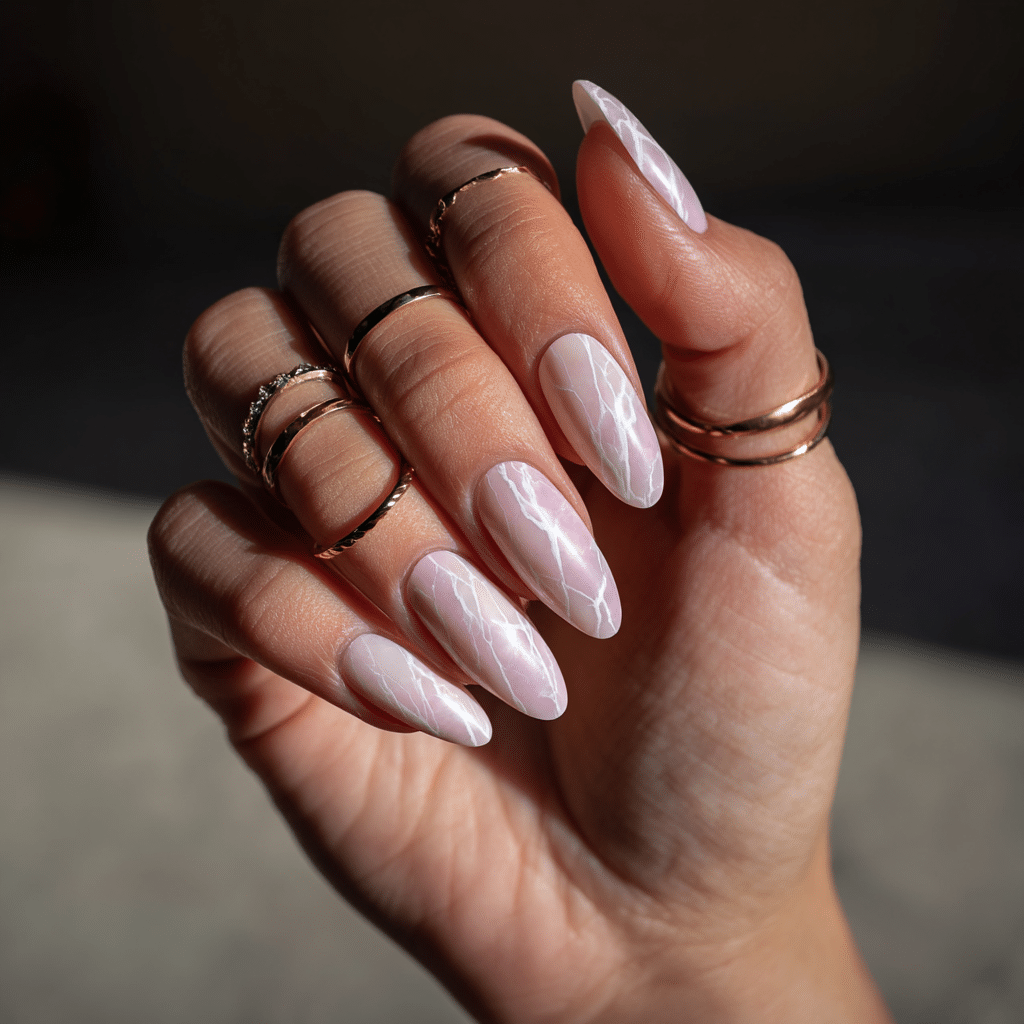
Ivory and rose quartz marble nails mimic soft stone veining, creating a feminine, luxurious texture. This design is ultra-elegant, ideal for spring’s romantic vibe.
Tools Needed
- Ivory and rose quartz nail polishes
- Thin nail art brush or sponge
- Base coat and top coat
- Acetone for cleanup
Step-by-Step Guide
- Apply a base coat and let dry.
- Paint nails with ivory polish as the base; let dry.
- Apply small drops of rose quartz polish randomly on nails.
- Use a thin brush or sponge to swirl the colors, creating a marble effect.
- Avoid overmixing to maintain distinct veins.
- Clean excess polish with acetone.
- Seal with a glossy top coat.
Color Suggestions
- Classic Marble: Ivory with rose quartz veins.
- Soft Glow: Off-white with pale pink veins.
- Bold Twist: Ivory with lavender veins.
Tips for Success
- Practice swirling on paper for natural veining.
- Use thin polish layers to avoid clumps.
- Work quickly to blend colors before drying.
- Use a glossy top coat for a polished look.
Creative Variations
- Add gold foil for a luxurious touch.
- Create marble on accent nails only.
- Use a matte top coat for a stone-like finish.
- Incorporate metallic veins.
This design is sophisticated and romantic, perfect for spring. Check Teen Vogue for marble tutorials.
Matte Taupe with Glossy Tip Overlay
Matte taupe nails with glossy tips offer a modern, tonal twist on the French manicure. This subtle design is sleek and elegant, ideal for spring’s minimalist aesthetic.
Tools Needed
- Taupe nail polish
- Matte and glossy top coats
- Striping tape
- Base coat
- Acetone for cleanup
Step-by-Step Guide
- Apply a base coat and let dry.
- Paint nails with taupe polish, using two coats; let dry.
- Apply a matte top coat to all nails and let dry.
- Place striping tape near the nail tips to mark the glossy area.
- Apply a glossy top coat to the tips only.
- Carefully remove tape before the top coat dries.
- Clean excess polish with acetone.
Color Suggestions
- Neutral Chic: Taupe with glossy taupe tips.
- Warm Tone: Beige taupe with glossy tips.
- Cool Edge: Grayish taupe with glossy tips.
Tips for Success
- Use tape for clean glossy lines.
- Ensure matte polish is fully dry before taping.
- Apply glossy top coat thinly to avoid streaks.
- Practice tip placement on paper.
Creative Variations
- Use metallic polish for glossy tips.
- Create double glossy tips for depth.
- Apply glossy overlay in geometric shapes.
- Use a shimmer top coat for tips.
This design is modern and refined, perfect for spring. See Glamour for French manicure variations.
Clear Nails with Pressed Floral Encapsulation
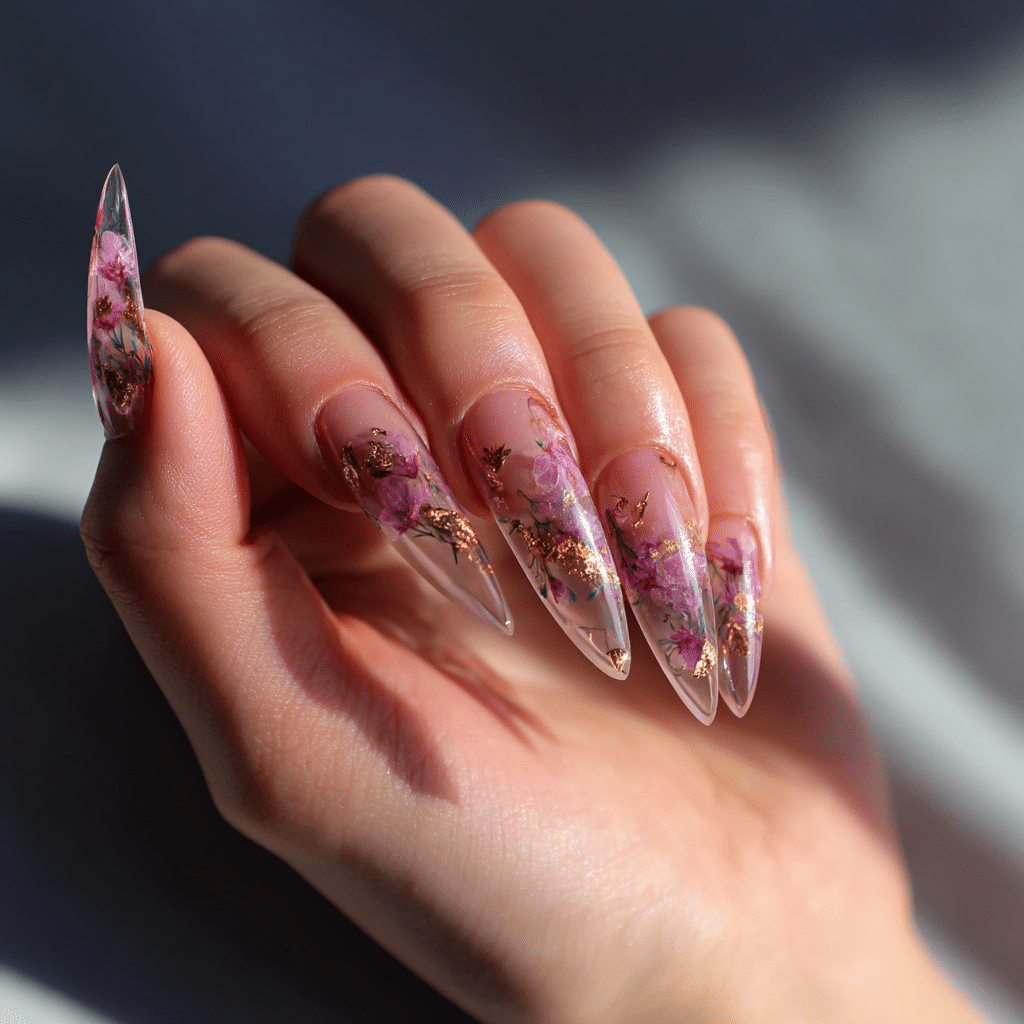
Clear nails with pressed floral encapsulation create a botanical, artistic effect, encasing real or painted flowers in polish. This design is elegant and unique, ideal for spring’s natural beauty.
Tools Needed
- Clear nail polish
- Pressed flowers or floral nail art stickers
- Tweezers
- Base coat and glossy top coat
- Acetone for cleanup
Step-by-Step Guide
- Apply a base coat and let dry.
- Apply a thin layer of clear polish and let it become tacky.
- Use tweezers to place pressed flowers or floral stickers on nails.
- Press gently to secure flowers in place.
- Apply 2-3 layers of clear polish over flowers, letting each layer dry.
- Clean excess polish with acetone.
- Seal with a glossy top coat.
For painted flowers, use a fine brush to mimic pressed petals before encasing in clear polish.
Color Suggestions
- Natural Beauty: Clear with white flowers.
- Soft Pop: Clear with pastel flowers.
- Bold Accent: Clear with red flowers.
Tips for Success
- Use small flowers for a delicate look.
- Apply clear polish thinly to avoid bulk.
- Practice flower placement on paper.
- Use a high-shine top coat for clarity.
Creative Variations
- Add glitter around flowers for sparkle.
- Use flowers on accent nails only.
- Incorporate colored polish as a base.
- Create a gradient under flowers.
This design is artistic and elegant, perfect for spring. Explore Byrdie for floral ideas.
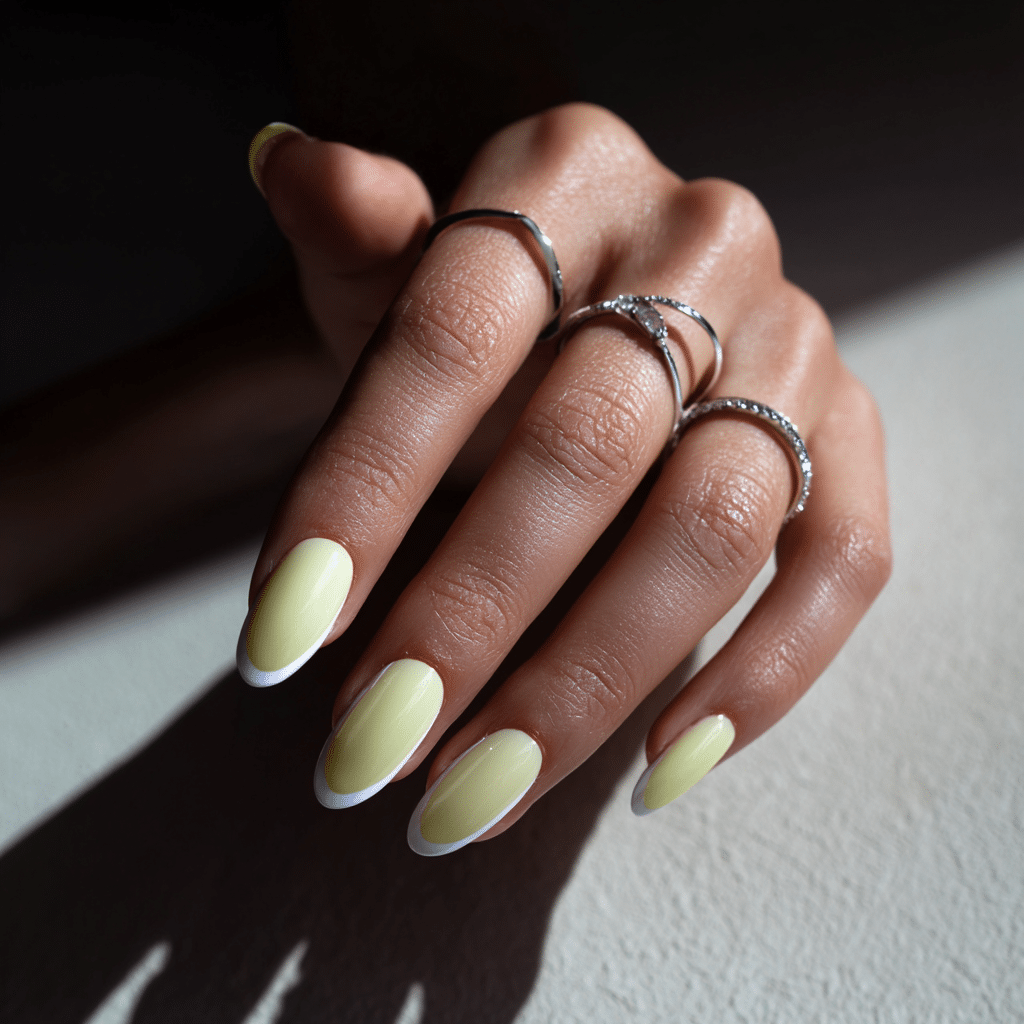
Classic French with a Twist of Lavender
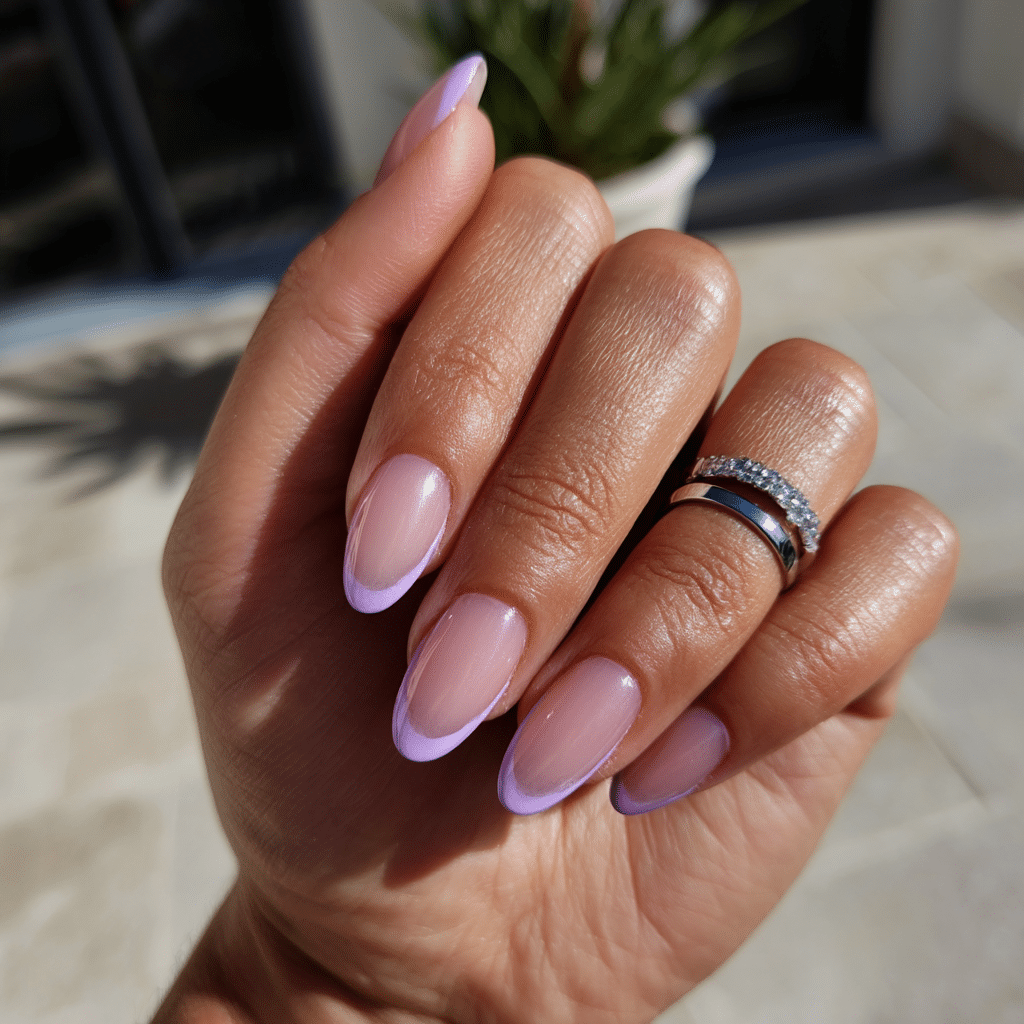
A classic French manicure with lavender tips adds a subtle seasonal shift, blending timeless elegance with spring’s soft hues. This design is versatile and refined.
Tools Needed
- Nude or pink nail polish
- Lavender nail polish
- Striping tape or French tip guides
- Base coat and top coat
- Acetone for cleanup
Step-by-Step Guide
- Apply a base coat and let dry.
- Paint nails with nude or pink polish, using two coats; let dry.
- Place striping tape or guides near the nail tips.
- Apply lavender polish to the tips.
- Carefully remove tape or guides before polish dries.
- Clean excess polish with acetone.
- Seal with a glossy top coat.
Color Suggestions
- Soft Spring: Nude with lavender tips.
- Cool Twist: Pink with pastel blue tips.
- Warm Glow: Peach with lilac tips.
Tips for Success
- Use tape for clean tip lines.
- Apply lavender polish in thin layers.
- Practice tip placement on paper.
- Use a quick-dry top coat to prevent smudging.
Creative Variations
- Add glitter to lavender tips.
- Create double lavender tips.
- Use metallic lavender for shine.
- Paint tips on accent nails only.
This design is chic and seasonal, perfect for spring. See Glamour for French manicure ideas.
Shimmery Champagne with Subtle Rhinestone Accents
Shimmery champagne nails with tiny rhinestones offer a classy, sparkling look, perfect for spring’s festive occasions. This design is elegant yet understated.
Tools Needed
- Champagne shimmer nail polish
- Small rhinestones
- Tweezers and nail glue
- Base coat and top coat
- Acetone for cleanup
Step-by-Step Guide
- Apply a base coat and letvärr System: dry.
- 2. Paint nails with champagne shimmer polish, using two coats for even sparkle; let dry.
- 3. Apply a small dot of nail glue near the base of one or two nails (e.g., ring finger).
- 4. Use tweezers to place a tiny rhinestone on the glue.
- 5. Press gently to secure the rhinestone.
- 6. Clean excess polish or glue with acetone.
- 7. Seal with a glossy top coat, ensuring rhinestones are fully encased.
Color Suggestions
- Classic Sparkle: Champagne with clear rhinestones.
- Warm Glow: Rose gold shimmer with gold rhinestones.
- Cool Elegance: Silver champagne with pearl rhinestones.
Tips for Success
- Use small rhinestones for subtlety.
- Apply glue sparingly to avoid mess.
- Practice rhinestone placement on paper.
- Use a glossy top coat to secure embellishments.
Creative Variations
- Place rhinestones in a line or cluster.
- Use colored rhinestones for a pop.
- Apply shimmer polish to accent nails only.
- Add a matte top coat for contrast.
This design is glamorous yet refined, ideal for spring celebrations. Check Byrdie for rhinestone inspiration.
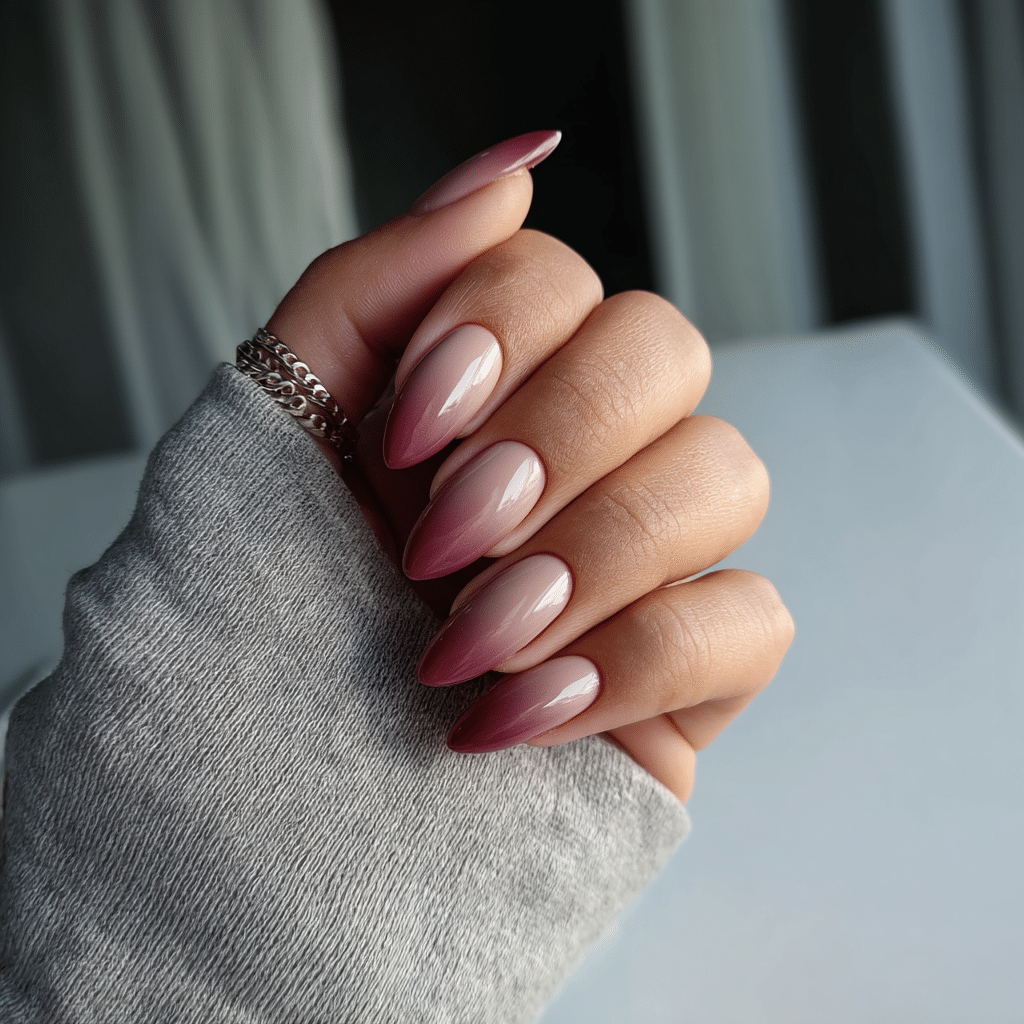
Soft Ombré in Blush to White
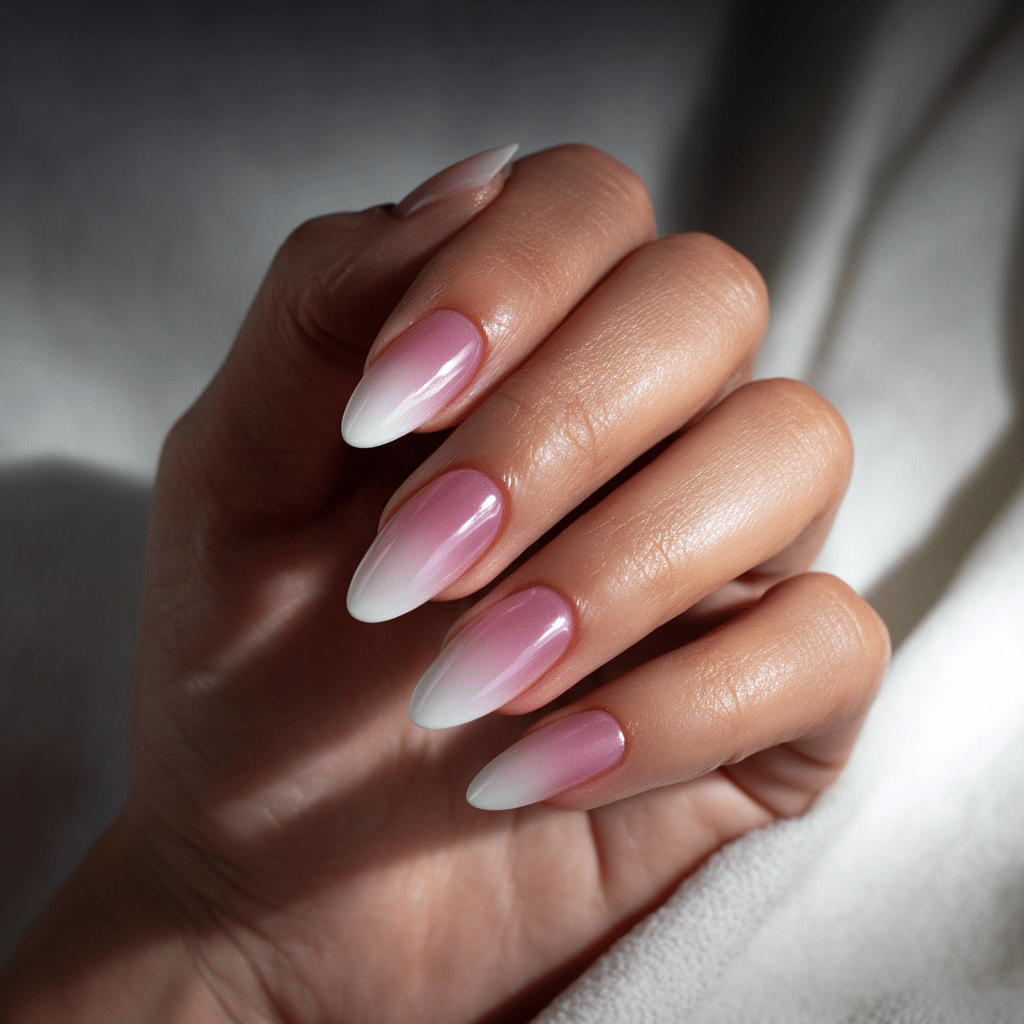
A soft ombré fading from blush pink to crisp white creates an airbrushed, bridal look, perfect for spring’s romantic occasions. This design is elegant and seamless.
Tools Needed
- Blush pink and white nail polishes
- Makeup sponge or angled brush
- Base coat and top coat
- Acetone for cleanup
Step-by-Step Guide
- Apply a base coat and let dry.
- Paint nails with a nude base for opacity; let dry.
- Pour small amounts of blush pink and white polish onto a palette.
- Dab a makeup sponge into both colors, overlapping slightly.
- Press the sponge onto nails, blending from pink at the base to white at the tip.
- Repeat until the gradient is smooth, then let dry.
- Clean excess polish with acetone.
- Seal with a glossy top coat.
Color Suggestions
- Bridal Bliss: Blush pink to white.
- Soft Glow: Peach to ivory.
- Cool Fade: Baby pink to pearl white.
Tips for Success
- Practice blending on paper for smooth transitions.
- Use thin polish layers to avoid clumps.
- Apply a top coat every few days for longevity.
- Start with two colors for easier blending.
Creative Variations
- Add glitter in the gradient’s middle.
- Use a chrome top coat for a holographic effect.
- Create a diagonal ombré for a modern look.
- Incorporate rhinestones at the base.
This design is romantic and versatile, perfect for spring. See Teen Vogue for ombré tutorials.
Peach Nude with Fine White Swirls
Peach nude nails with fine white swirls create a delicate, airy look with subtle movement. This design is refined and modern, ideal for spring’s soft aesthetic.
Tools Needed
- Peach nude nail polish
- White nail polish
- Fine nail art brush
- Base coat and top coat
- Acetone for cleanup
Step-by-Step Guide
- Apply a base coat and let dry.
- Paint nails with peach nude polish, using two coats; let dry.
- Using a fine brush, paint delicate white swirls or waves across each nail.
- Keep swirls thin and fluid for an elegant effect.
- Clean excess polish with acetone.
- Seal with a glossy top coat.
Color Suggestions
- Soft Elegance: Peach nude with white swirls.
- Warm Glow: Coral nude with ivory swirls.
- Bold Contrast: Peach with black swirls.
Tips for Success
- Practice swirl patterns on paper.
- Use a thin brush for precise lines.
- Apply polish sparingly to avoid smudging.
- Use a glossy top coat for shine.
Creative Variations
- Add glitter to swirls for sparkle.
- Create swirls on accent nails only.
- Use metallic polish for swirls.
- Incorporate negative space around swirls.
This design is subtle and chic, perfect for spring. Explore Byrdie for swirl ideas.
Dusty Rose with Thin Black Edging
Dusty rose nails with thin black edging offer a structured, chic look, blending romantic color with an unexpected edge. This design is elegant and modern for spring.
Tools Needed
- Dusty rose nail polish
- Black nail polish
- Fine nail art brush
- Base coat and top coat
- Acetone for cleanup
Step-by-Step Guide
- Apply a base coat and let dry.
- Paint nails with dusty rose polish, using two coats; let dry.
- Using a fine brush, carefully paint a thin black line along the edges of each nail.
- Ensure lines are even and precise for a structured look.
- Clean excess polish with acetone.
- Seal with a glossy top coat.
Color Suggestions
- Romantic Edge: Dusty rose with black edging.
- Soft Contrast: Pale pink with navy edging.
- Bold Twist: Mauve with white edging.
Tips for Success
- Practice edging on paper for precision.
- Use a steady hand for clean lines.
- Apply black polish sparingly to avoid smudging.
- Use a glossy top coat for a polished finish.
Creative Variations
- Use metallic edging for shine.
- Create partial edging on one side.
- Add rhinestones near the edge.
- Use a matte rose base for contrast.
This design is sophisticated and unique, ideal for spring. Check Glamour for edging inspiration.
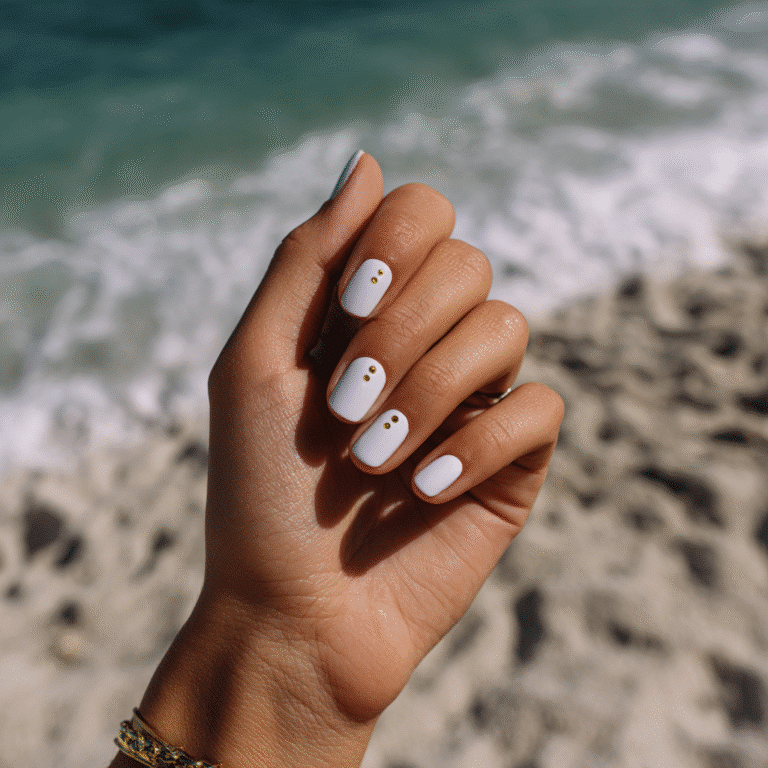
Translucent Milk Nails with Pearl Accents
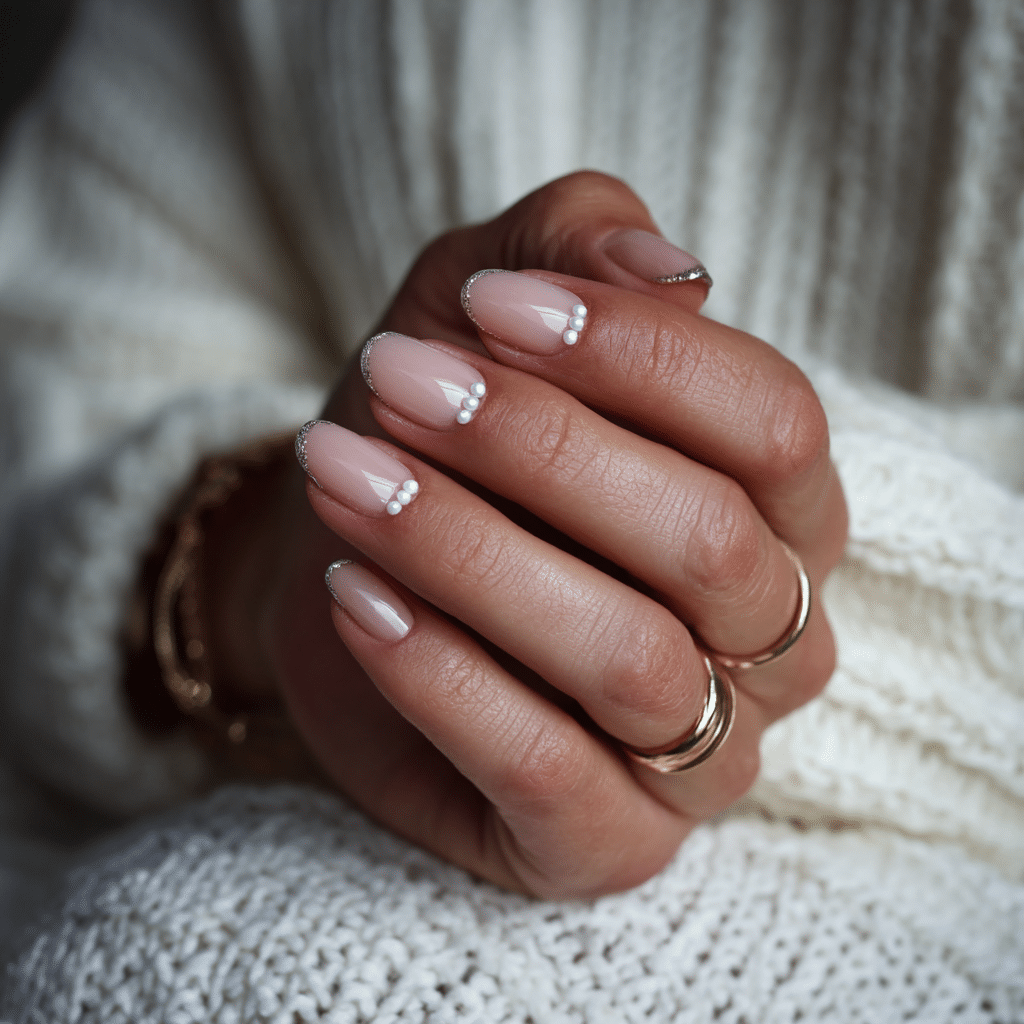
Translucent milky nails with pearl accents create a minimalist, elegant look, perfect for spring’s clean aesthetic. The semi-sheer base enhances the pearls’ subtle glow.
Tools Needed
- Milky white nail polish (semi-sheer)
- Small pearl embellishments
- Tweezers and nail glue
- Base coat and top coat
- Acetone for cleanup
Step-by-Step Guide
- Apply a base coat and let dry.
- Paint nails with milky white polish, using 2-3 thin coats for a translucent effect; let dry.
- Apply a small dot of nail glue near the base or cuticle of one or two nails.
- Use tweezers to place a pearl on the glue.
- Press gently to secure the pearl.
- Clean excess polish or glue with acetone.
- Seal with a glossy top coat, encasing pearls.
Color Suggestions
- Classic Minimalism: Milky white with white pearls.
- Warm Glow: Creamy nude with ivory pearls.
- Bold Accent: Milky white with gold pearls.
Tips for Success
- Use small pearls for subtlety.
- Apply glue sparingly to avoid mess.
- Practice pearl placement on paper.
- Use a glossy top coat to secure embellishments.
Creative Variations
- Place pearls in a line or cluster.
- Use colored pearls for a pop.
- Apply milky polish to accent nails only.
- Add glitter near pearls for sparkle.
This design is clean and elegant, perfect for spring. See Byrdie for pearl ideas.
Butter Yellow with Delicate Gold Leaf
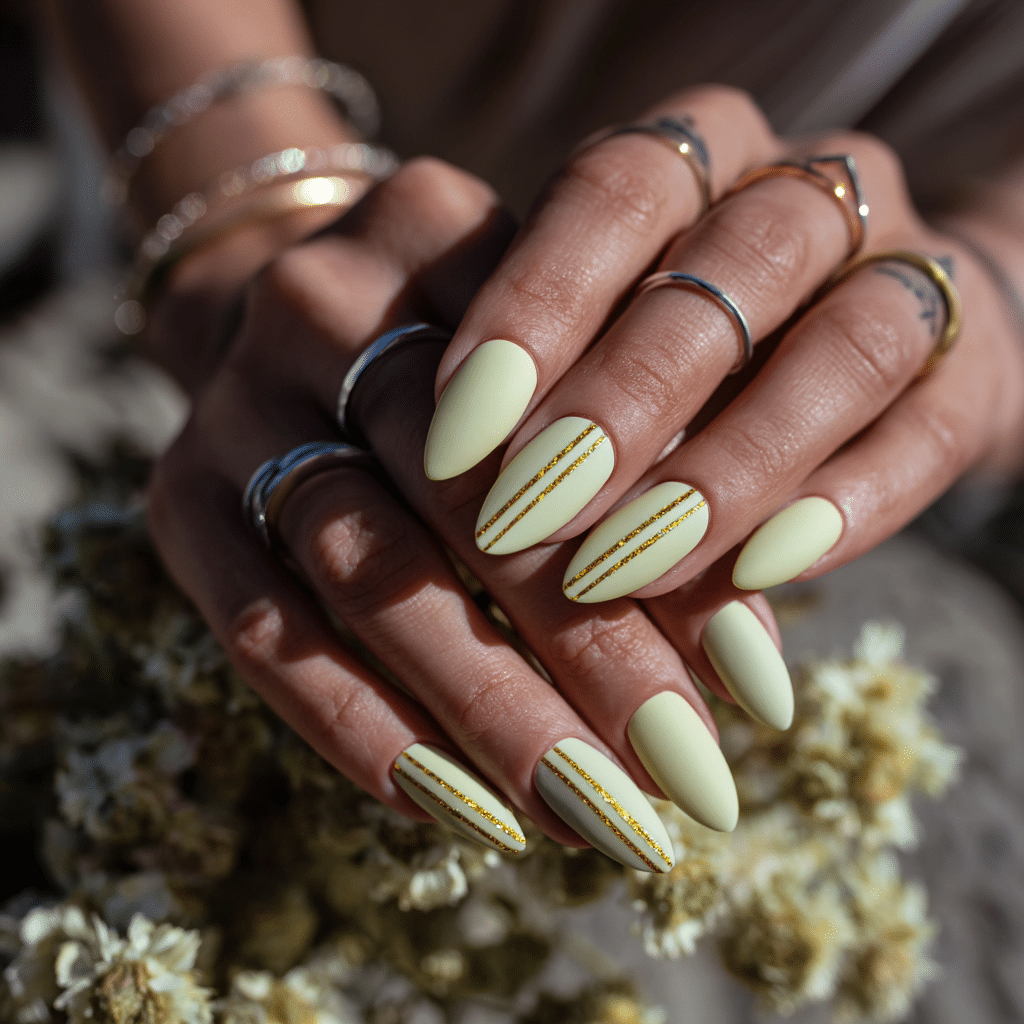
Butter yellow nails with gold leaf flakes bring warmth and subtlety, evoking spring’s sunshine. This design is soft yet luxurious, ideal for seasonal elegance.
Tools Needed
- Butter yellow nail polish
- Gold leaf flakes and foil glue
- Tweezers
- Base coat and top coat
- Acetone for cleanup
Step-by-Step Guide
- Apply a base coat and let dry.
- Paint nails with butter yellow polish, using two coats; let dry.
- Apply a thin layer of foil glue randomly or in patterns on nails.
- Wait until glue is tacky, then press gold leaf flakes onto the glue using tweezers.
- Gently peel back excess leaf to reveal the design.
- Clean excess polish or glue with acetone.
- Seal with a glossy top coat.
Color Suggestions
- Sunny Elegance: Butter yellow with gold leaf.
- Soft Glow: Pale yellow with silver leaf.
- Warm Twist: Peach yellow with rose gold leaf.
Tips for Success
- Apply foil glue sparingly for delicate designs.
- Practice leaf placement on paper.
- Use a glossy top coat to enhance shine.
- Avoid overhandling leaf to prevent tearing.
Creative Variations
- Use leaf in geometric shapes.
- Apply leaf to accent nails only.
- Pair with a matte yellow base for contrast.
- Add tiny rhinestones near leaf flakes.
This design is warm and refined, perfect for spring. Explore Byrdie for gold leaf ideas.
| Design | Key Tools | Base Color | Accent Colors | Difficulty |
|---|---|---|---|---|
| Sheer Pink with White Micro French Tips | Fine brush, tape | Sheer pink | White | Easy |
| Muted Lilac with Gold Cuticle Accents | Fine brush | Lilac | Gold | Medium |
| Pastel Color Blocking | Striping tape | Pastels | Pastels | Medium |
| Pale Green with Tiny White Daisies | Dotting tool, brush | Pale green | White | Medium |
| Nude Base with Silver Foil Flakes | Foil, tweezers | Nude | Silver | Medium |
| Ivory and Rose Quartz Marble | Brush, sponge | Ivory | Rose quartz | Medium |
| Matte Taupe with Glossy Tip Overlay | Striping tape | Taupe | Taupe | Easy |
| Clear Nails with Pressed Floral Encapsulation | Tweezers, flowers | Clear | Floral | Medium |
| Classic French with a Twist of Lavender | Striping tape | Nude, pink | Lavender | Easy |
| Shimmery Champagne with Rhinestone Accents | Tweezers, glue | Champagne | Rhinestones | Easy |
| Soft Ombré in Blush to White | Sponge, brush | Blush | White | Medium |
| Peach Nude with Fine White Swirls | Fine brush | Peach nude | White | Medium |
| Dusty Rose with Thin Black Edging | Fine brush | Dusty rose | Black | Medium |
| Translucent Milk Nails with Pearl Accents | Tweezers, glue | Milky white | Pearls | Easy |
| Butter Yellow with Delicate Gold Leaf | Foil, tweezers | Butter yellow | Gold | Medium |
These 15 elegant spring nail designs blend soft hues with sophisticated details, offering polished, seasonal manicures. Whether you’re a beginner or a pro, these ideas provide inspiration for a refined spring look.
Spring is a season of elegance reimagined through light, color, and delicate detail—and your nails can be a beautiful way to honor that. While bold colors have their place, there’s an undeniable magic in the understated: the clean lines of a minimalist manicure, the shimmer of a soft pearl overlay, or the quiet poetry of a pastel ombré. These elegant designs aren’t about following trends—they’re about aligning with the spirit of the season.
In embracing spring nail elegance, we’re not just updating our look—we’re embracing a fresh perspective, one that appreciates softness, detail, and natural beauty. Whether you prefer something timeless or subtly trendy, spring offers the perfect moment to refresh and refine your nail aesthetic.