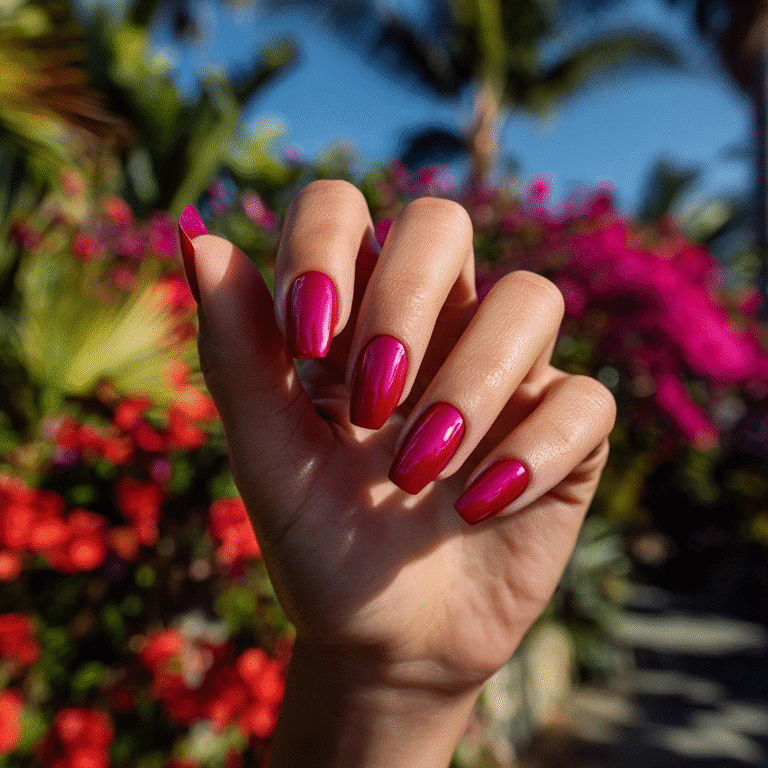
The Charm of Simplicity in Spring Nail Art
As the seasons shift and nature blossoms into its full expression, spring invites us to refresh and simplify. This philosophy of lightness doesn’t just apply to our wardrobes or skincare—it extends to our nails, too. Spring nail art, when cute and simple, has a unique way of capturing the season’s playful spirit without overwhelming the senses. Gone are the heavy glitters and moody winter tones; in their place come gentle pastels, minimal florals, and subtle designs that reflect the energy of renewal.
What makes spring nail art so delightful is its accessibility. These aren’t elaborate masterpieces meant only for the salon—they’re cheerful, wearable looks that can be achieved at home or with minimal effort. Soft colors, clean shapes, and tiny decorative touches come together to create a style that feels fresh, personal, and seasonally aligned. Simplicity isn’t just a trend—it’s a form of quiet elegance, and in spring, it shines the brightest.
Why I Love Cute and Simple Spring Nails
There’s something incredibly charming about nail art that doesn’t try too hard. I love how cute and simple designs bring a balance of personality and polish without feeling overly styled. Whether it’s a single daisy on a bare nail or a set of pastel polka dots, these looks speak to joy, lightness, and a kind of sweet spontaneity that feels perfectly in tune with spring.
These designs are also incredibly versatile. They work for anyone, at any age, and in virtually any setting—from brunch dates to casual Fridays at the office. They’re also easy to switch up depending on your mood or the occasion. The effort-to-impact ratio is one of the main reasons I gravitate toward them. You don’t need hours or advanced skills to feel put-together and in season. In fact, it’s the minimalism that makes them pop.
Cute and Simple Spring Nail Art Designs
Spring brings a burst of fresh energy, and these 15 nail designs capture its charm with cute, easy-to-wear styles. Perfect for quick manicures, each look blends seasonal hues and playful details, making them ideal for beginners and seasoned nail enthusiasts. Detailed steps, color suggestions, and creative variations ensure accessibility and inspiration.
Pastel Polka Dots
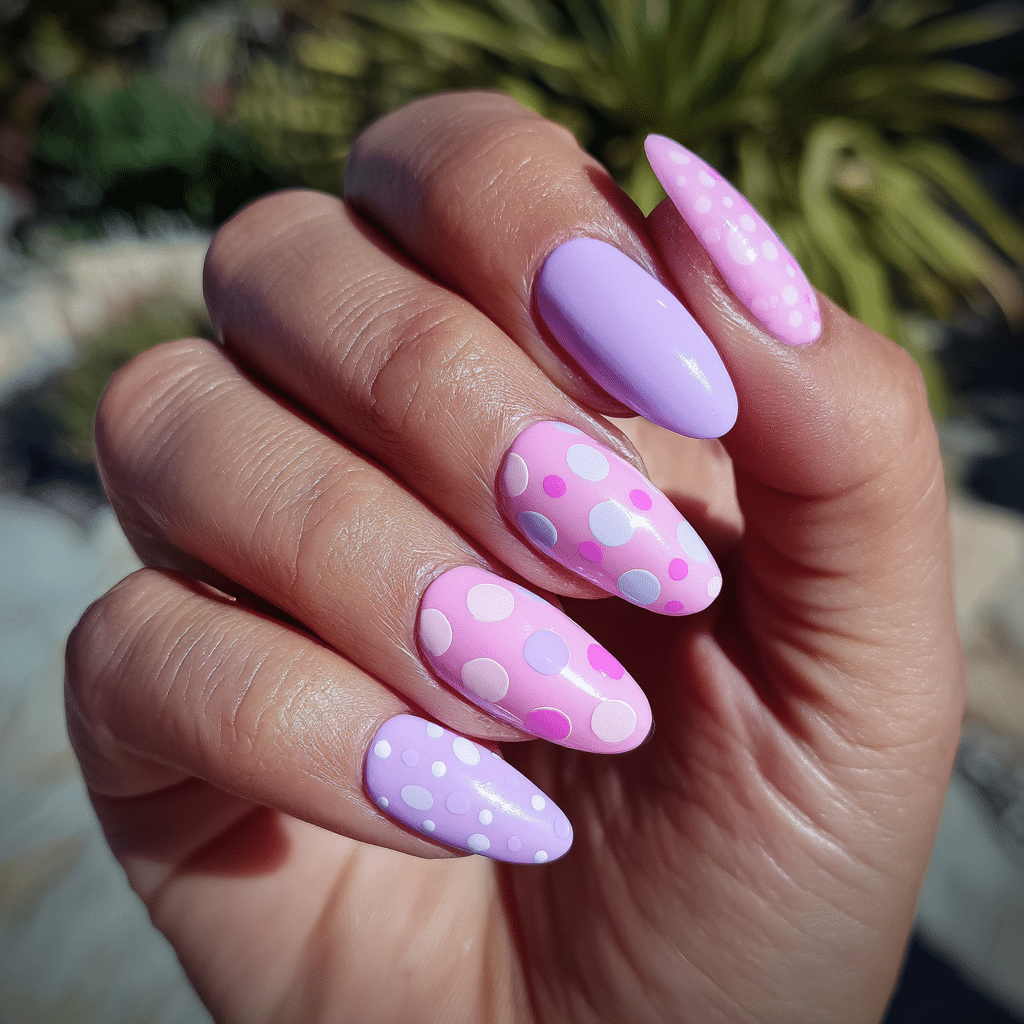
Pastel polka dots on a nude or white base create a sweet, fun look that’s effortlessly springy. This simple design is versatile and perfect for a light-hearted manicure.
Tools Needed
- Nude or white nail polish
- Pastel nail polishes (e.g., pink, mint, lavender)
- Dotting tool or toothpick
- Base coat and top coat
- Acetone for cleanup
Step-by-Step Guide
- Apply a base coat and let dry.
- Paint nails with nude or white polish, using two coats for opacity; let dry.
- Dip a dotting tool or toothpick into a pastel polish.
- Gently touch the nail to create small, evenly spaced dots.
- Repeat with different pastel colors for variety.
- Let dry and clean excess polish with acetone.
- Seal with a glossy top coat.
Color Suggestions
- Soft Mix: Nude base with pink, mint, and lavender dots.
- Bright Pop: White base with coral, yellow, and blue dots.
- Monochrome: Nude with shades of pink dots.
Tips for Success
- Practice dotting on paper for consistent sizes.
- Use thin polish layers to avoid clumps.
- Wait for dots to dry before adding more colors.
- Apply a top coat for a polished finish.
Creative Variations
- Mix dot sizes for a dynamic look.
- Create clusters or rows of dots.
- Use glitter polish for some dots.
- Combine with a single accent stripe.
This design is playful and beginner-friendly, perfect for spring’s cheerful vibe.
Mini Daisy Clusters
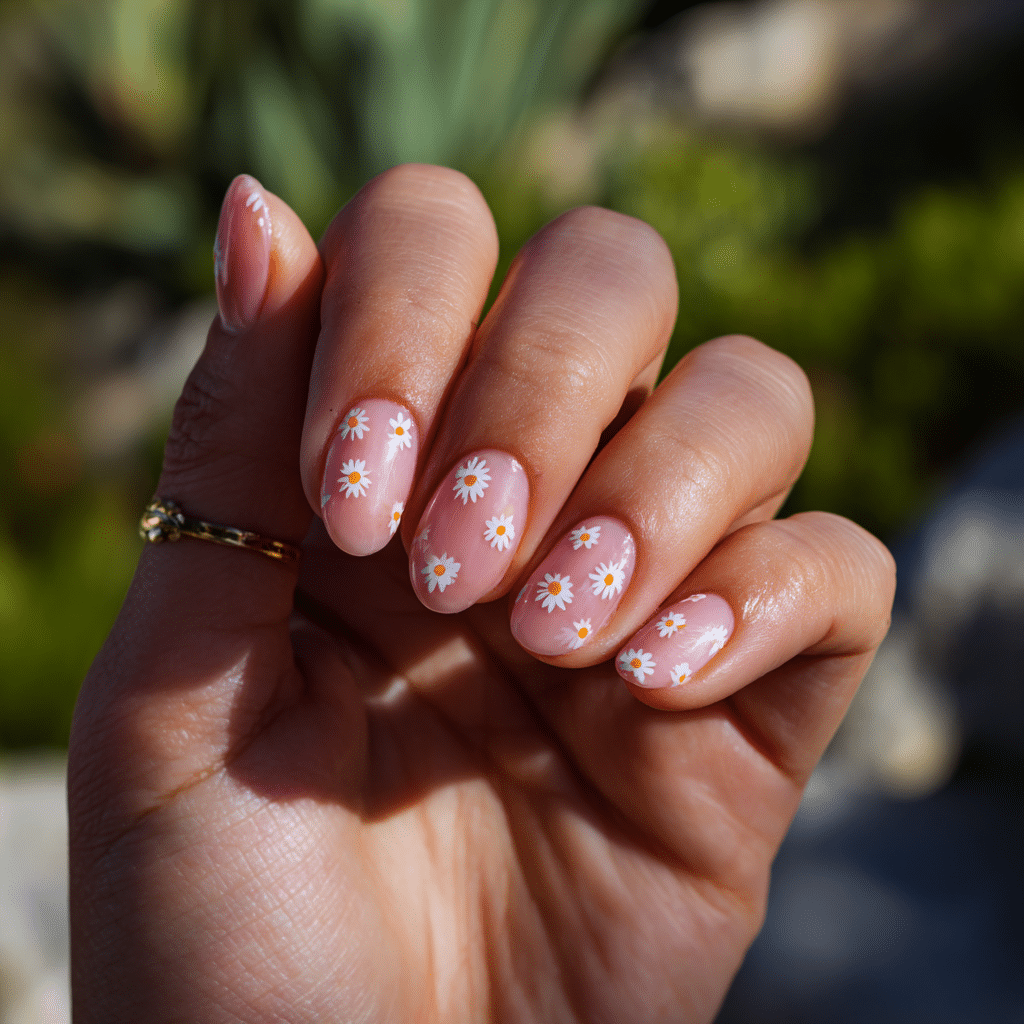
Soft pink or clear nails with tiny white daisy clusters near the base or edges offer a cute, floral touch that screams spring.
Tools Needed
- Soft pink or clear nail polish
- White and yellow nail polishes
- Dotting tools and fine nail art brush
- Base coat and top coat
- Acetone for cleanup
Step-by-Step Guide
- Apply a base coat and let dry.
- Paint nails with soft pink or clear polish, using 2-3 coats; let dry.
- Using a dotting tool, create small yellow dots near the base or edges for daisy centers.
- Add white petal dots around each center with a larger dotting tool, forming clusters.
- Optionally, add green leaves with a fine brush.
- Clean excess polish with acetone.
- Seal with a glossy top coat.
Color Suggestions
- Delicate Bloom: Clear base with white daisies.
- Soft Pink: Pink base with yellow daisies.
- Bold Contrast: Clear with pastel daisies.
Tips for Success
- Keep daisies small for a delicate look.
- Practice flower shapes on paper.
- Use thin polish layers to avoid smudging.
- Apply a top coat for durability.
Creative Variations
- Add glitter to daisy centers.
- Place daisies on accent nails only.
- Use a matte base for contrast.
- Incorporate tiny rhinestones.
This design is adorable and seasonal, ideal for spring.
Rainbow French Tips
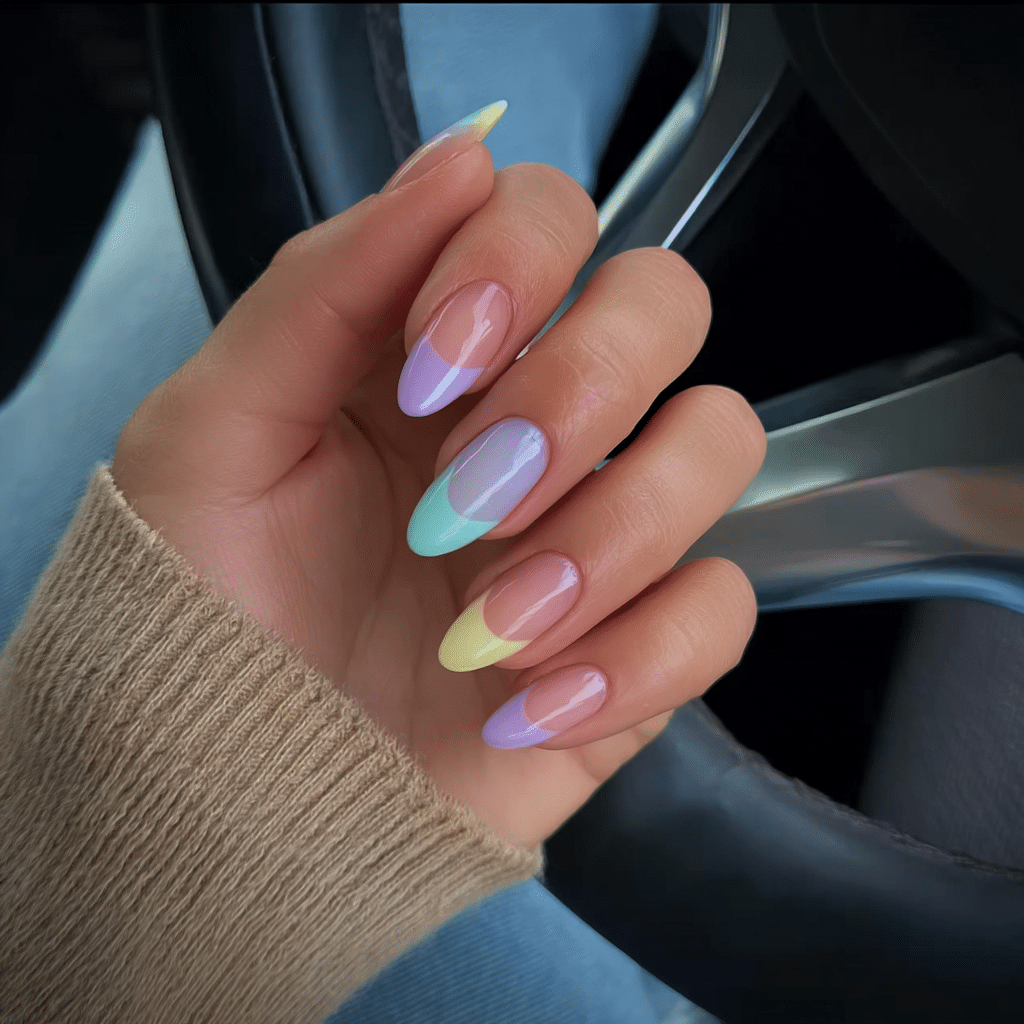
A nude base with each nail tip painted in a different pastel shade creates a playful twist on the classic French manicure, perfect for spring’s vibrant palette.
Tools Needed
- Nude nail polish
- Pastel nail polishes (e.g., pink, mint, lavender, yellow, blue)
- Striping tape or fine brush
- Base coat and top coat
- Acetone for cleanup
Step-by-Step Guide
- Apply a base coat and let dry.
- Paint nails with nude polish, using two coats; let dry.
- Place striping tape near the tips or use a fine brush to paint each tip with a different pastel color.
- Ensure clean, even lines for each tip.
- Remove tape carefully before polish dries.
- Clean excess polish with acetone.
- Seal with a glossy top coat.
Color Suggestions
- Rainbow Glow: Nude with pink, mint, lavender, yellow, blue tips.
- Soft Blend: Nude with peach, coral, mint, lilac tips.
- Cool Tones: Nude with blue, mint, lavender tips.
Tips for Success
- Use tape for precise tip lines.
- Apply pastel polish in thin layers.
- Practice tip placement on paper.
- Use a quick-dry top coat to prevent smudging.
Creative Variations
- Add glitter to one tip color.
- Use metallic pastels for tips.
- Create double tips on one nail.
- Apply tips to accent nails only.
This design is fun and colorful, perfect for spring.
Single Flower Accent Nail
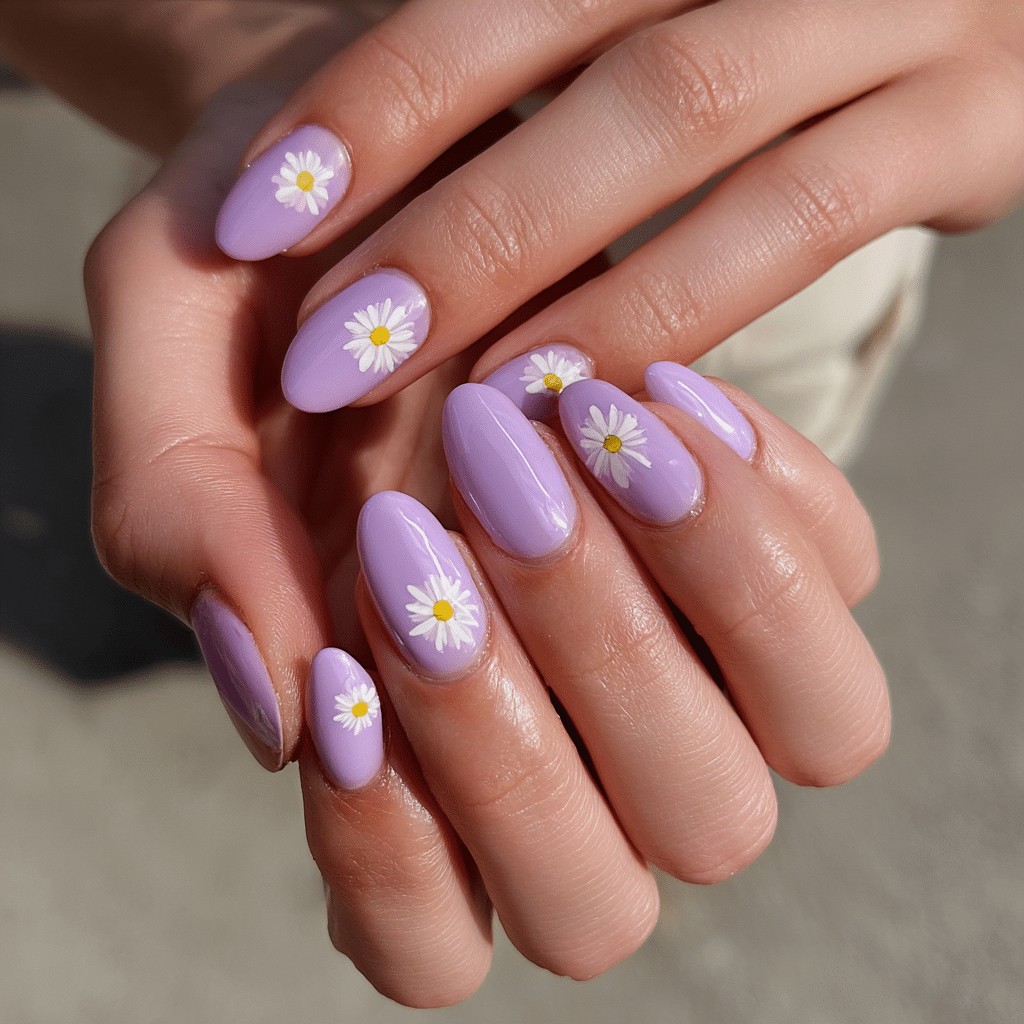
A clear or blush base with one tiny daisy or tulip on each ring finger offers a subtle, adorable look that’s effortlessly springy.
Tools Needed
- Clear or blush nail polish
- White, yellow, or pastel nail polishes
- Dotting tools and fine nail art brush
- Base coat and top coat
- Acetone for cleanup
Step-by-Step Guide
- Apply a base coat and let dry.
- Paint nails with clear or blush polish, using 2-3 coats; let dry.
- On the ring finger, use a dotting tool to create a small yellow or pastel dot for the flower center.
- Add white or pastel petal shapes with a fine brush for a daisy or tulip.
- Optionally, add a green stem or leaf.
- Clean excess polish with acetone.
- Seal with a glossy top coat.
Color Suggestions
- Subtle Charm: Clear with white daisy.
- Blush Bloom: Blush with yellow tulip.
- Pastel Pop: Clear with lavender flower.
Tips for Success
- Practice flower shapes on paper.
- Keep the flower small for subtlety.
- Use thin polish layers to maintain translucency.
- Apply a top coat for clarity.
Creative Variations
- Add glitter to the flower center.
- Use a matte base for contrast.
- Place flowers on multiple accent nails.
- Incorporate a tiny rhinestone.
This design is minimalist and cute, ideal for spring.
Two-Tone Pastel Diagonals
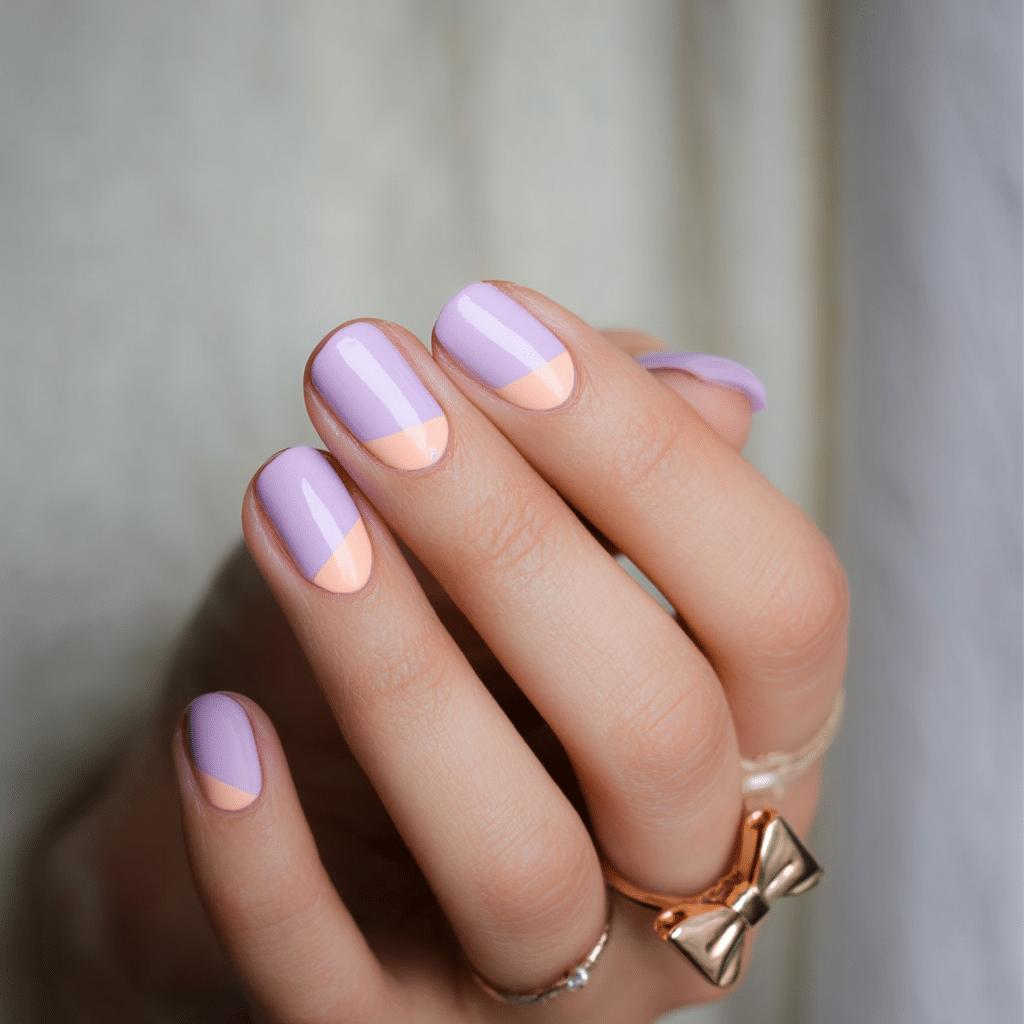
Diagonally divided nails painted in two soft pastel colors create a clean, modern look that’s simple yet striking for spring.
Tools Needed
- Pastel nail polishes (e.g., mint, lavender)
- Striping tape or nail vinyls
- Base coat and top coat
- Acetone for cleanup
Step-by-Step Guide
- Apply a base coat and let dry.
- Place striping tape diagonally across each nail to divide it.
- Paint one side with a pastel color (e.g., mint) and the other with another (e.g., lavender).
- Carefully remove tape before polish dries.
- Let dry and clean excess polish with acetone.
- Seal with a glossy top coat.
Color Suggestions
- Soft Contrast: Mint and lavender.
- Warm Blend: Peach and pink.
- Cool Mix: Baby blue and lilac.
Tips for Success
- Use tape for sharp, clean lines.
- Apply polish in thin layers to avoid bleeding.
- Practice tape placement on paper.
- Use a glossy top coat for a sleek finish.
Creative Variations
- Add a thin metallic line between colors.
- Use a matte finish for one color.
- Create vertical or curved divisions.
- Apply diagonals to accent nails only.
This design is chic and modern, perfect for spring.
Mint Green with Tiny Heart Decals
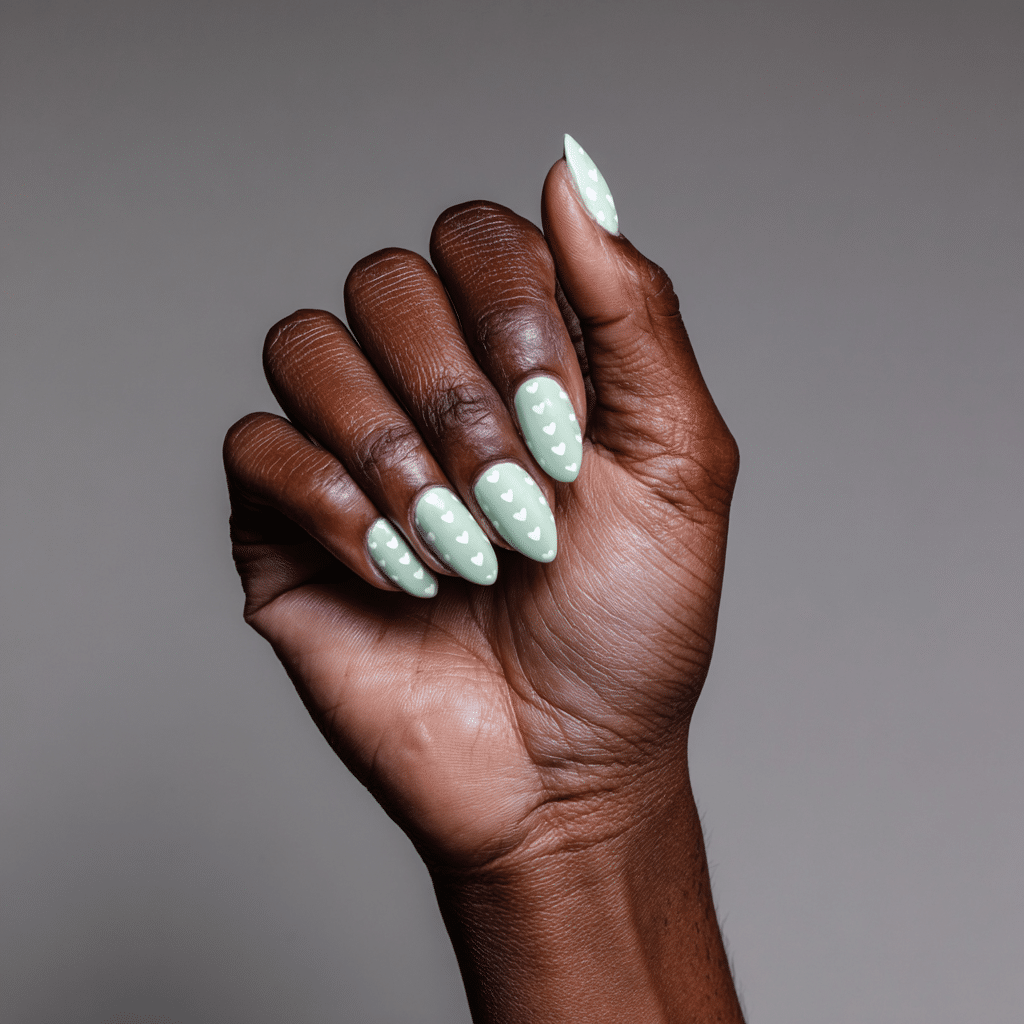
Mint green nails dotted with minimalist white hearts add a cute, unfussy touch, embodying spring’s light-hearted charm.
Tools Needed
- Mint green nail polish
- White nail polish
- Dotting tool or fine brush
- Base coat and top coat
- Acetone for cleanup
Step-by-Step Guide
- Apply a base coat and let dry.
- Paint nails with mint green polish, using two coats; let dry.
- Using a dotting tool or fine brush, create tiny white hearts by placing two small dots side by side and dragging downward to form a point.
- Space hearts randomly or in a pattern.
- Clean excess polish with acetone.
- Seal with a glossy top coat.
Color Suggestions
- Fresh Vibe: Mint green with white hearts.
- Soft Pop: Pale green with pink hearts.
- Bold Contrast: Mint with black hearts.
Tips for Success
- Practice heart shapes on paper.
- Keep hearts small for minimalism.
- Use thin polish layers to avoid smudging.
- Apply a top coat for durability.
Creative Variations
- Add glitter to hearts.
- Place hearts on accent nails only.
- Use metallic polish for hearts.
- Create a heart cluster pattern.
This design is adorable and simple, ideal for spring.
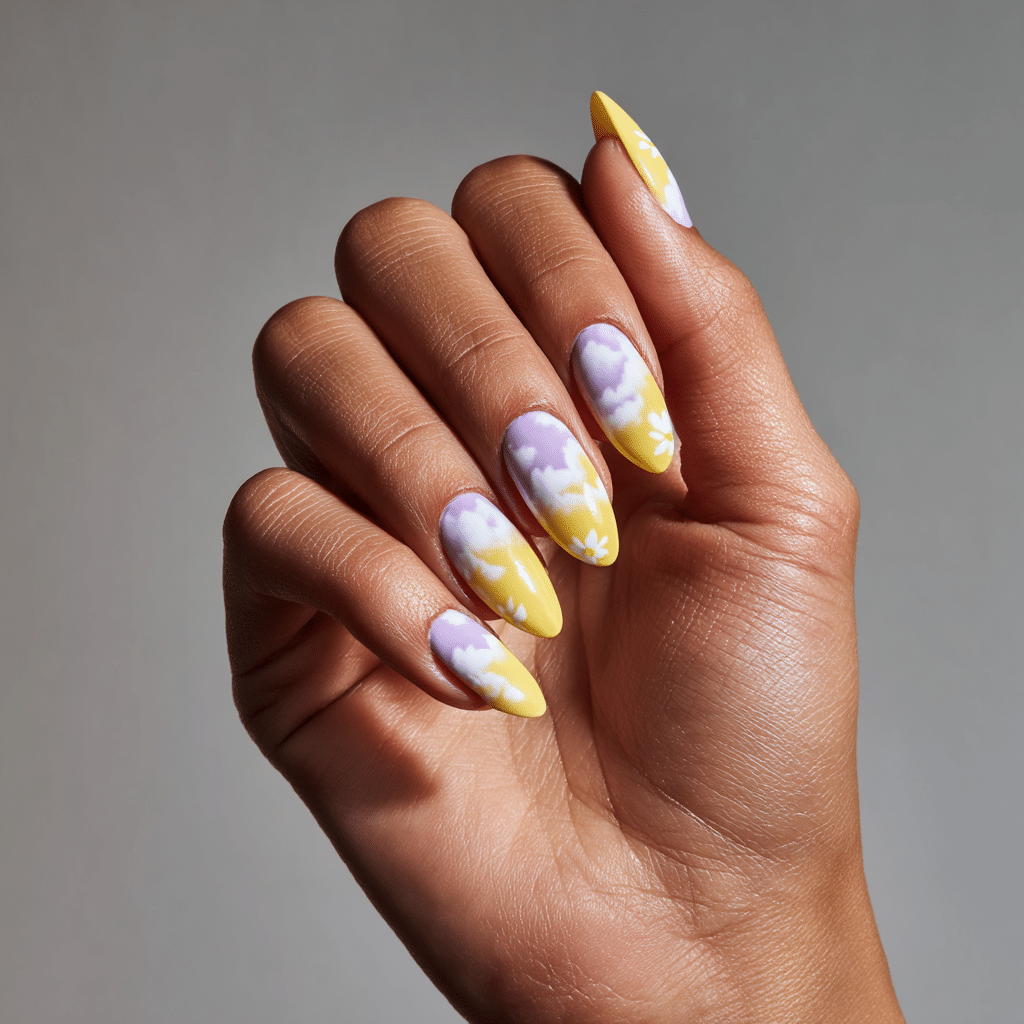
Soft Yellow with White Cloud Tips

Soft yellow nails with fluffy white cloud tips create a sky-inspired look, blending May’s sunny warmth with whimsical charm.
Tools Needed
- Soft yellow nail polish
- White nail polish
- Dotting tool or fine brush
- Base coat and top coat
- Acetone for cleanup
Step-by-Step Guide
- Apply a base coat and let dry.
- Paint nails with soft yellow polish, using two coats; let dry.
- Using a dotting tool or fine brush, paint small, irregular white shapes at the tips to form clouds.
- Layer shapes for a fluffy texture.
- Clean excess polish with acetone.
- Seal with a glossy top coat.
Color Suggestions
- Sunny Sky: Soft yellow with white clouds.
- Pastel Glow: Pale yellow with ivory clouds.
- Bold Pop: Bright yellow with gray clouds.
Tips for Success
- Practice cloud shapes on paper.
- Use light brush strokes for texture.
- Keep clouds small for elegance.
- Apply a glossy top coat for shine.
Creative Variations
- Add tiny gold stars with polish.
- Use a gradient yellow base.
- Place clouds on accent nails only.
- Incorporate a sun detail.
This design is whimsical and fresh, perfect for spring.
Simple Swirls in Peach and Lilac
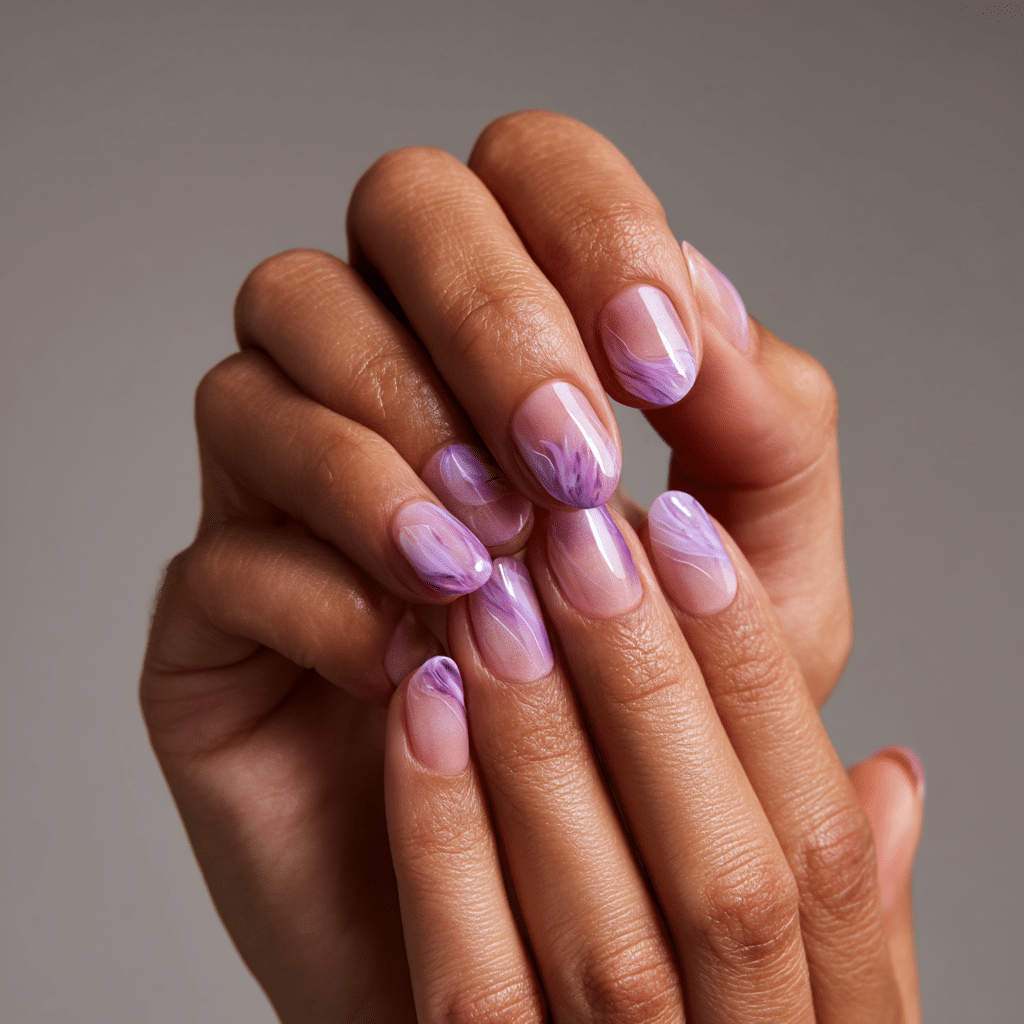
Light peach and lilac swirls over a sheer base create a dreamy, fluid look, capturing spring’s soft, flowing aesthetic.
Tools Needed
- Sheer nail polish
- Peach and lilac nail polishes
- Fine nail art brush
- Base coat and top coat
- Acetone for cleanup
Step-by-Step Guide
- Apply a base coat and let dry.
- Paint nails with sheer polish, using 2-3 coats; let dry.
- Using a fine brush, paint light, wavy swirls in peach and lilac across each nail.
- Keep swirls thin and fluid for a dreamy effect.
- Clean excess polish with acetone.
- Seal with a glossy top coat.
Color Suggestions
- Dreamy Flow: Sheer with peach and lilac swirls.
- Soft Blend: Sheer with pink and lavender swirls.
- Bold Pop: Sheer with coral and purple swirls.
Tips for Success
- Practice swirl patterns on paper.
- Use a thin brush for precise lines.
- Apply polish sparingly to avoid smudging.
- Use a glossy top coat for clarity.
Creative Variations
- Add glitter to swirls for sparkle.
- Use swirls on accent nails only.
- Incorporate metallic swirls.
- Create a gradient swirl effect.
This design is ethereal and simple, ideal for spring.
Barely-There Butterfly Decals
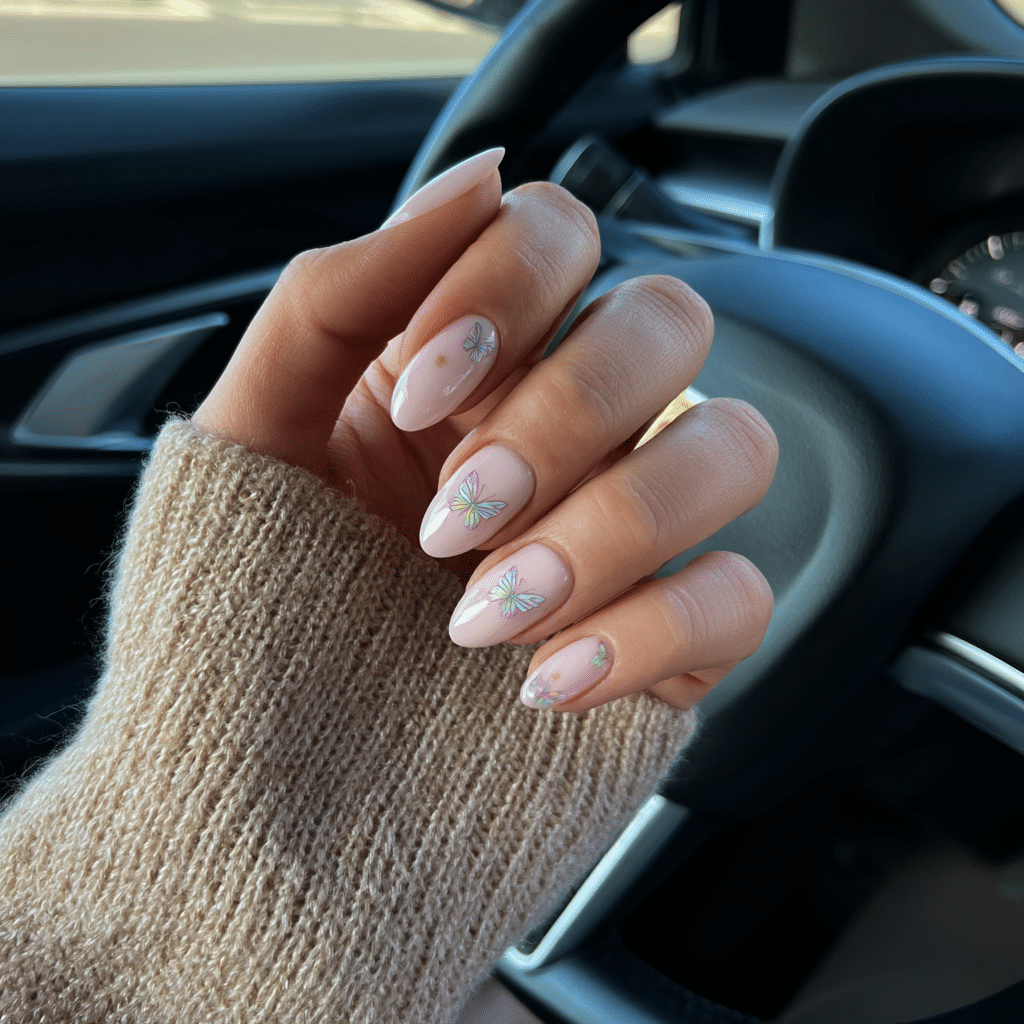
Clear nails with one small pastel butterfly on each finger offer a delicate, seasonal look that’s cute and understated.
Tools Needed
- Clear nail polish
- Pastel nail polishes (e.g., pink, blue)
- Fine nail art brush
- Base coat and top coat
- Acetone for cleanup
Step-by-Step Guide
- Apply a base coat and let dry.
- Paint nails with clear polish, using 2-3 coats; let dry.
- Using a fine brush, paint a small butterfly on each nail with pastel polish (two curved wings above, two below).
- Add a thin black line for the body and outlines.
- Clean excess polish with acetone.
- Seal with a glossy top coat.
Alternatively, use butterfly nail stickers for ease.
Color Suggestions
- Delicate Wings: Clear with pink butterflies.
- Soft Glow: Clear with blue butterflies.
- Mixed Palette: Clear with varied pastel butterflies.
Tips for Success
- Practice butterfly shapes on paper.
- Keep butterflies small for subtlety.
- Use thin polish layers to maintain translucency.
- Apply a top coat for clarity.
Creative Variations
- Add glitter to wings.
- Place butterflies on accent nails only.
- Use metallic polish for wings.
- Incorporate a gradient base.
This design is whimsical and minimal, perfect for spring.
Clear Nails with Colorful Confetti Dots

A transparent base with multicolor confetti dots mimics spring’s playful energy, creating a fun, light-hearted look.
Tools Needed
- Clear nail polish
- Pastel nail polishes (e.g., pink, yellow, blue)
- Dotting tool
- Base coat and top coat
- Acetone for cleanup
Step-by-Step Guide
- Apply a base coat and let dry.
- Paint nails with clear polish, using 2-3 coats; let dry.
- Dip a dotting tool into a pastel polish and create small, random dots across nails.
- Repeat with different pastel colors for a confetti effect.
- Clean excess polish with acetone.
- Seal with a glossy top coat.
Color Suggestions
- Playful Confetti: Clear with pink, yellow, blue dots.
- Soft Mix: Clear with pastel pink, mint, lavender dots.
- Bold Pop: Clear with neon dots.
Tips for Success
- Practice dot placement on paper.
- Use small dots for a delicate effect.
- Apply polish sparingly to avoid clumps.
- Use a glossy top coat for clarity.
Creative Variations
- Add glitter dots for sparkle.
- Place dots on accent nails only.
- Use larger dots for variety.
- Create a gradient confetti pattern.
This design is vibrant and fun, ideal for spring.
Blush Pink with Tiny Gold Stars

Blush pink nails with miniature gold stars add whimsical elegance, blending spring’s softness with a touch of sparkle.
Tools Needed
- Blush pink nail polish
- Gold nail polish or star stickers
- Fine nail art brush or dotting tool
- Base coat and top coat
- Acetone for cleanup
Step-by-Step Guide
- Apply a base coat and let dry.
- Paint nails with blush pink polish, using two coats; let dry.
- Using a fine brush or dotting tool, paint tiny gold stars randomly across nails.
- Alternatively, apply gold star stickers with tweezers.
- Clean excess polish with acetone.
- Seal with a glossy top coat.
Color Suggestions
- Whimsical Glow: Blush pink with gold stars.
- Soft Contrast: Pale pink with silver stars.
- Bold Pop: Bright pink with rose gold stars.
Tips for Success
- Practice star shapes on paper.
- Keep stars small for elegance.
- Use thin polish layers or secure stickers firmly.
- Apply a top coat to seal embellishments.
Creative Variations
- Add glitter around stars.
- Place stars on accent nails only.
- Use star clusters for patterns.
- Incorporate a matte finish.
This design is elegant and playful, perfect for spring.
Striped Pastel Tips
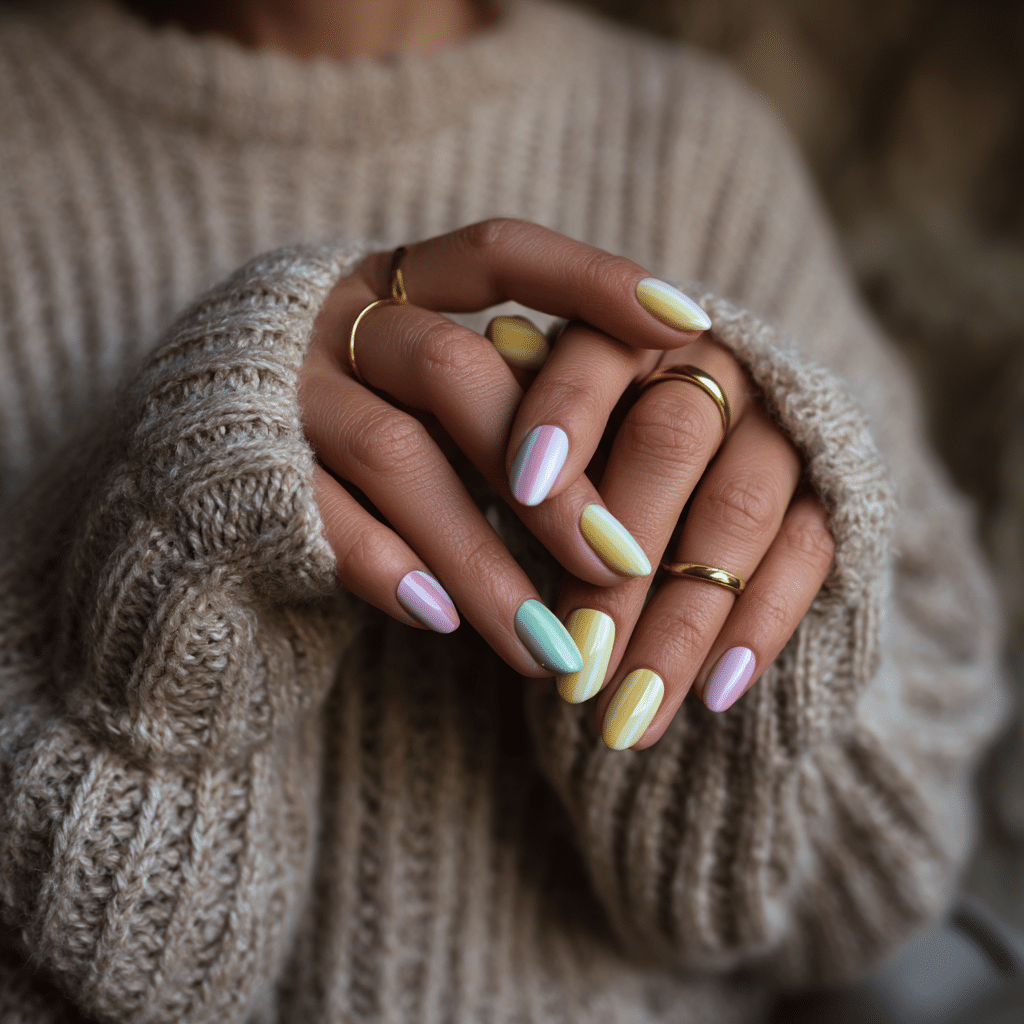
Horizontal or vertical pastel stripes at the nail tips create a soft, candy-like look, ideal for spring’s light-hearted aesthetic.
Tools Needed
- Nude nail polish
- Pastel nail polishes (e.g., pink, mint, lavender)
- Striping tape
- Base coat and top coat
- Acetone for cleanup
Step-by-Step Guide
- Apply a base coat and let dry.
- Paint nails with nude polish, using two coats; let dry.
- Place striping tape horizontally or vertically near the tips to create stripe patterns.
- Paint over tape with pastel polishes, alternating colors.
- Remove tape carefully before polish dries.
- Clean excess polish with acetone.
- Seal with a glossy top coat.
Color Suggestions
- Candy Stripes: Nude with pink, mint, lavender stripes.
- Soft Blend: Nude with peach, yellow, blue stripes.
- Cool Tones: Nude with blue, lavender stripes.
Tips for Success
- Use thin tape for precise stripes.
- Apply polish in thin layers to avoid bleeding.
- Practice tape placement on paper.
- Use a glossy top coat for shine.
Creative Variations
- Use glitter polish for stripes.
- Create diagonal stripes.
- Apply stripes to accent nails only.
- Add a metallic stripe.
This design is sweet and simple, ideal for spring.
Peach Base with White Outlined Hearts
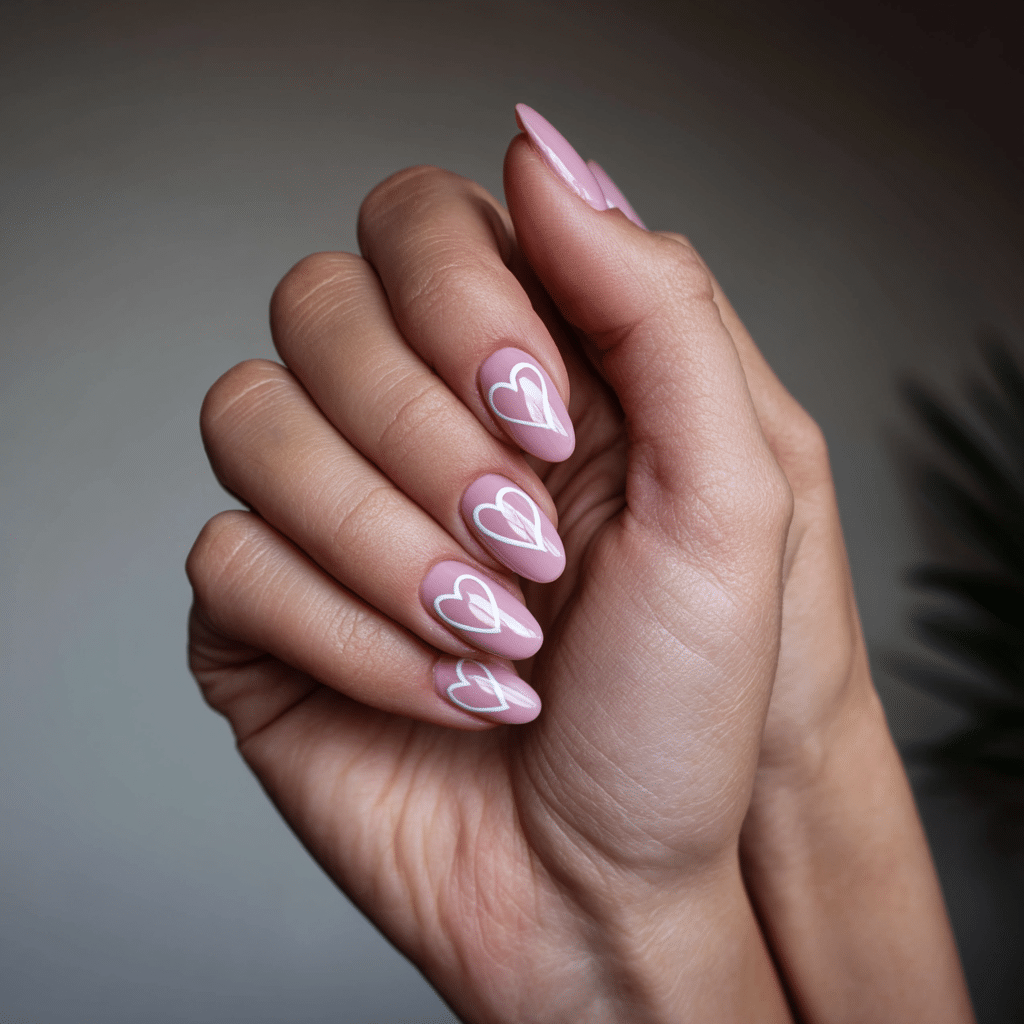
Light peach nails with minimal white heart outlines offer a cute, youthful vibe, perfect for spring’s romantic charm.
Tools Needed
- Peach nail polish
- White nail polish
- Fine nail art brush
- Base coat and top coat
- Acetone for cleanup
Step-by-Step Guide
- Apply a base coat and let dry.
- Paint nails with peach polish, using two coats; let dry.
- Using a fine brush, paint small white heart outlines randomly across nails.
- Keep hearts minimal and open for a delicate look.
- Clean excess polish with acetone.
- Seal with a glossy top coat.
Color Suggestions
- Youthful Charm: Peach with white hearts.
- Soft Glow: Pale peach with ivory hearts.
- Bold Pop: Bright peach with black hearts.
Tips for Success
- Practice heart shapes on paper.
- Use a thin brush for precise outlines.
- Keep hearts small for subtlety.
- Apply a top coat for durability.
Creative Variations
- Fill hearts with glitter.
- Place hearts on accent nails only.
- Use metallic outlines.
- Create a heart cluster pattern.
This design is romantic and cute, perfect for spring.
Baby Blue Base with White Dots
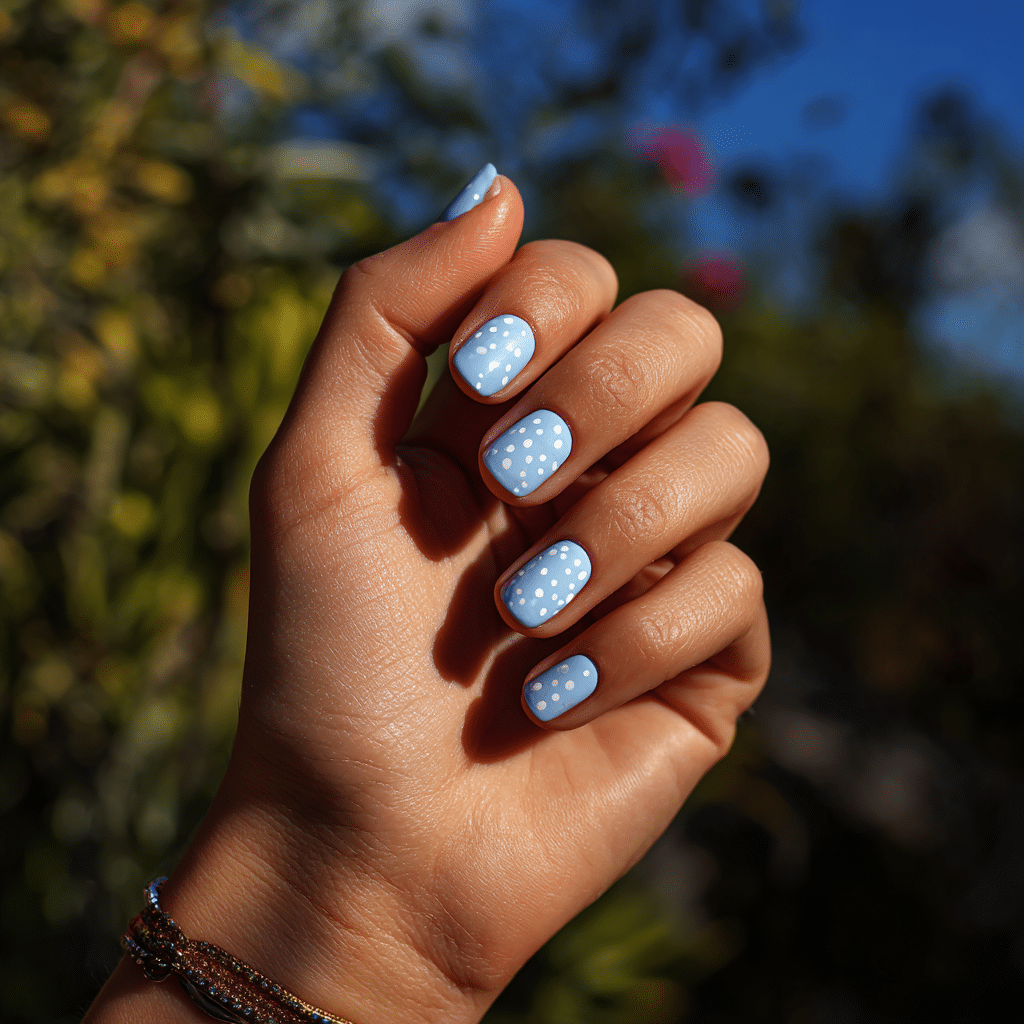
Baby blue nails with white dots mimic tiny petals or dewdrops, creating a minimal, fresh look for spring.
Tools Needed
- Baby blue nail polish
- White nail polish
- Dotting tool or toothpick
- Base coat and top coat
- Acetone for cleanup
Step-by-Step Guide
- Apply a base coat and let dry.
- Paint nails with baby blue polish, using two coats; let dry.
- Dip a dotting tool or toothpick into white polish.
- Create small, random dots across nails to resemble petals or dewdrops.
- Clean excess polish with acetone.
- Seal with a glossy top coat.
Color Suggestions
- Fresh Dew: Baby blue with white dots.
- Soft Contrast: Pale blue with ivory dots.
- Bold Pop: Bright blue with yellow dots.
Tips for Success
- Practice dot placement on paper.
- Keep dots small for a minimal effect.
- Use thin polish layers to avoid clumps.
- Apply a top coat for shine.
Creative Variations
- Add glitter dots for sparkle.
- Create dot clusters or rows.
- Use dots on accent nails only.
- Incorporate a gradient base.
This design is simple and serene, ideal for spring.
Clear Base with Green Leaf Detailing
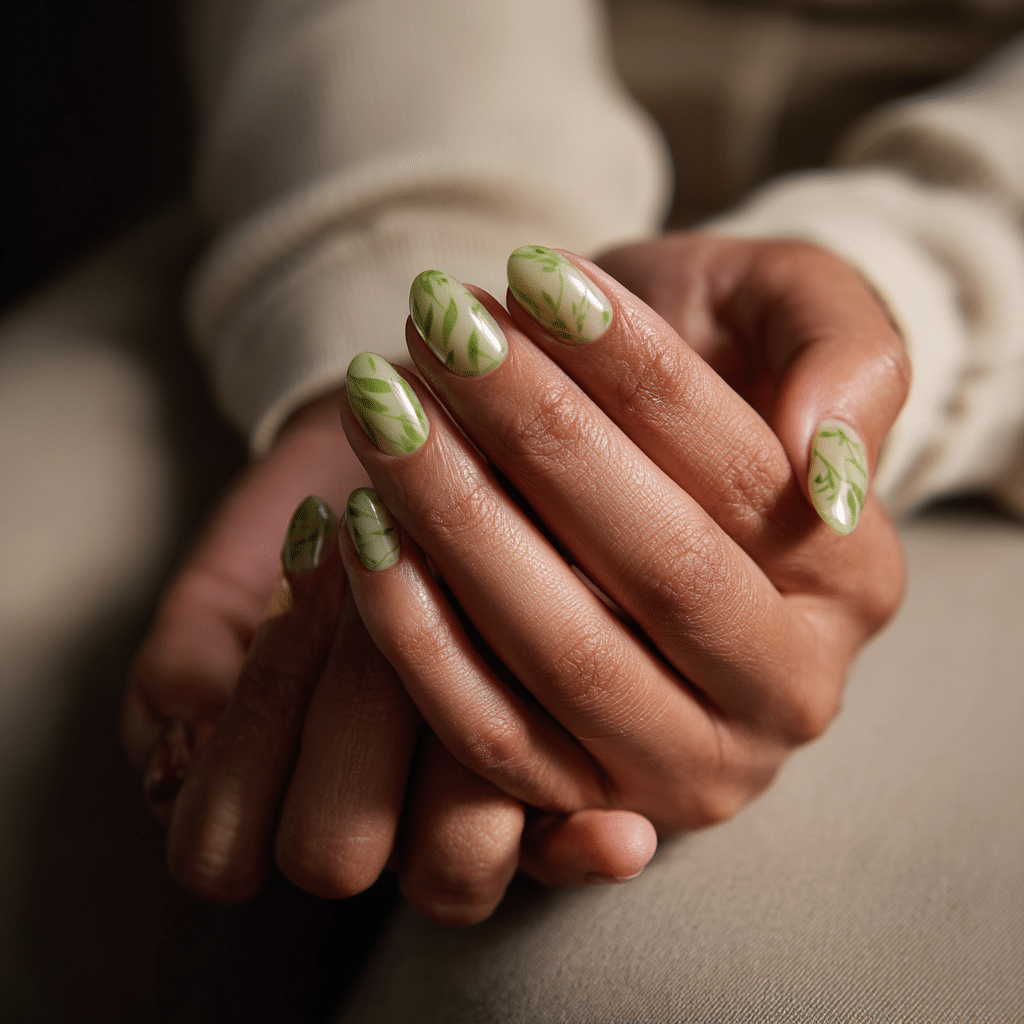
Clear nails with subtle green leaf strokes offer a botanical, calming look, blending spring’s earthy charm with cute simplicity.
Tools Needed
- Clear nail polish
- Green nail polish
- Fine nail art brush
- Base coat and top coat
- Acetone for cleanup
Step-by-Step Guide
- Apply a base coat and let dry.
- Paint nails with clear polish, using 2-3 coats; let dry.
- Using a fine brush, paint thin green leaf strokes or branches randomly across nails.
- Keep leaves small and delicate for a subtle effect.
- Clean excess polish with acetone.
- Seal with a glossy top coat.
Color Suggestions
- Earthy Vibe: Clear with soft green leaves.
- Bold Contrast: Clear with lime green leaves.
- Mixed Tones: Clear with olive and mint leaves.
Tips for Success
- Practice leaf shapes on paper.
- Use a thin brush for precise strokes.
- Apply polish sparingly to maintain translucency.
- Apply a top coat for clarity.
Creative Variations
- Add tiny flowers with a dotting tool.
- Use metallic green for leaves.
- Place leaves on accent nails only.
- Incorporate a gradient base.
This design is calming and natural, perfect for spring.
| Design | Key Tools | Base Color | Accent Colors | Difficulty |
|---|---|---|---|---|
| Pastel Polka Dots | Dotting tool | Nude, white | Pastels | Easy |
| Mini Daisy Clusters | Dotting tool, brush | Pink, clear | White, yellow | Medium |
| Rainbow French Tips | Striping tape | Nude | Pastels | Easy |
| Single Flower Accent Nail | Dotting tool, brush | Clear, blush | White, pastels | Easy |
| Two-Tone Pastel Diagonals | Striping tape | Pastels | Pastels | Medium |
| Mint Green with Tiny Heart Decals | Dotting tool, brush | Mint green | White | Easy |
| Soft Yellow with White Cloud Tips | Dotting tool, brush | Soft yellow | White | Easy |
| Simple Swirls in Peach and Lilac | Fine brush | Sheer | Peach, lilac | Medium |
| Barely-There Butterfly Decals | Fine brush | Clear | Pastels | Medium |
| Clear Nails with Colorful Confetti Dots | Dotting tool | Clear | Pastels | Easy |
| Blush Pink with Tiny Gold Stars | Fine brush | Blush pink | Gold | Easy |
| Striped Pastel Tips | Striping tape | Nude | Pastels | Medium |
| Peach Base with White Outlined Hearts | Fine brush | Peach | White | Medium |
| Baby Blue Base with White Dots | Dotting tool | Baby blue | White | Easy |
| Clear Base with Green Leaf Detailing | Fine brush | Clear | Green | Medium |
These 15 cute and simple spring nail designs offer fresh, light-hearted styles that capture the season’s charm. Perfect for quick updates, they blend playful details with easy execution for a vibrant manicure.
In a world where trends often lean toward the extravagant, simple spring nail art stands out by being effortlessly beautiful. These cute designs don’t demand attention—they invite a closer look. They echo the soft beauty of the season itself: gentle blossoms, sunny skies, and the quiet return of color to our everyday lives.
By choosing simplicity, we don’t lose creativity—we refine it. Spring is about fresh starts and soft statements, and nothing captures that better than a clean, charming manicure. Whether you’re painting your own nails at home or heading to a salon, embracing cute and simple designs is a way to honor the season’s energy while staying true to your own style.