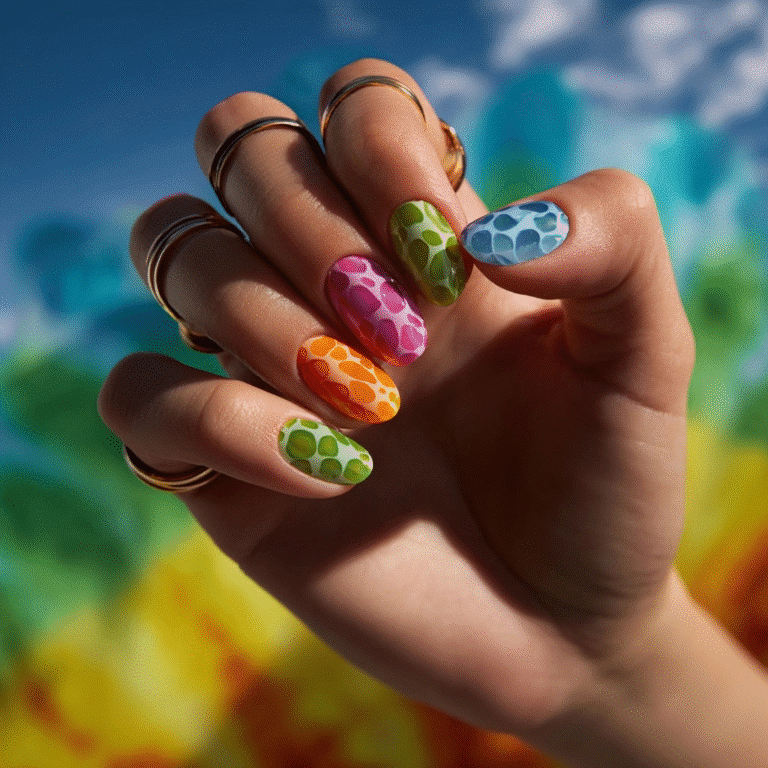
Spring Nail Art: Embracing the Fresh and Fun Vibes of the Season
Spring is the season of renewal and growth, and it’s the perfect time to refresh every aspect of your life – including your nails! After months of heavy winter tones and darker colors, spring offers an opportunity to switch to lighter, fresher hues and playful designs. In this article, I’ll share my love for spring nail art, highlighting why it’s the perfect way to express creativity, embrace the season’s cheerful vibe, and give your hands a pop of personality.
Why I Love Spring Nail Art
One of the reasons spring nail art holds such a special place in my heart is because it’s so versatile and refreshing. The season brings with it a sense of new beginnings, and what better way to embrace that than by adorning your nails with colors and designs that reflect nature’s beauty? The shift from the muted and sometimes heavy tones of winter to the light, pastel shades of spring feels like an invitation to let your creativity blossom.
The pastel palette in spring is undoubtedly one of my favorites. These soft hues – from baby blues to pale pinks – are not only delicate but also incredibly versatile. Whether you prefer a simple design or something more intricate, these colors can be adapted to any style or preference. I love how pastel colors bring a sense of calm and positivity to a manicure, effortlessly enhancing my mood whenever I look at my nails. Furthermore, they pair so well with floral patterns, playful geometric designs, or even simple minimalism, giving you endless possibilities to explore.
Another aspect I adore about spring nail art is how it mirrors the beauty of nature. The world around us blooms into life in spring, and what better way to reflect that than by incorporating subtle floral designs, leaves, or even fruit-inspired accents onto your nails? This theme connects you with the vibrancy of the season, and it feels like you’re carrying a small piece of spring with you everywhere you go.
The Perfect Time for Experimentation
Spring is a time of rejuvenation, and with that comes the chance to experiment with different colors and techniques on your nails. The beauty of spring nail art is its ability to blend elegance with playfulness. Whether you want to keep things minimal with a single pastel shade or go all out with tiny hand-painted flowers, spring offers the freedom to experiment.
For those who enjoy adding some flair without overcomplicating things, negative space nail art is an excellent option. By leaving small parts of your nails exposed, you create a design that feels clean yet modern. Using tape to create geometric shapes or stripes can turn a simple manicure into something unique and eye-catching. It’s an excellent way to make a statement while still keeping things understated.
Additionally, spring nails allow for creative freedom with details like butterflies, clouds, or even fruits like lemons or strawberries. These whimsical touches add a sense of fun to your manicure and are guaranteed to spark conversations. Personally, I find it so rewarding to come up with new designs that reflect the season’s energy. It’s almost like painting a small masterpiece on each nail!
How Spring Nail Art Elevates Your Style
Nail art is an easy yet impactful way to express your personality and style. Spring nail art, in particular, can elevate your entire look. With warmer weather and lighter clothing, your nails become an accessory that complements your outfits. Whether you’re wearing a cute sundress, a casual t-shirt and jeans, or a stylish blazer, the right nail art can tie everything together and add a touch of flair.
The beauty of spring nail art is its ability to be both subtle and bold. If you prefer a minimalist approach, you can go for a simple pastel base with a single line or a dot on each nail. It’s clean and chic, but still has that playful element. On the other hand, if you’re someone who loves to stand out, vibrant florals, stripes, or a mix of pastel shades can make your nails the star of the show.
I love how spring nail art not only reflects the season’s aesthetic but also provides an opportunity to experiment with new techniques and trends. It’s a way to feel connected to the natural beauty that surrounds us during this time of year while still showcasing your individuality.
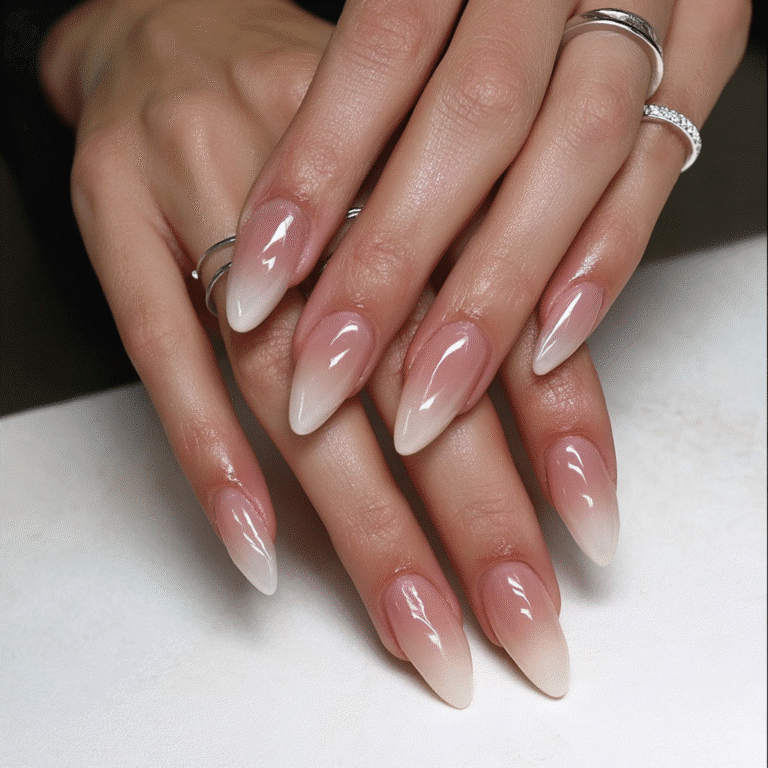
Pastel Gradient Nail Art
Pastel gradient nail art captures spring’s essence with a seamless blend of soft colors, creating a delicate ombré effect. This design evokes blooming flowers and new beginnings, making it a seasonal favorite. Its versatility allows for minimalist or bold interpretations, depending on your style.
Tools Needed
- Nail polishes in pastel shades (e.g., lavender, mint green, baby pink)
- Makeup sponge or angled brush
- Base coat and top coat
- Acetone and brush for cleanup
Step-by-Step Guide
- Apply a base coat to protect nails and let it dry.
- Select two or three pastel shades that complement each other.
- Pour small amounts of each polish onto a palette or foil.
- For the sponge method, dab a makeup sponge into the colors, blending them slightly.
- Gently press the sponge onto your nail, moving from base to tip or vice versa.
- Repeat until the gradient is smooth, then let it dry.
- Clean excess polish with acetone and a brush.
- Seal with a top coat for a glossy finish.
For precision, use an angled brush to layer and blend colors directly on the nail, starting with the base color and adding the second shade at the opposite end.
Color Suggestions
- Classic Spring: Lavender and mint green for a soothing look.
- Warm Tones: Baby pink and pale yellow for a cheerful vibe.
- Bold Twist: Pastel purple and teal for a modern edge.
Tips for Success
- Practice on paper to perfect your blending technique.
- Use thin polish layers to avoid smudging.
- Apply a top coat every few days to maintain the design.
- For beginners, start with two colors for easier blending.
Creative Variations
- Add glitter polish in the gradient’s middle for sparkle.
- Use a chrome top coat for a holographic effect.
- Create a French gradient with color only at the tips.
- Incorporate negative space by leaving parts of the nail bare.
This design is beginner-friendly yet offers endless customization, making it a go-to for spring manicures. For a detailed tutorial, visit Teen Vogue.
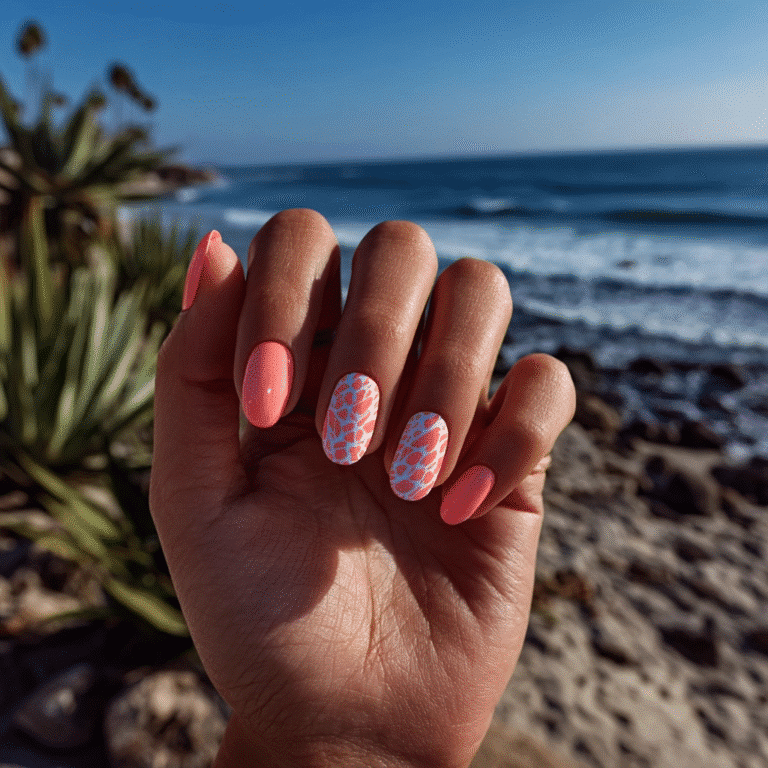
Floral Accents: Nature’s Touch
Floral accents bring spring’s beauty to your nails with tiny, hand-painted flowers on a light base. This feminine design is perfect for adding a natural, delicate touch, with simple flowers like daisies or tulips being ideal for beginners.
Tools Needed
- Dotting tools (various sizes)
- Fine nail art brushes
- Nail art pens (optional)
- Nail polishes in desired colors
- Base and top coats
- Acetone and brush for cleanup
Step-by-Step Guide
- Apply a base coat and let it dry.
- Paint nails with a light base color (nude, white, or pastel) and let dry.
- Choose flower colors, such as pastels or brights.
- Use a small dotting tool to create a flower’s center with a tiny dot.
- With a larger dotting tool, add petal dots around the center, overlapping slightly.
- Add another petal layer for fuller flowers, if desired.
- Use a fine brush for details like stamens or leaves.
- Let dry and apply a top coat.
For beginners, floral stickers are a quick alternative: apply them over a base color and seal with a top coat.
Color Suggestions
- Pastel Palette: Lavender, mint, and baby pink for a soft look.
- Bright Blooms: Coral, turquoise, or yellow for vibrancy.
- Monochromatic: Shades of one color for subtlety.
Tips for Success
- Practice dotting on paper to master flower shapes.
- Use thin polish layers to prevent smudging.
- Clean mistakes with acetone and a brush.
- Start with simple daisies before trying complex flowers.
Creative Variations
- Use metallic polish for flowers to add shine.
- Place flowers on a gradient base for depth.
- Incorporate negative space around flowers.
- Mix with stripes or dots for an eclectic look.
Floral accents are versatile and charming, perfect for spring events. Check Mylee for a beginner-friendly tutorial.
Polka Dots: Playful Patterns
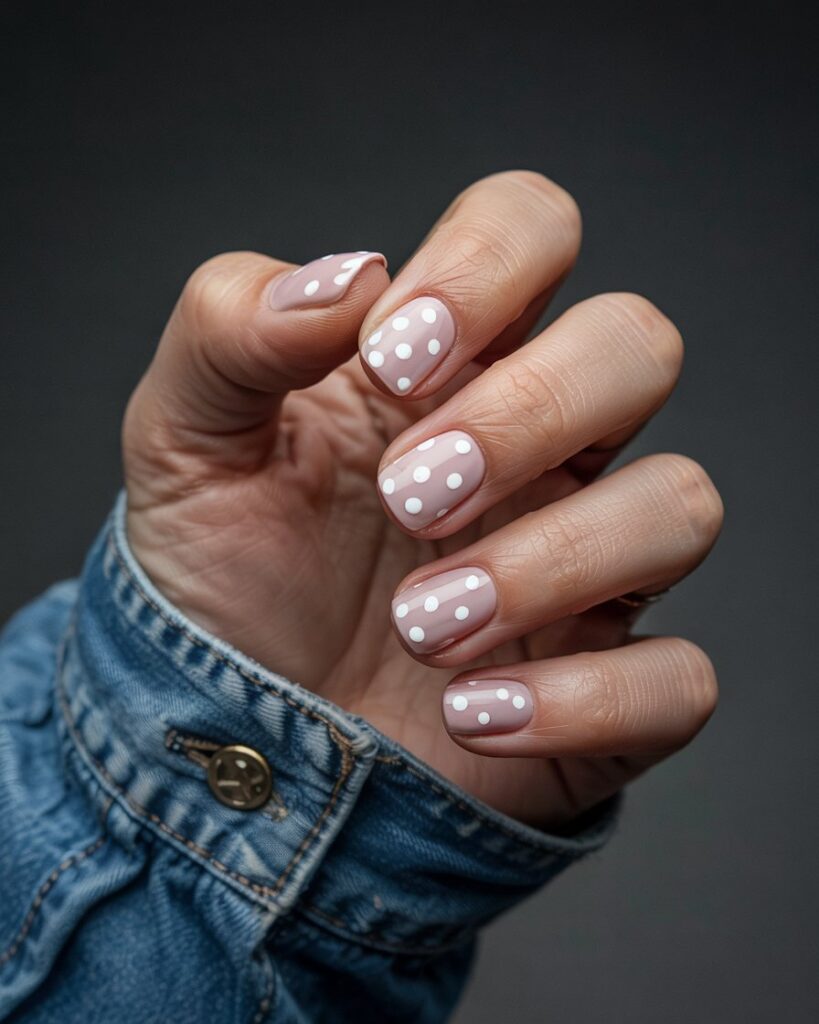
Polka dot nail art is a timeless, playful design that’s easy to create and endlessly customizable. By applying dots of one or more colors on a base, you can achieve a chic yet fun look that suits any occasion, especially spring’s lighthearted vibe.
Tools Needed
- Nail polishes (base and dot colors)
- Dotting tool, toothpick, or bobby pin
- Base and top coats
- Acetone and brush for cleanup
Step-by-Step Guide
- Apply a base coat and let it dry.
- Paint nails with a base color and let dry.
- Choose dot colors that contrast with the base.
- Dip a dotting tool or toothpick into polish and gently touch the nail to create dots.
- Arrange dots randomly, in rows, or in clusters.
- Let dry completely.
- Clean excess polish with acetone.
- Apply a top coat to seal.
Color Suggestions
- Classic: Black dots on white or red on nude.
- Spring Vibes: Pastel dots on light pink or nude.
- Bold: Bright coral or turquoise on a dark base.
- Glam: Metallic or glitter dots for sparkle.
Tips for Success
- Practice dotting on paper for consistency.
- Use thin polish layers to avoid clumps.
- Wait for dots to dry before adding more colors.
- Use larger tools for bigger dots if needed.
Creative Variations
- Mix dot sizes for a dynamic look.
- Create rows or clusters for patterns.
- Use ombre dots, transitioning colors across the nail.
- Combine with stripes or flowers for complexity.
Polka dots are perfect for beginners and can be elevated with creative touches. See Paper and Stitch for a detailed guide.
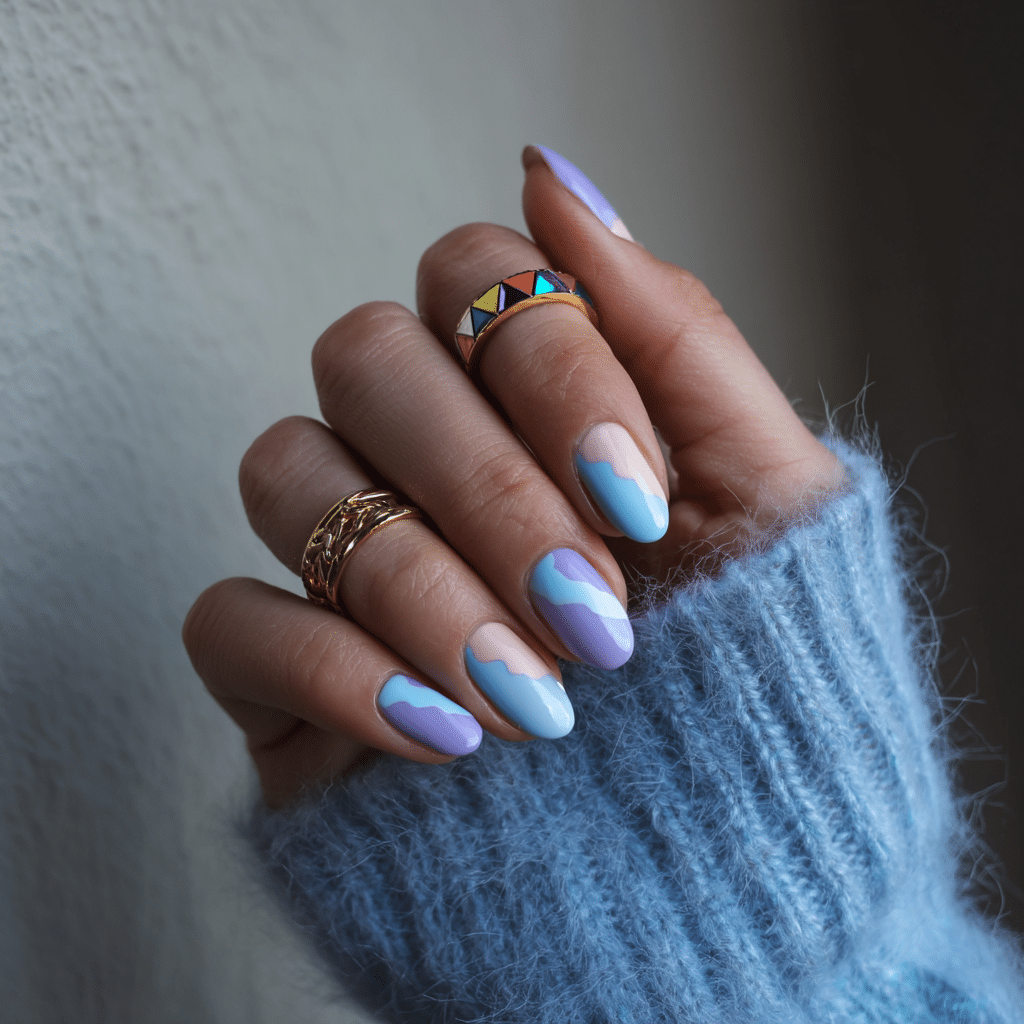
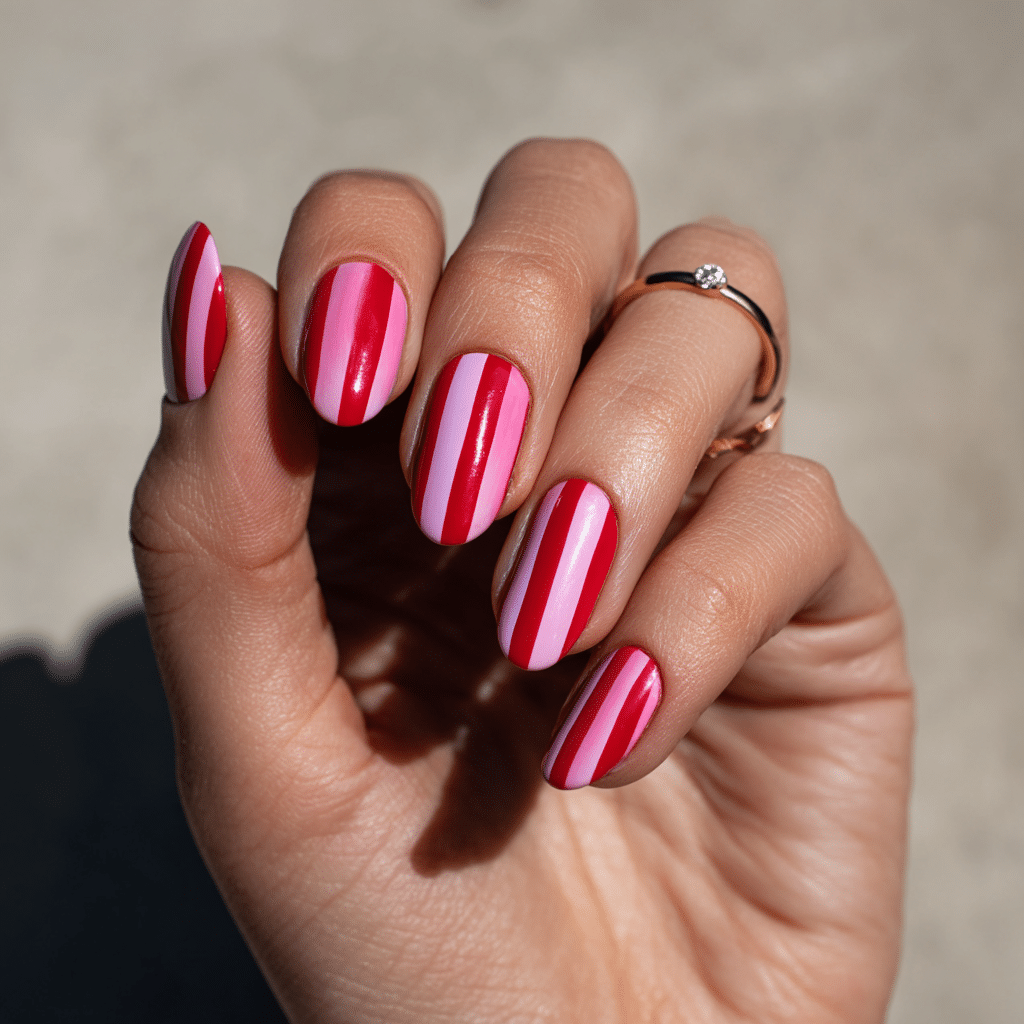
Negative Space Stripes: Modern Elegance
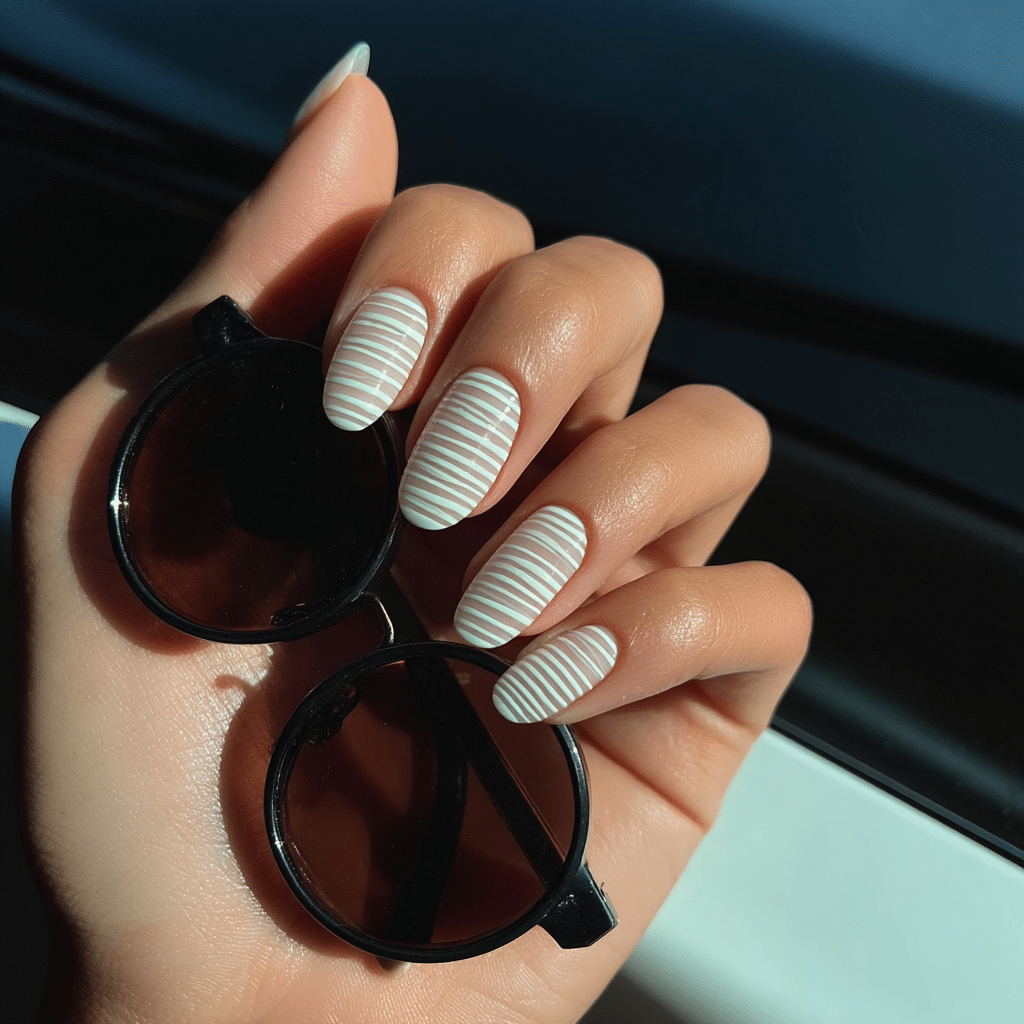
Negative space stripes offer a sleek, modern take on nail art, using bare nail sections to create a striking contrast. This design uses thin, horizontal stripes with tape, leaving gaps for a minimalist, spring-appropriate look.
Tools Needed
- Nail polishes (pastel or gold)
- Striping tape or regular tape
- Base and top coats
- Acetone and brush for cleanup
- Tweezers (optional)
Step-by-Step Guide
- Apply a base coat and let dry.
- Paint nails with a nude or light pink base; let dry.
- Place striping tape horizontally across nails, leaving gaps.
- Paint over the tape with a pastel or gold polish.
- Carefully remove tape with tweezers before polish dries.
- Let dry and clean excess polish with acetone.
- Apply a top coat for protection.
Color Suggestions
- Soft Look: Pastel pink with white stripes.
- Elegant: Nude base with gold stripes.
- Bold: Mint green with black stripes.
Tips for Success
- Use thin tape for precise lines.
- Remove tape quickly to avoid smudging.
- Practice tape placement on paper.
- Seal with a top coat to prevent peeling.
Creative Variations
- Try diagonal or vertical stripes.
- Use multiple colors for stripes.
- Add glitter polish over stripes.
- Combine with negative space shapes like hearts.
This design is chic and easy, perfect for spring’s modern aesthetic. For inspiration, explore Glamour.
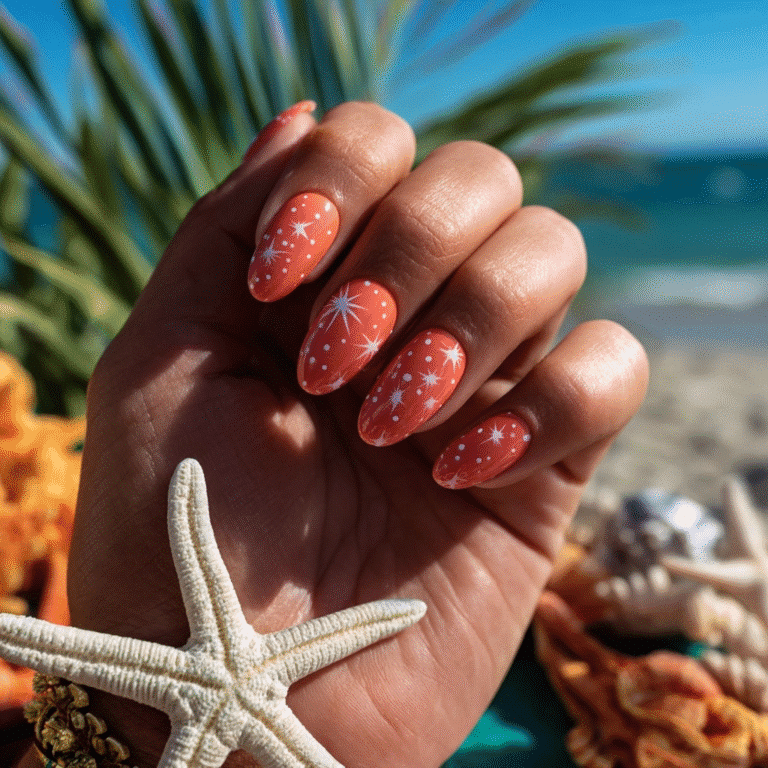
Baby Blue Clouds: Dreamy Skies
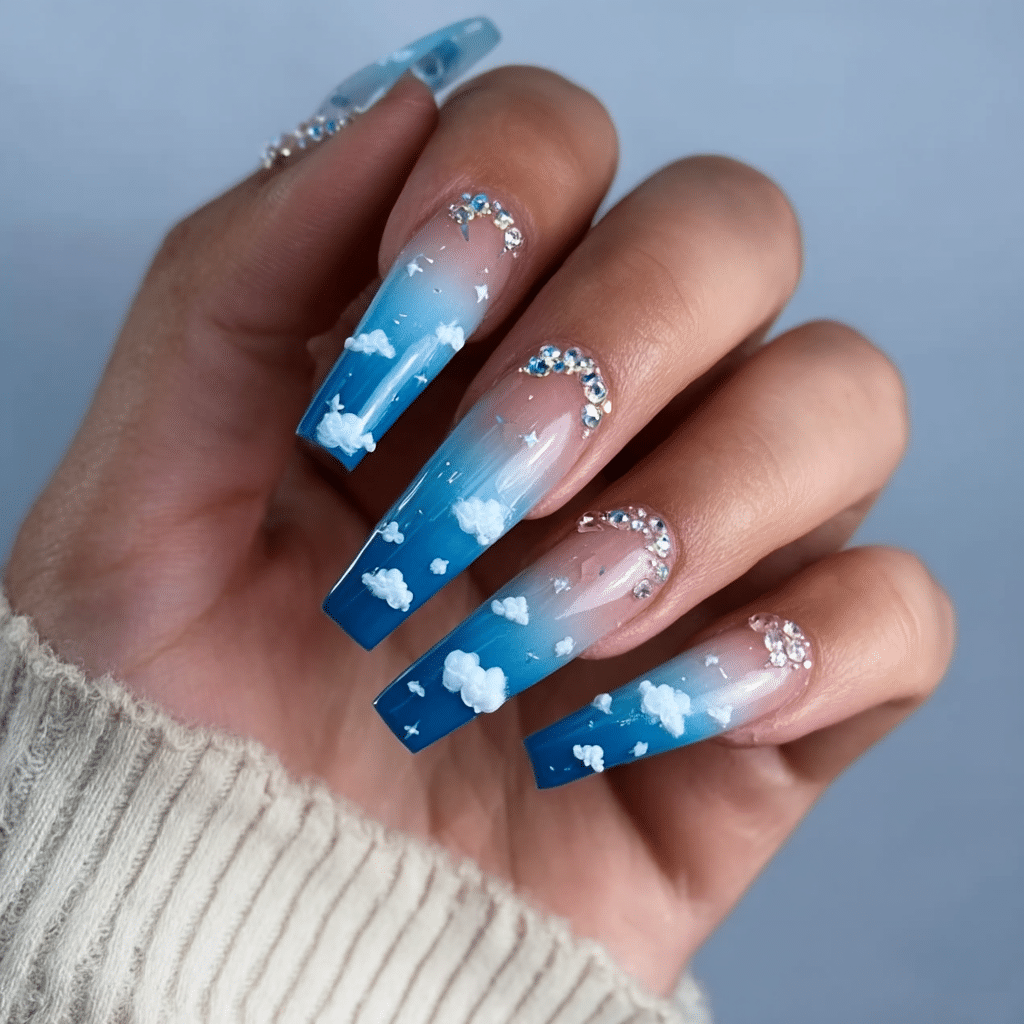
Baby blue clouds create a whimsical, sky-inspired look, with fluffy white clouds painted on a soft blue base. This design is simple yet evocative, bringing spring’s clear skies to your nails.
Tools Needed
- Baby blue and white nail polishes
- Dotting tool or fine brush
- Base and top coats
- Acetone for cleanup
Step-by-Step Guide
- Apply a base coat and let dry.
- Paint nails with baby blue polish; let dry.
- Use a dotting tool or brush to paint small, irregular white shapes for clouds.
- Layer shapes to create fluffy textures.
- Let dry and clean excess polish.
- Apply a top coat.
Color Suggestions
- Classic: Baby blue with white clouds.
- Pastel Twist: Pale lavender base with white clouds.
- Bold: Bright blue with gray clouds.
Tips for Success
- Use light brush strokes for cloud texture.
- Practice cloud shapes on paper.
- Keep clouds small for realism.
- Use a glossy top coat for shine.
Creative Variations
- Add tiny stars with gold polish.
- Use a gradient blue base.
- Paint clouds on accent nails only.
- Include a sun or moon detail.
This dreamy design is perfect for spring’s airy feel. Check Byrdie for related inspiration.
Butterfly Details: Whimsical Wings
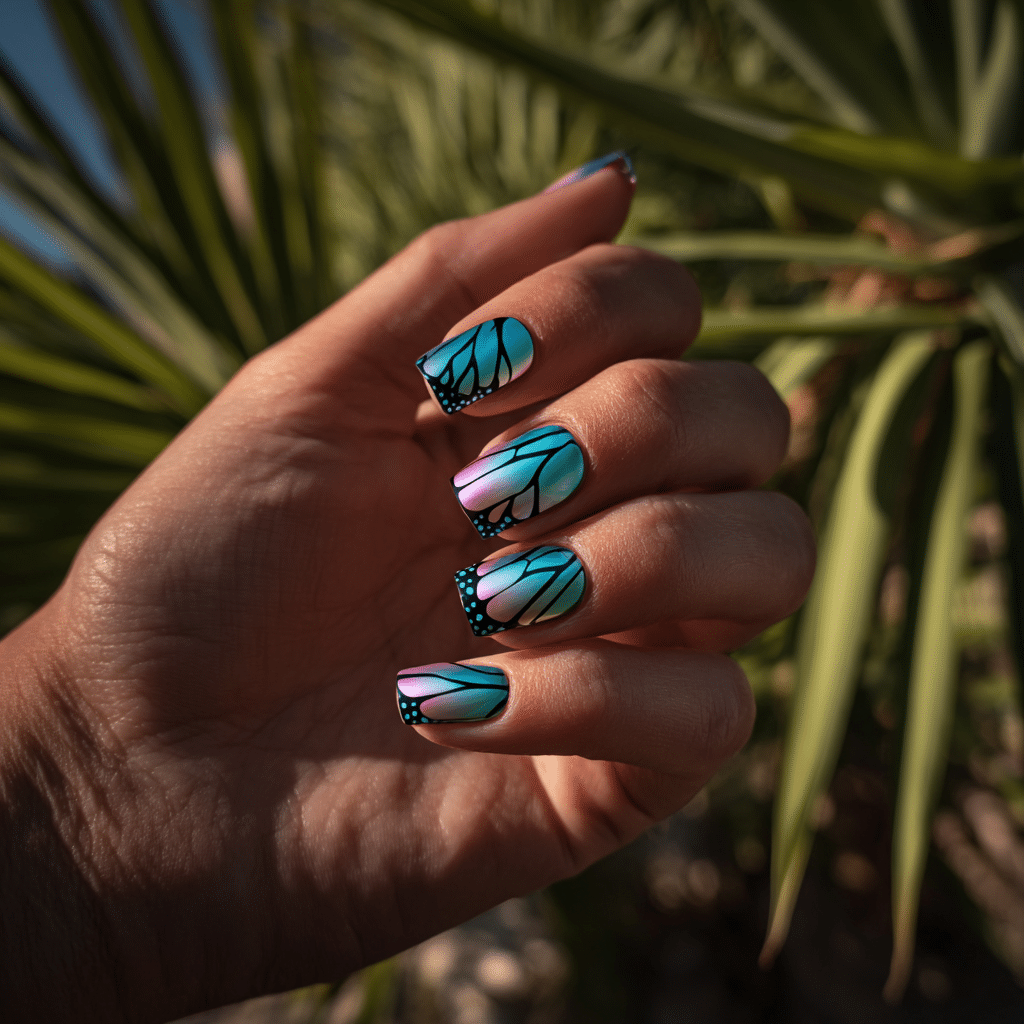
Butterfly details add a touch of whimsy with small, pastel-colored butterfly wings painted on nails. This design is simple yet enchanting, ideal for spring’s playful spirit.
Tools Needed
- Nail polishes (pastel and black)
- Fine nail art brush
- Base and top coats
- Acetone for cleanup
- Dotting tool (optional)
Step-by-Step Guide
- Apply a base coat and let dry.
- Paint nails with a light base color; let dry.
- Use a fine brush to paint two small, curved wings in a pastel shade.
- Add a second set of wings below for a full butterfly.
- Outline wings with black polish for definition.
- Add a body with a thin black line.
- Let dry and apply a top coat.
Color Suggestions
- Spring Pastels: Pink or lavender wings on nude.
- Bright: Yellow wings on white.
- Elegant: Gold wings on pastel blue.
Tips for Success
- Practice wing shapes on paper.
- Use a steady hand for outlines.
- Keep butterflies small for simplicity.
- Use stickers for easier application.
Creative Variations
- Add glitter to wings for sparkle.
- Paint butterflies on accent nails.
- Use gradient wings for depth.
- Combine with floral accents.
Greenery: Botanical Bliss
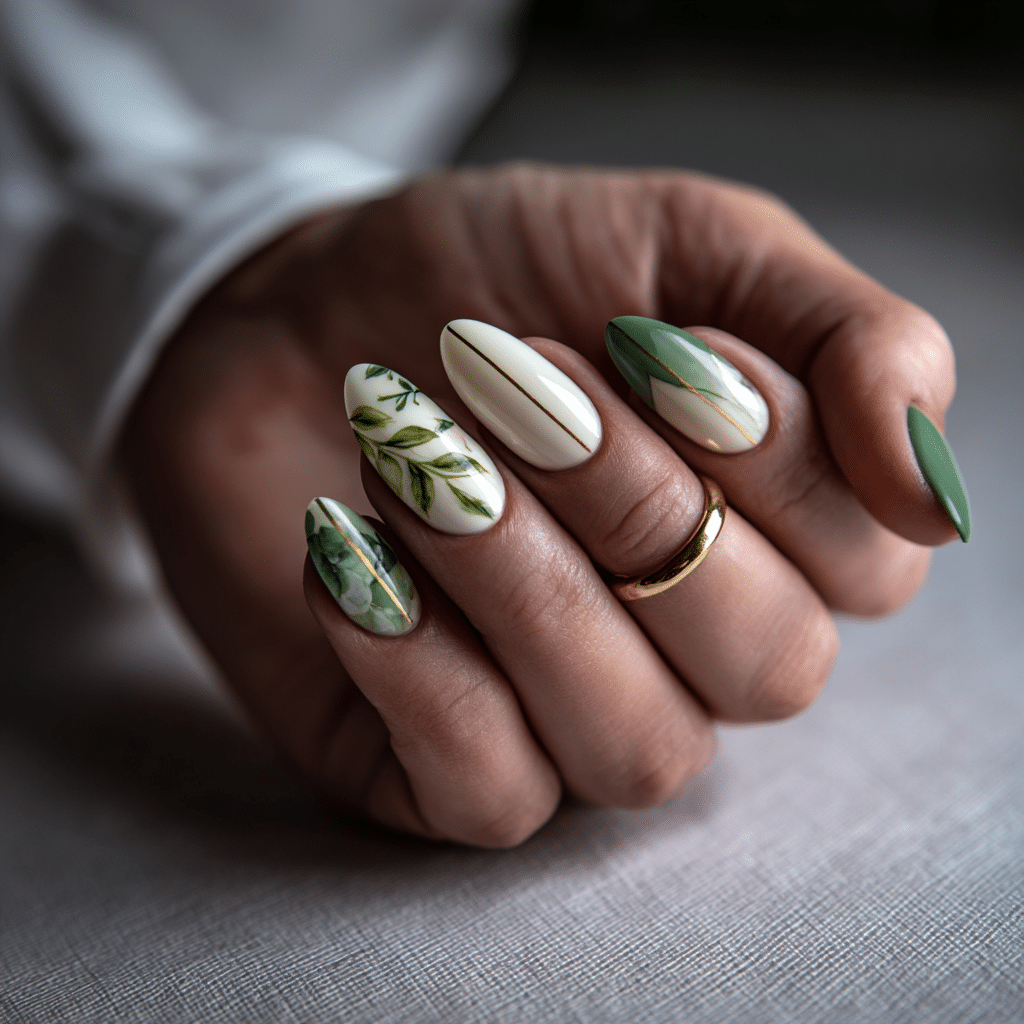
Greenery nail art incorporates small leaves or branches for a fresh, botanical look. Painted on a nude base, this design celebrates spring’s lush landscapes.
Tools Needed
- Green nail polishes
- Fine nail art brush
- Base and top coats
- Acetone for cleanup
- Dotting tool (optional)
Step-by-Step Guide
- Apply a base coat and let dry.
- Paint nails with a nude base; let dry.
- Use a fine brush to paint thin green lines for branches.
- Add small, leaf-shaped strokes along branches.
- Let dry and clean excess polish.
- Apply a top coat.
Color Suggestions
- Natural: Olive green on nude.
- Vibrant: Lime green on white.
- Mixed: Green with pastel flower accents.
Tips for Success
- Practice leaf shapes on paper.
- Use thin polish layers for detail.
- Keep designs small for elegance.
- Seal with a top coat for durability.
Creative Variations
- Add tiny flowers with dotting tools.
- Use metallic green for shine.
- Paint greenery on accent nails.
- Create a gradient base.
This design is simple and nature-inspired, perfect for spring. Explore Byrdie for botanical ideas.
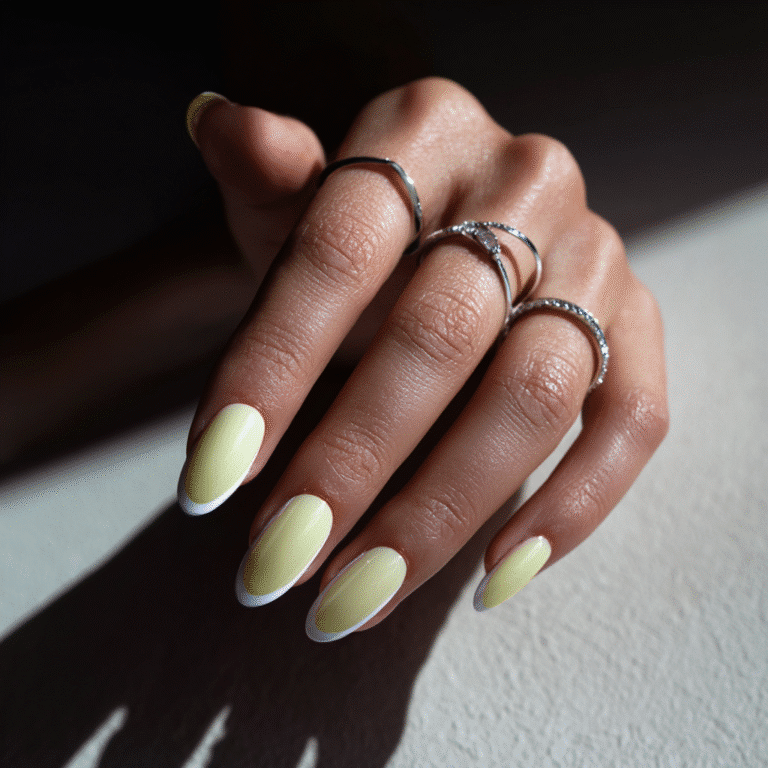
Peachy Tips: Fresh French Manicure
Peachy tips reinvent the classic French manicure with vibrant peach or coral tips, offering a bright, springy twist that’s easy to achieve.
Tools Needed
- Peach or coral nail polish
- White or nude base polish
- Striping tape or guides
- Base and top coats
- Acetone for cleanup
Step-by-Step Guide
- Apply a base coat and let dry.
- Paint nails with a nude or white base; let dry.
- Place tape or guides to mark tip area.
- Paint tips with peach or coral polish.
- Remove tape carefully and let dry.
- Clean excess polish with acetone.
- Apply a top coat.
Color Suggestions
- Soft: Peach tips on nude.
- Bold: Coral tips on white.
- Elegant: Pastel peach on pink.
Tips for Success
- Use tape for clean lines.
- Apply thin polish layers.
- Match tips to skin tone.
- Seal with a top coat.
Creative Variations
- Add glitter to tips.
- Use gradient tips.
- Paint tips on accent nails.
- Combine with polka dots.
This design is fresh and simple, ideal for spring. See Glamour for French manicure ideas.
Lemon Slice: Fruity Fun
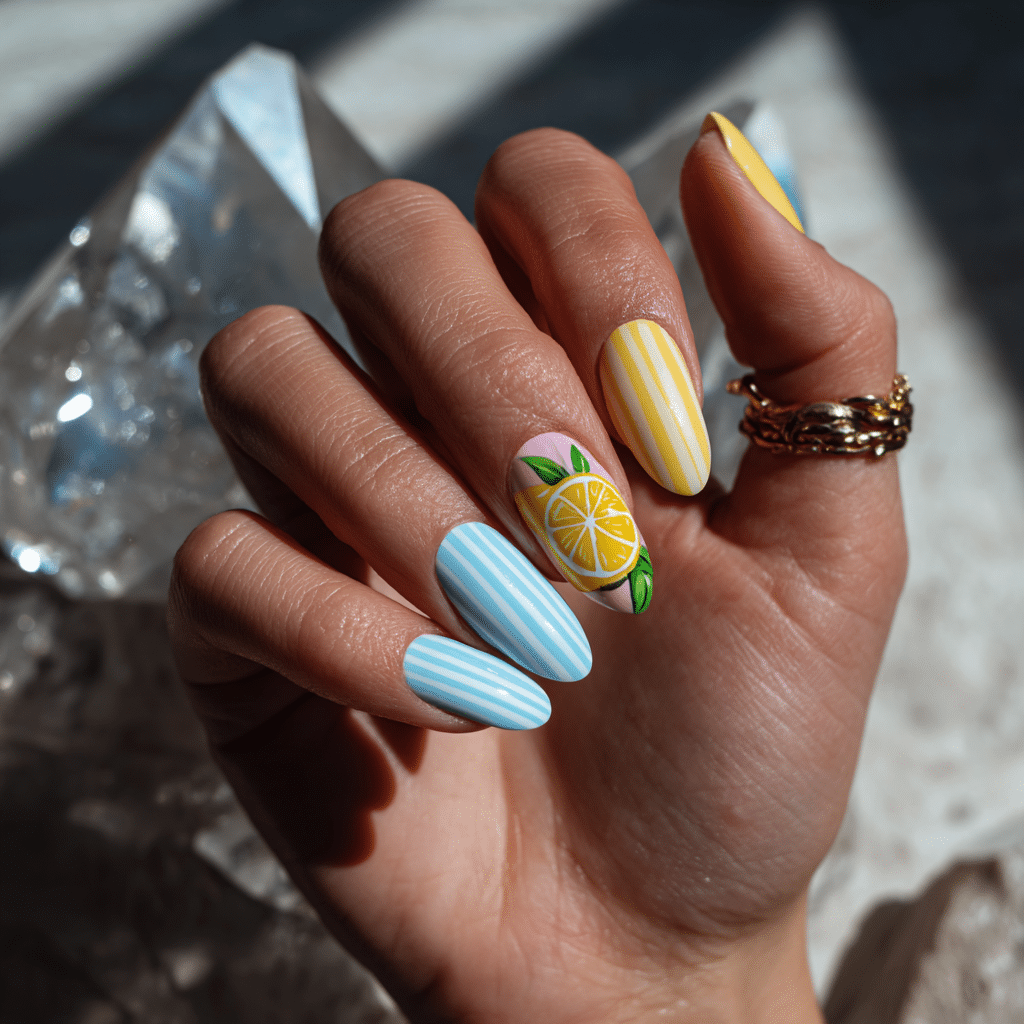
Lemon slice nail art brings a refreshing, summery vibe with pastel yellow bases and thin lemon slice designs, perfect for spring’s playful energy.
Tools Needed
- Yellow and green nail polishes
- Fine nail art brush
- Base and top coats
- Acetone for cleanup
Step-by-Step Guide
- Apply a base coat and let dry.
- Paint nails with pastel yellow; let dry.
- Use a fine brush to paint a half-circle for the lemon slice.
- Add thin white lines for segments.
- Outline with yellow or green for definition.
- Let dry and apply a top coat.
Color Suggestions
- Classic: Yellow slice on pastel yellow.
- Bright: Neon yellow on white.
- Mixed: Yellow with green leaf accents.
Tips for Success
- Practice slice shapes on paper.
- Use thin lines for realism.
- Keep slices small for elegance.
- Use a glossy top coat.
Creative Variations
- Add glitter for sparkle.
- Paint slices on accent nails.
- Use orange for citrus variety.
- Combine with floral accents.
This design is vibrant and fun, perfect for spring. Check Byrdie for fruity inspiration.
Striped French Mani: Chic Simplicity
Striped French manicures elevate the classic French tip with soft pastel stripes or diagonal lines, offering a subtle yet chic spring look.
Tools Needed
- Pastel nail polishes
- Striping tape
- White or nude base polish
- Base and top coats
- Acetone for cleanup
Step-by-Step Guide
- Apply a base coat and let dry.
- Paint nails with a nude or white base; let dry.
- Place striping tape on tips for stripe patterns.
- Paint over tape with pastel polish.
- Remove tape carefully and let dry.
- Clean excess polish with acetone.
- Apply a top coat.
Color Suggestions
- Soft: Pastel pink stripes on white.
- Bold: Mint green on nude.
- Elegant: Gold stripes on pastel blue.
Tips for Success
- Use thin tape for precision.
- Remove tape quickly to avoid smudging.
- Practice tape placement.
- Seal with a top coat.
Creative Variations
- Use diagonal or multiple stripes.
- Add glitter stripes.
- Paint stripes on accent nails.
- Combine with polka dots.
This design is sophisticated and easy, perfect for spring. See Glamour for French manicure variations.
| Design | Key Tools | Base Color | Accent Colors | Difficulty |
|---|---|---|---|---|
| Pastel Gradient | Sponge, brush | Light pastel | Pastels | Medium |
| Floral Accents | Dotting tool, brush | Nude, white | Pastels, brights | Easy |
| Polka Dots | Dotting tool, toothpick | Pastel, nude | Contrasting colors | Easy |
| Negative Space Stripes | Striping tape | Nude, pink | Pastel, gold | Medium |
| Baby Blue Clouds | Dotting tool, brush | Baby blue | White | Easy |
| Butterfly Details | Fine brush | Light pastel | Pastels, black | Medium |
| Greenery | Fine brush | Nude | Green | Medium |
| Peachy Tips | Striping tape | Nude, white | Peach, coral | Easy |
| Lemon Slice | Fine brush | Pastel yellow | Yellow, green | Medium |
| Striped French Mani | Striping tape | Nude, white | Pastels | Medium |
This guide offers a comprehensive look at 10 spring nail art designs, each designed to be accessible and inspiring. Whether you’re a beginner or a pro, these ideas will help you create a fresh, seasonal manicure.