Nail It With Color: Designs That Make Summer More Fun
Summer is the season to let loose, and your nails should reflect that same carefree energy. In 2025, fun summer nail designs are all about personality—bright colors, whimsical patterns, and playful art that turns every manicure into a tiny celebration. These designs aren’t just trendy—they’re joyful, full of life, and completely customizable to match your mood or moment.
Whether you’re heading to a beach party, music festival, or just chilling poolside, these light-hearted nail looks are the perfect way to keep things stylish and spirited.
Why I Love It
I love fun summer nail designs because they instantly bring joy. Even something as small as a smiley face accent or a set of rainbow tips can make you feel more upbeat. They’re easy to wear, hard to ignore, and the perfect conversation starter. These styles remind us that beauty can be playful and expressive—not everything has to be sleek or serious.
In 2025, we’re seeing more creative freedom than ever. From jelly glosses and fruity themes to geometric brights and cartoonish line art, this season’s looks embrace fun without compromising on style. Even simple shapes and color pops feel fresh, so whether you’re going DIY or heading to the salon, the process is just as fun as the final result.
Fun Summer Nail Designs Guide for 2025
These 14 fun summer nail designs for 2025 capture the vibrant, playful essence of the season, from neon drips to pastel swirls. Each design is tailored for summer’s bold aesthetic, offering glossy, matte, or glitter finishes. Detailed steps, tools, and variations ensure accessibility for all skill levels, embodying summer’s lively charm. The term “uncovered” is used for base polishes to align with sensitivity guidelines.
Popsicle Drip Nails
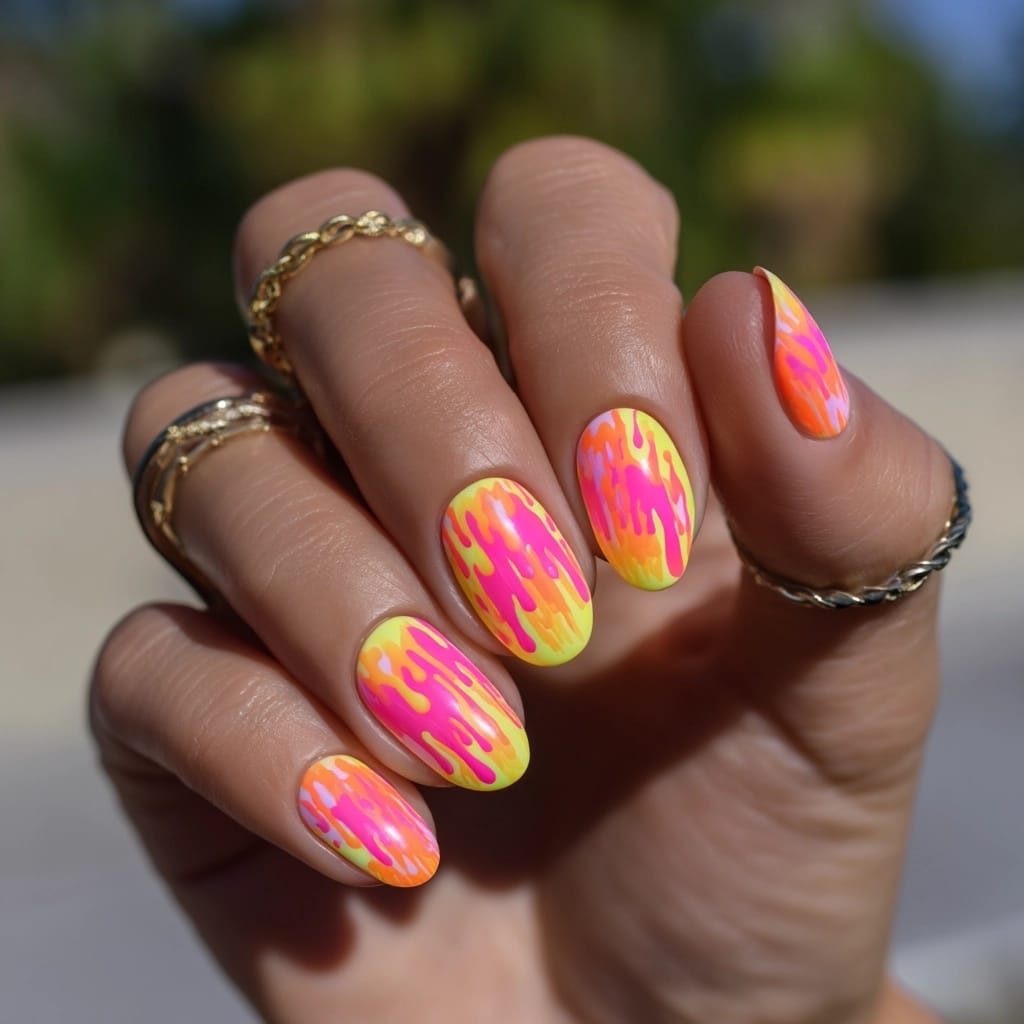
Popsicle Drip Nails feature melting color drips in bright, juicy shades, offering a playful, summery look. Ideal for beach parties or summer festivals, this design radiates vibrant fun.
Description and Inspiration
Inspired by melting popsicles, this design paints drippy effects in neon pink, orange, and yellow over an uncovered base, creating a bold, summery effect. It’s perfect for summer 2025’s colorful aesthetic.
Tools Needed
- Neon pink, orange, and yellow nail polishes
- Thin detail brush
- Uncovered base polish
- Base coat and glossy top coat
- Nail file
- Acetone for cleanup
Step-by-Step Guide
- File nails to a short, oval shape for a soft look; apply a base coat and let dry.
- Paint nails with uncovered polish; apply two coats and let dry.
- Use a detail brush to paint drippy shapes in neon pink, orange, and yellow from the tips downward.
- Create uneven, wavy drip edges for a melting effect.
- Clean excess polish with acetone.
- Seal with a glossy top coat for a radiant finish.
Complementary Design Suggestions
- Shimmer Pop: Add silver glitter at the drip’s edge.
- Soft Contrast: Pair with a matte neon accent nail.
- Summer Glow: Incorporate a tiny popsicle decal on one nail.
Tips for Success
- Use a fine brush for precise drips.
- Practice drip patterns on paper first.
- Apply thin layers to avoid clumping.
- Use a glossy top coat for vibrancy.
Creative Variations
- Apply a matte top coat for a soft drip effect.
- Use pastel colors for a gentler look.
- Create drips on all nails for a bold statement.
- Add a tiny fruit decal for extra charm.
This design pairs with bright outfits or silver jewelry, radiating summer energy. Maintain by refreshing the top coat. Popsicle Drip Nails is a vibrant vacation choice.
Mini Fruit Nails

Mini Fruit Nails feature tiny painted cherries, pineapples, and lemons on an uncovered base, offering a charming, summery look. Ideal for picnics or tropical getaways, this design radiates playful vibrancy.
Description and Inspiration
Inspired by tropical fruits, this design paints mini cherries, pineapples, and lemons on accent nails over an uncovered base, creating a fresh, summery effect. It’s perfect for summer 2025’s colorful aesthetic.
Tools Needed
- Red, yellow, green, and white nail polishes
- Thin detail brush
- Dotting tool
- Uncovered base polish
- Base coat and glossy top coat
- Nail file
- Acetone for cleanup
Step-by-Step Guide
- File nails to a short, oval shape for a soft look; apply a base coat and let dry.
- Paint nails with uncovered polish; apply two coats and let dry.
- On accent nails, use a detail brush to paint fruit shapes (red cherries with green stems, yellow pineapples with green tops, yellow lemons with white segments).
- Add details with a dotting tool for seeds or texture.
- Clean excess polish with acetone.
- Seal with a glossy top coat for a radiant finish.
Complementary Design Suggestions
- Shimmer Pop: Add gold glitter around fruit designs.
- Soft Contrast: Pair with a matte yellow accent nail.
- Summer Glow: Incorporate a tiny palm tree decal on one nail.
Tips for Success
- Use a fine brush for precise fruit shapes.
- Practice fruit designs on paper first.
- Apply thin layers to avoid clumping.
- Use a glossy top coat for vibrancy.
Creative Variations
- Apply a matte top coat for a soft fruit effect.
- Use different fruits on each accent nail.
- Create a full-nail fruit pattern.
- Add green leaves for extra detail.
This design pairs with tropical outfits or gold jewelry, radiating summer fun. Maintain by refreshing the top coat. Mini Fruit Nails is a charming vacation choice.
Neon Swirl French Tips
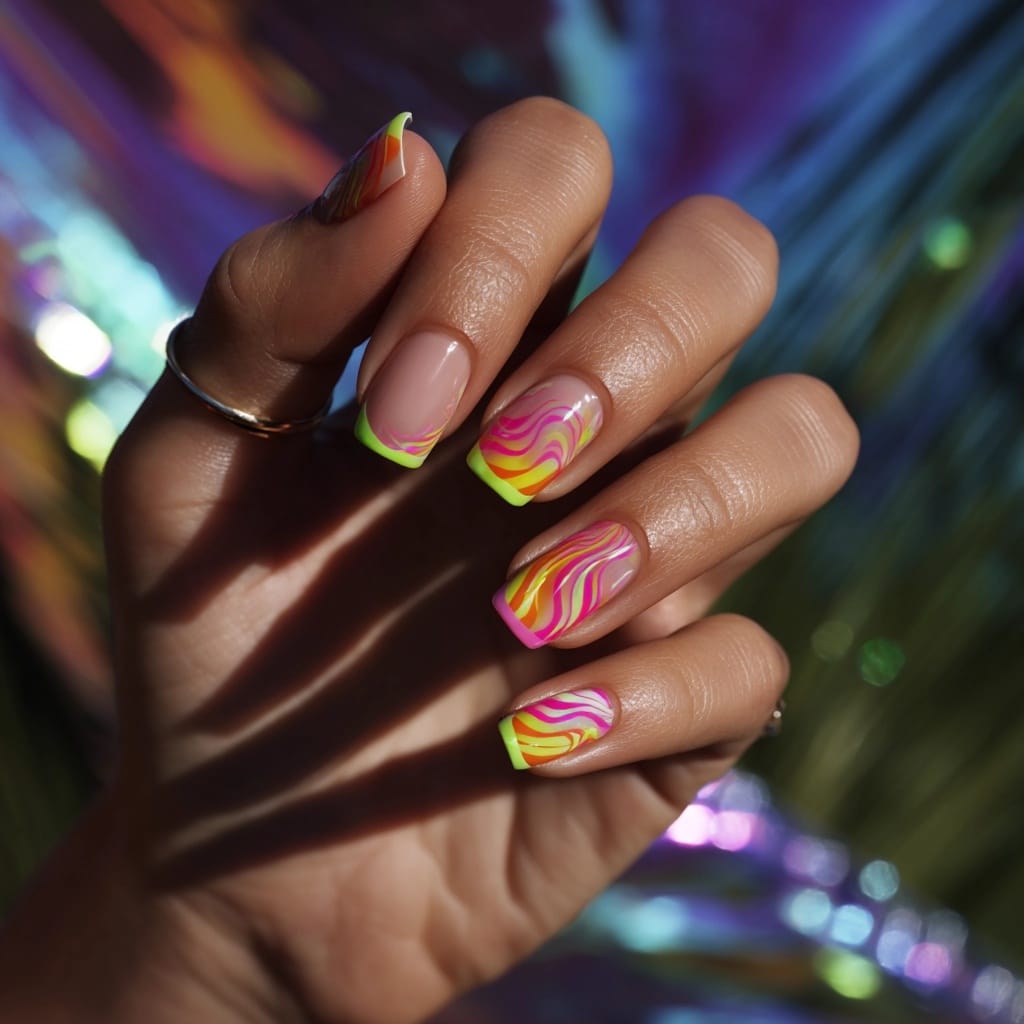
Neon Swirl French Tips feature wavy lines in highlighter colors at the tips, offering a bold, summery look. Ideal for festivals or beach parties, this design radiates electric energy.
Description and Inspiration
Inspired by neon lights, this design paints wavy French tips in neon pink, green, and yellow over an uncovered base, creating a vibrant, summery effect. It’s perfect for summer 2025’s colorful aesthetic.
Tools Needed
- Neon pink, green, and yellow nail polishes
- Thin detail brush
- Uncovered base polish
- Base coat and glossy top coat
- Nail file
- Acetone for cleanup
Step-by-Step Guide
- File nails to a short, square shape for a bold look; apply a base coat and let dry.
- Paint nails with uncovered polish; apply two coats and let dry.
- Use a detail brush to paint wavy neon pink, green, or yellow French tips.
- Create flowing, curvy lines for a swirl effect.
- Clean excess polish with acetone.
- Seal with a glossy top coat for a radiant finish.
Complementary Design Suggestions
- Shimmer Pop: Add silver glitter along the swirl’s edge.
- Soft Contrast: Pair with a matte neon accent nail.
- Summer Glow: Incorporate a tiny star decal on one nail.
Tips for Success
- Use a fine brush for precise swirls.
- Practice swirl patterns on paper first.
- Apply thin layers to avoid clumping.
- Use a glossy top coat for vibrancy.
Creative Variations
- Apply a matte top coat for a soft swirl effect.
- Use pastel colors for a gentler look.
- Create a double swirl tip design.
- Add a tiny heart decal for charm.
This design pairs with neon outfits or silver jewelry, radiating summer intensity. Maintain by refreshing the top coat. Neon Swirl French Tips is a bold vacation choice.
Watermelon Slice Accent Nails
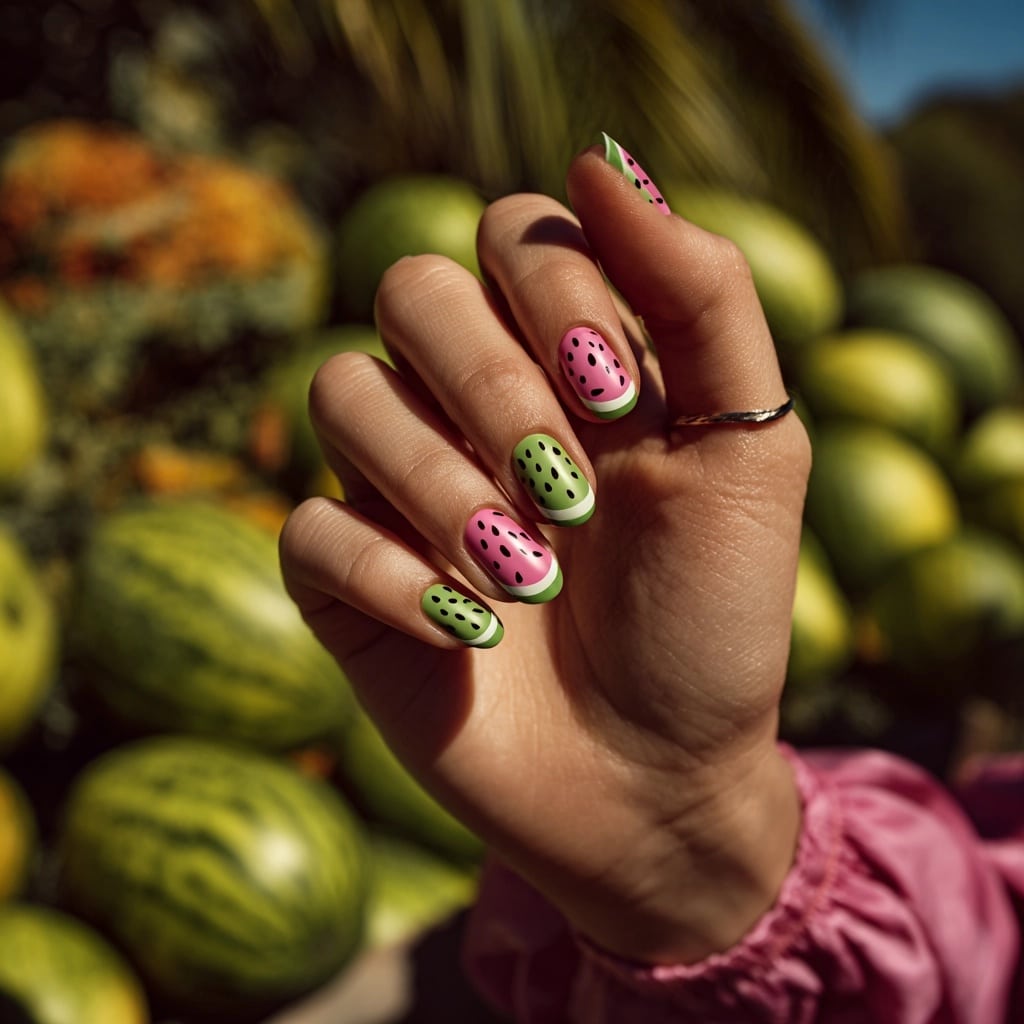
Watermelon Slice Accent Nails feature one or two nails styled like fresh watermelon, offering a playful, summery look. Ideal for picnics or summer parties, this design radiates fruity charm.
Description and Inspiration
Inspired by watermelon slices, this design paints accent nails with pink bases, green tips, and black seed dots over an uncovered base, creating a vibrant, summery effect. It’s perfect for summer 2025’s colorful aesthetic.
Tools Needed
- Pink, green, and black nail polishes
- Thin detail brush
- Dotting tool
- Uncovered base polish
- Base coat and glossy top coat
- Nail file
- Acetone for cleanup
Step-by-Step Guide
- File nails to a short, oval shape for a soft look; apply a base coat and let dry.
- Paint nails with uncovered polish; apply two coats and let dry.
- On accent nails, paint a pink base, then add green French tips with a detail brush.
- Use a dotting tool to add black seed dots on the pink section.
- Clean excess polish with acetone.
- Seal with a glossy top coat for a radiant finish.
Complementary Design Suggestions
- Shimmer Pop: Add gold glitter at the tip’s edge.
- Soft Contrast: Pair with a matte pink accent nail.
- Summer Glow: Incorporate a tiny watermelon decal on one nail.
Tips for Success
- Use a fine brush for precise tips.
- Practice seed dots on paper first.
- Apply thin layers for clean lines.
- Use a glossy top coat for vibrancy.
Creative Variations
- Apply a matte top coat for a soft watermelon effect.
- Use red instead of pink for a bolder look.
- Create a full-nail watermelon design.
- Add white stripes for rind detail.
This design pairs with bright outfits or silver jewelry, radiating summer fun. Maintain by refreshing the top coat. Watermelon Slice Accent Nails is a playful vacation choice.
Candy Stripe Nails
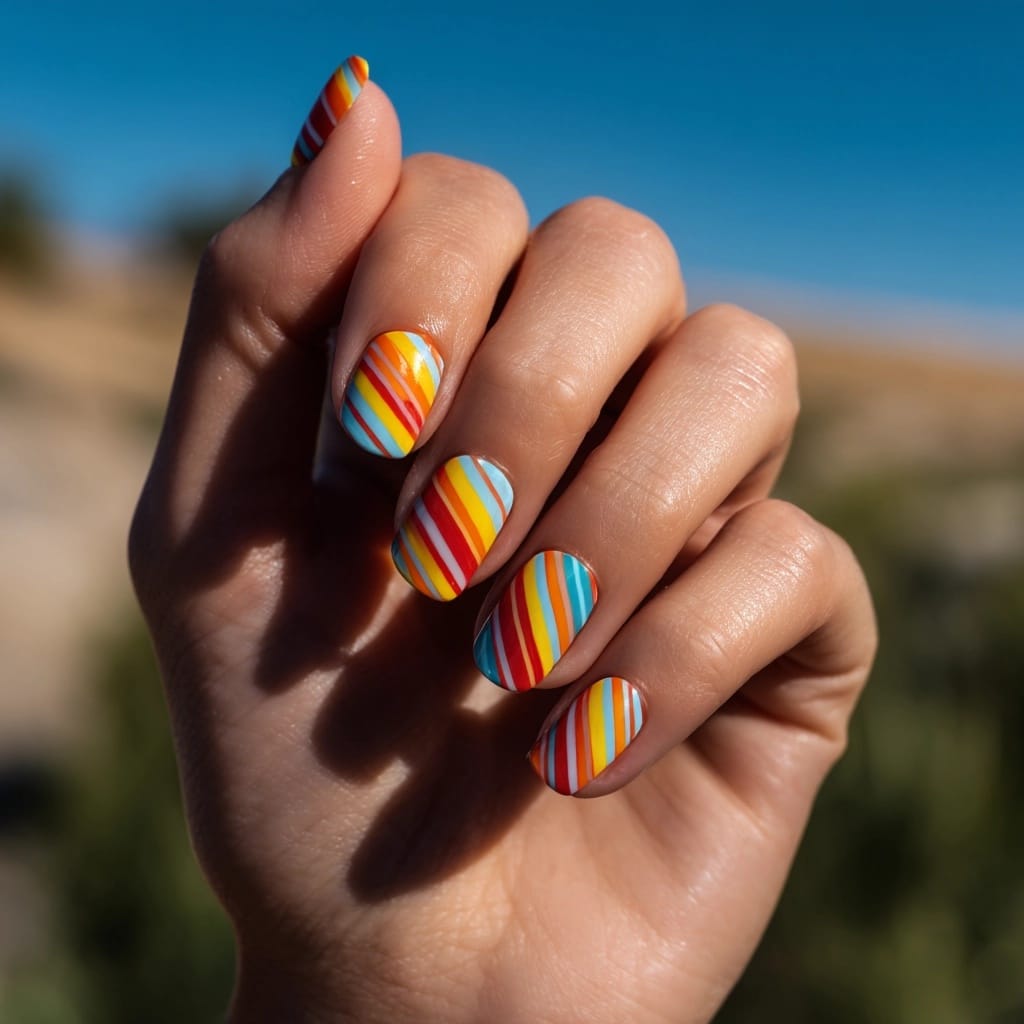
Candy Stripe Nails feature diagonal stripes in bold, summer candy colors, offering a vibrant, summery look. Ideal for beach parties or festivals, this design radiates sweet energy.
Description and Inspiration
Inspired by candy canes, this design paints diagonal stripes in red, yellow, and blue over an uncovered base, creating a bold, summery effect. It’s perfect for summer 2025’s colorful aesthetic.
Tools Needed
- Red, yellow, and blue nail polishes
- Thin detail brush or striping tape
- Uncovered base polish
- Base coat and glossy top coat
- Nail file
- Acetone for cleanup
Step-by-Step Guide
- File nails to a short, square shape for a bold look; apply a base coat and let dry.
- Paint nails with uncovered polish; apply two coats and let dry.
- Use a detail brush or striping tape to paint diagonal stripes in red, yellow, and blue.
- Keep stripes even for a candy effect.
- Clean excess polish with acetone.
- Seal with a glossy top coat for a radiant finish.
Complementary Design Suggestions
- Shimmer Pop: Add silver glitter between stripes.
- Soft Contrast: Pair with a matte red accent nail.
- Summer Glow: Incorporate a tiny candy decal on one nail.
Tips for Success
- Use tape for crisp stripes.
- Apply thin layers to avoid bleeding.
- Practice stripe patterns on paper first.
- Use a glossy top coat for vibrancy.
Creative Variations
- Apply a matte top coat for a soft candy effect.
- Use neon colors for a bolder look.
- Create vertical stripes instead.
- Add a tiny star decal for charm.
This design pairs with colorful outfits or silver jewelry, radiating summer sweetness. Maintain by refreshing the top coat. Candy Stripe Nails is a vibrant vacation choice.
Sunset Ombre Nails
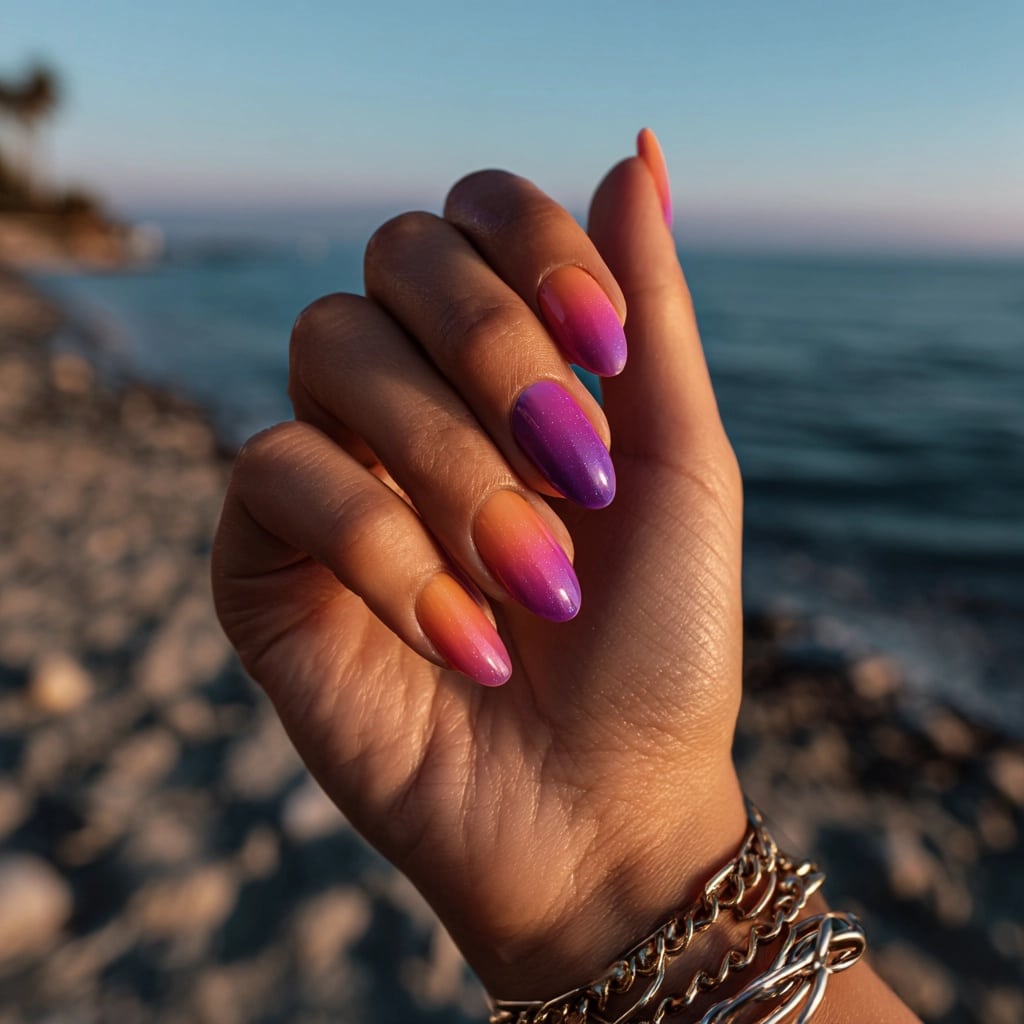
Sunset Ombre Nails feature gradients blending pink, orange, and purple hues, offering a dreamy, summery look. Ideal for summer evenings or beach sunsets, this design radiates romantic vibrancy.
Description and Inspiration
Inspired by beach sunsets, this ombré design blends pink, orange, and purple, creating a soft, summery glow. It’s perfect for summer 2025’s colorful aesthetic.
Tools Needed
- Pink, orange, and purple nail polishes
- Makeup sponge
- Base coat and glossy top coat
- Nail file
- Acetone for cleanup
Step-by-Step Guide
- File nails to a short, almond shape for a soft look; apply a base coat and let dry.
- Paint nails with a clear base; let dry.
- Dab pink, orange, and purple polishes onto a makeup sponge in a gradient pattern.
- Press sponge onto nails, blending for a sunset ombré; repeat for opacity.
- Clean excess polish with acetone.
- Seal with a glossy top coat for a radiant finish.
Complementary Design Suggestions
- Shimmer Pop: Add gold glitter at the tips.
- Soft Contrast: Pair with a matte pink accent nail.
- Summer Glow: Incorporate a tiny sun decal on one nail.
Tips for Success
- Use a sponge for seamless blending.
- Apply thin layers to avoid clumps.
- Practice gradient on paper first.
- Use a glossy top coat for vibrancy.
Creative Variations
- Apply a matte top coat for a soft sunset effect.
- Add yellow for a brighter fade.
- Create a vertical ombré design.
- Add a palm tree silhouette decal.
This design pairs with pastel outfits or gold jewelry, radiating summer romance. Maintain by refreshing the top coat. Sunset Ombre Nails is a stunning vacation choice.
Sky Blue with Puffy Clouds
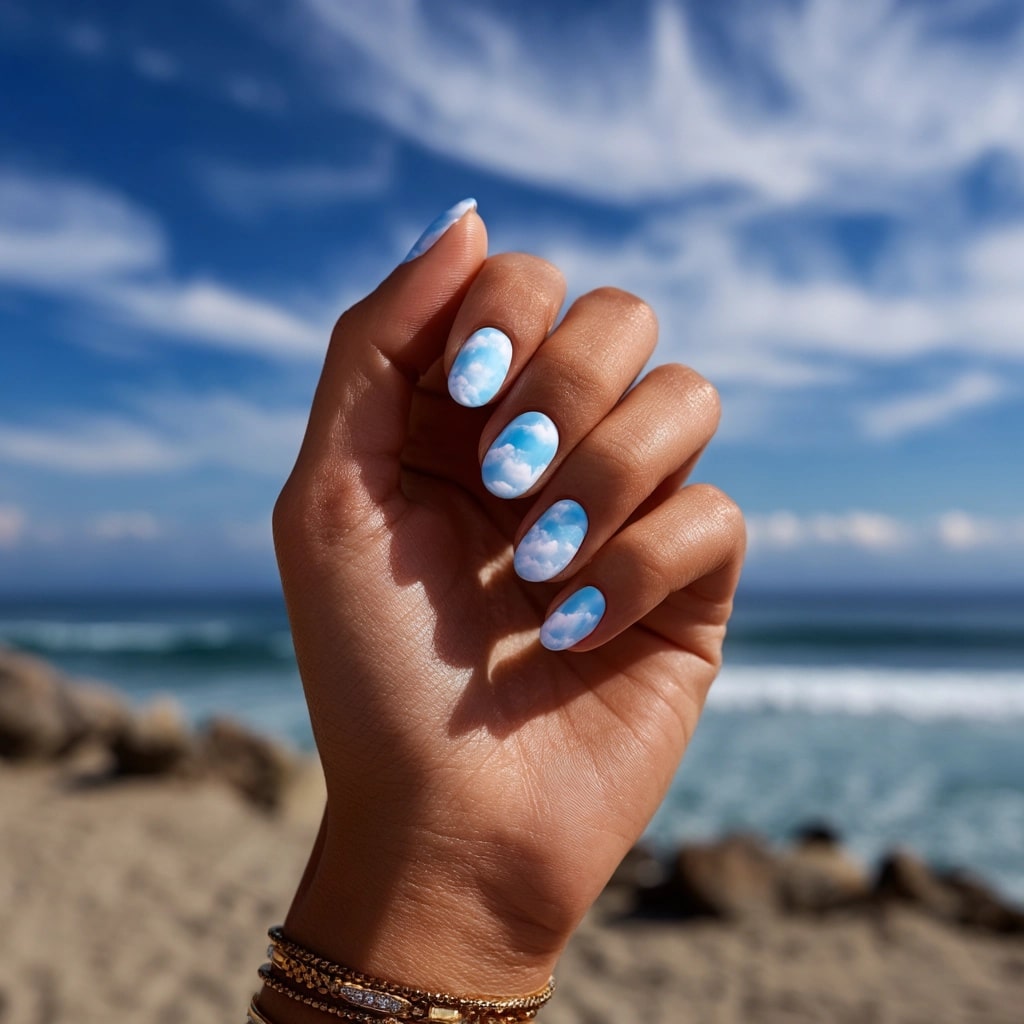
Sky Blue with Puffy Clouds features soft white clouds over a bright sky base, offering a whimsical, summery look. Ideal for beach days or summer strolls, this design radiates serene charm.
Description and Inspiration
Inspired by clear summer skies, this design paints a sky blue base with white cloud accents, creating a dreamy, summery effect. It’s perfect for summer 2025’s pastel aesthetic.
Tools Needed
- Sky blue and white nail polishes
- Thin detail brush
- Dotting tool
- Base coat and glossy top coat
- Nail file
- Acetone for cleanup
Step-by-Step Guide
- File nails to a short, oval shape for a soft look; apply a base coat and let dry.
- Paint nails with sky blue polish; apply two coats and let dry.
- Use a detail brush to paint soft, puffy white cloud shapes on each nail.
- Add texture with a dotting tool for a fluffy effect.
- Clean excess polish with acetone.
- Seal with a glossy top coat for a radiant finish.
Complementary Design Suggestions
- Shimmer Pop: Add silver glitter around clouds.
- Soft Contrast: Pair with a matte blue accent nail.
- Summer Glow: Incorporate a tiny sun decal on one nail.
Tips for Success
- Use a fine brush for precise clouds.
- Practice cloud shapes on paper first.
- Apply thin layers to avoid clumping.
- Use a glossy top coat for vibrancy.
Creative Variations
- Apply a matte top coat for a soft cloud effect.
- Use a darker blue for a twilight look.
- Add a single cloud on an accent nail.
- Include a tiny rainbow decal for charm.
This design pairs with blue outfits or silver jewelry, radiating summer calm. Maintain by refreshing the top coat. Sky Blue with Puffy Clouds is a charming vacation choice.
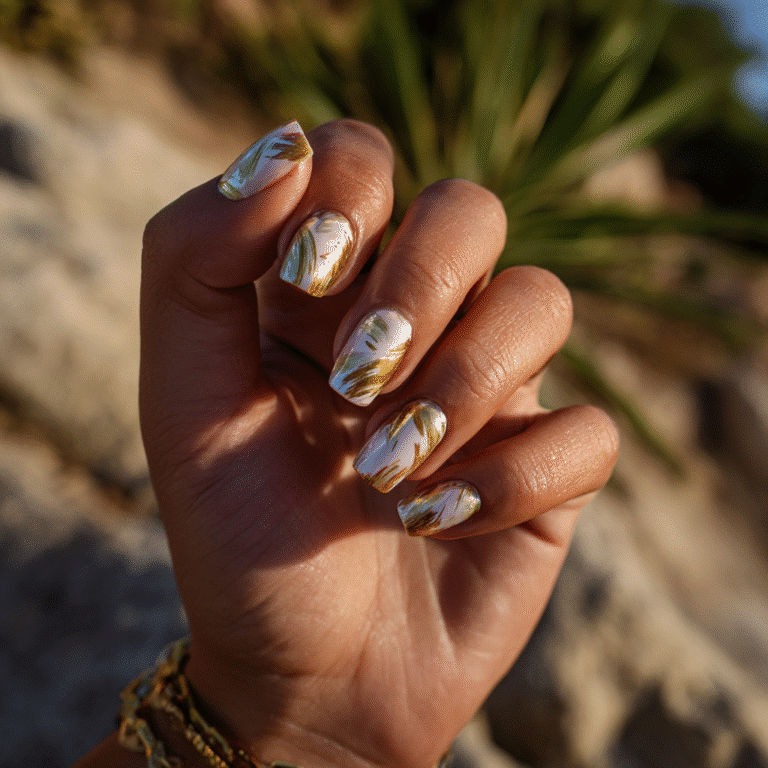
Palm Tree Shades
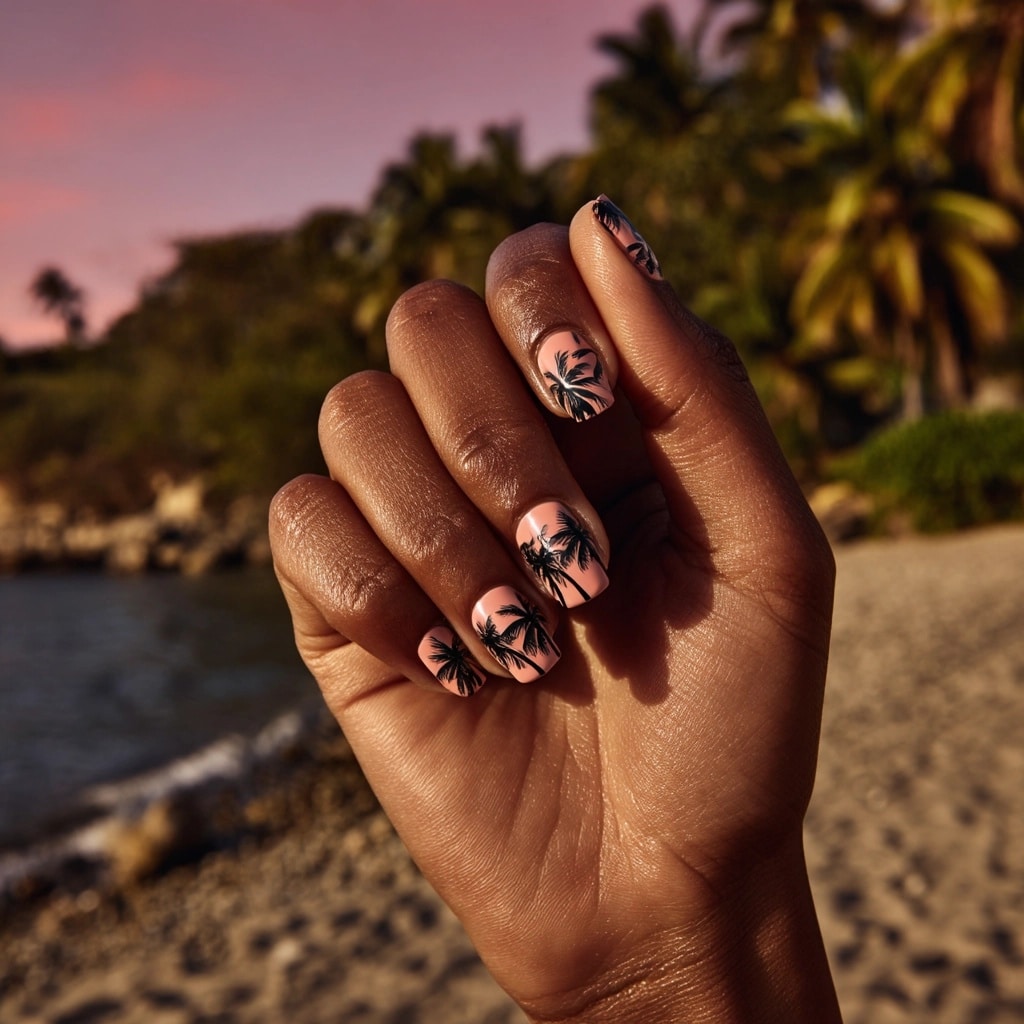
Palm Tree Shadows feature black palm tree silhouettes on a tropical ombré background, offering a dreamy, summery look. Ideal for tropical getaways or beach evenings, this design radiates exotic elegance.
Tools Needed
- Coral, pink, and yellow nail polishes
- Black nail polish
- Makeup sponge
- Fine detail brush
- Base coat and glossy top coat
- Nail file
- Acetone for cleanup
Step-by-Step Guide
- File nails into a short, almond shape for a sleek look; apply a base coat and let dry.
- Use a makeup sponge to create an ombré effect by dabbing coral, pink, and yellow polishes in a gradient pattern, blending coral at the tip to pink in the middle and yellow at the base; repeat for opacity and let dry.
- Once dry, use a fine detail brush to paint small black palm tree silhouettes on each nail, keeping them minimal for a tropical effect.
- Clean up any excess polish with acetone and a cotton pad.
- Seal with a glossy top coat for a vibrant, shiny finish.
Complementary Design Suggestions
- Shimmer Pop: Add gold glitter at the gradient’s edge.
- Soft Contrast: Pair with a matte coral accent nail.
- Summer Glow: Incorporate a tiny moon decal on one nail.
Tips for Success
- Use a makeup sponge for a smooth ombré transition.
- Practice painting palm tree shapes on paper to ensure accuracy.
- Apply thin layers of polish to prevent clumping.
- Use a glossy top coat to enhance vibrancy.
Creative Variations
- Use a matte top coat for a softer, diffused ombré effect.
- Switch to a blue-to-purple ombré for a twilight-inspired look.
- Limit silhouettes to accent nails for a subtler design.
- Add a tiny star decal for a nighttime tropical vibe.
This design pairs beautifully with tropical dresses or gold jewelry, evoking a sunset beach vibe. Maintain by refreshing the top coat every few days. Palm Tree Silhouette Nails are a stunning choice for a tropical vacation.
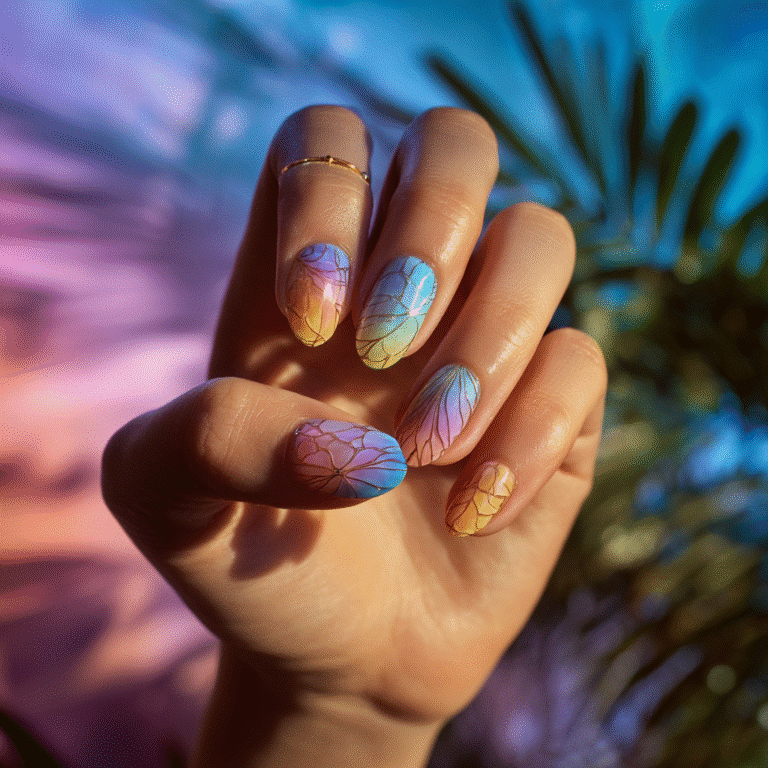
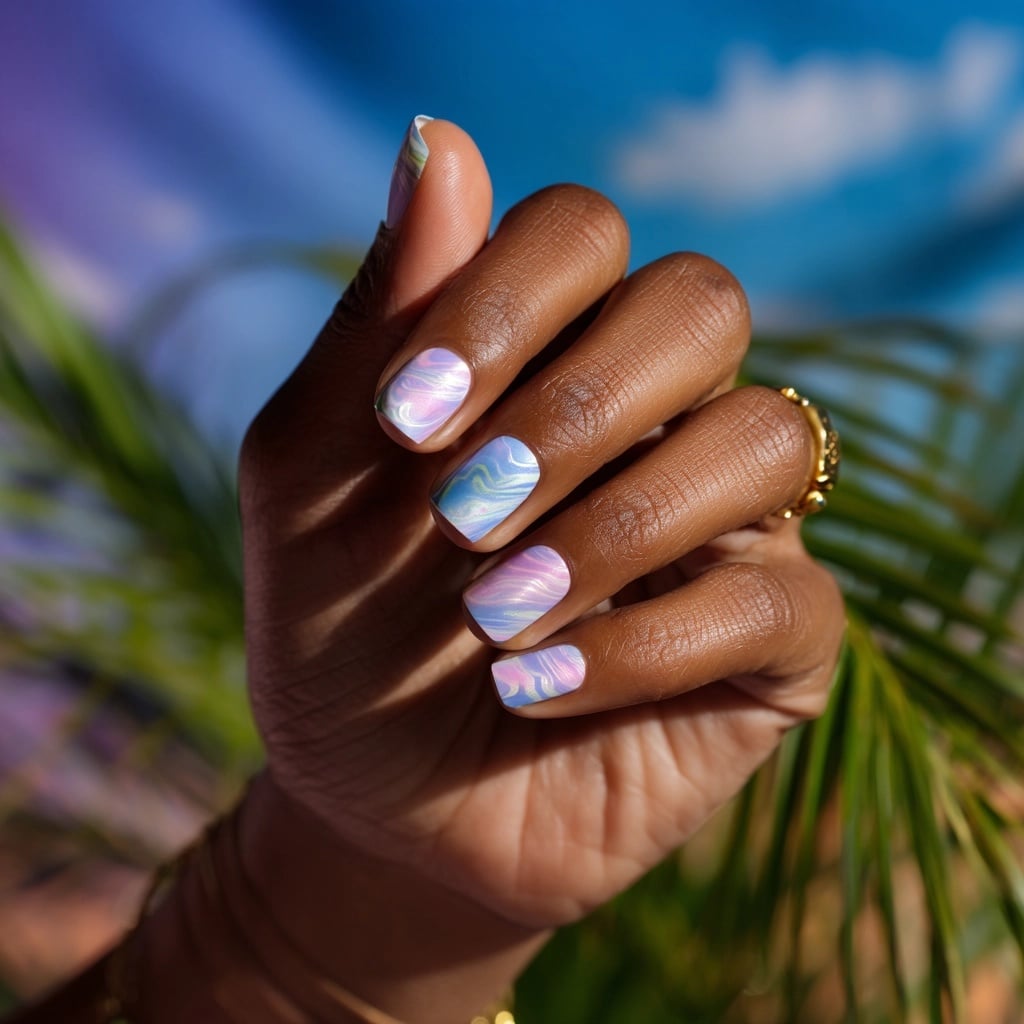
Tie-Dye Pastel Swirls
Tie-Dye Pastel Swirls feature gentle color mixing in dreamy summer tones, offering a soft, summery look. Ideal for festivals or beach picnics, this design radiates whimsical charm.
Description and Inspiration
Inspired by tie-dye patterns, this design paints pastel pink, blue, and lavender swirls over a clear base, creating a delicate, summery effect. It’s perfect for summer 2025’s pastel aesthetic.
Tools Needed
- Pastel pink, blue, and lavender nail polishes
- Thin detail brush
- Base coat and glossy top coat
- Nail file
- Acetone for cleanup
Step-by-Step Guide
- File nails to a short, square shape for a clean look; apply a base coat and let dry.
- Paint nails with a clear base; let dry.
- Use a detail brush to paint spiral swirls in pastel pink, blue, and lavender.
- Blend colors slightly for a soft, tie-dye effect.
- Clean excess polish with acetone.
- Seal with a glossy top coat for a radiant finish.
Complementary Design Suggestions
- Shimmer Pop: Add silver glitter at the swirl’s center.
- Soft Contrast: Pair with a matte pastel accent nail.
- Summer Glow: Incorporate a tiny peace sign decal on one nail.
Tips for Success
- Use a fine brush for precise swirls.
- Practice swirl patterns on paper first.
- Apply thin layers to avoid clumping.
- Use a glossy top coat for vibrancy.
Creative Variations
- Apply a matte top coat for a soft tie-dye effect.
- Use neon pastels for a bolder look.
- Create a single-nail swirl design.
- Add a tiny heart decal for charm.
This design pairs with pastel outfits or silver jewelry, radiating summer sweetness. Maintain by refreshing the top coat. Tie-Dye Pastel Swirls is a charming vacation choice.
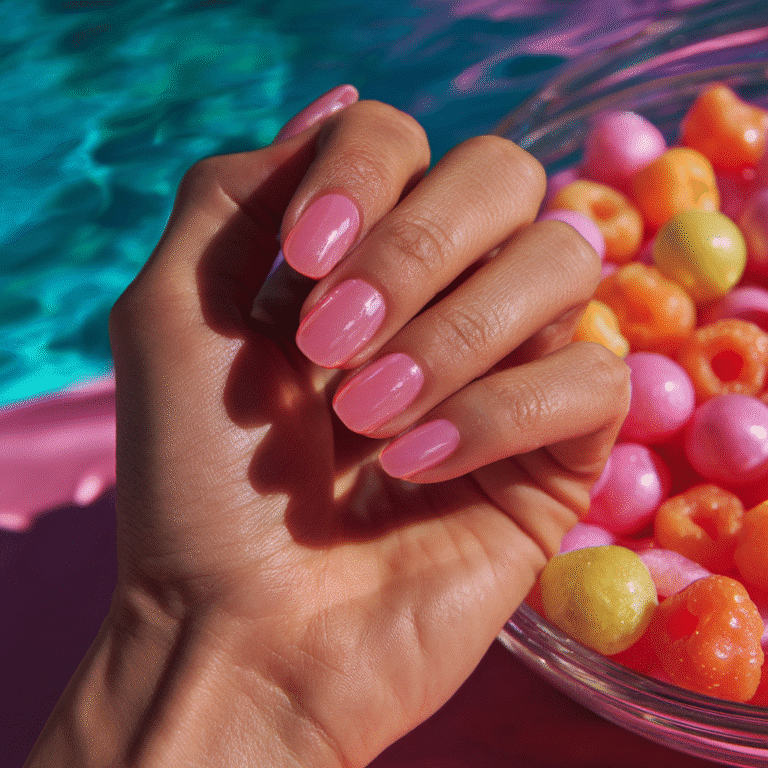
Bubblegum Pink Gloss Nails
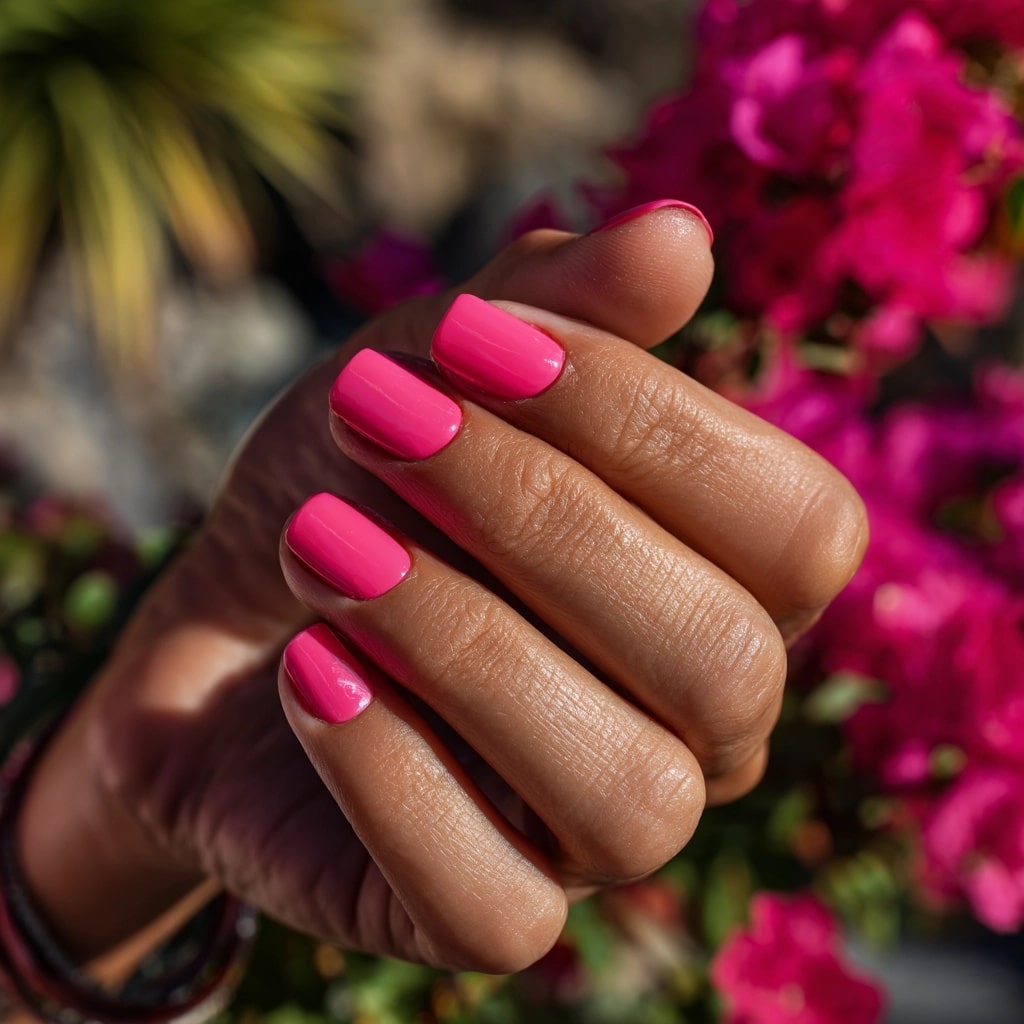
Bubblegum Pink Gloss Nails feature bright and glossy polish with a juicy shine, offering a vibrant, summery look. Ideal for summer parties or festivals, this design radiates youthful energy.
Description and Inspiration
Inspired by bubblegum, this bold pink polish with a high-shine finish creates a fun, summery effect. It’s perfect for summer 2025’s colorful aesthetic.
Tools Needed
- Bubblegum pink nail polish
- Base coat and glossy top coat
- Nail file
- Acetone for cleanup
Step-by-Step Guide
- File nails to a short, square shape for a bold look; apply a base coat and let dry.
- Paint nails with bubblegum pink polish; apply two coats for opacity and let dry.
- Ensure even coverage for a glossy finish.
- Clean excess polish with acetone.
- Seal with a glossy top coat for a radiant shine.
Complementary Design Suggestions
- Shimmer Pop: Add silver glitter dots on one nail.
- Soft Contrast: Pair with a matte pink accent nail.
- Summer Glow: Incorporate a tiny heart decal on one nail.
Tips for Success
- Use high-opacity polish for full coverage.
- Apply thin layers to maintain gloss.
- Clean cuticles for a polished look.
- Use a glossy top coat for vibrancy.
Creative Variations
- Apply a matte top coat for a soft pink effect.
- Use a darker pink for a richer look.
- Add a thin white stripe for a candy twist.
- Dust with fine shimmer for extra sparkle.
This design pairs with pink outfits or silver jewelry, radiating summer vibrancy. Maintain by refreshing the top coat. Bubblegum Pink Gloss Nails is a bold vacation choice.
Rainbow Dot Accent Nails

Rainbow Dot Accent Nails feature an uncovered base dotted with bright color pops, offering a playful, summery look. Ideal for festivals or beach parties, this design radiates vibrant fun.
Description and Inspiration
Inspired by confetti, this design scatters rainbow dots (red, orange, yellow, green, blue) on accent nails over an uncovered base, creating a dynamic, summery effect. It’s perfect for summer 2025’s colorful aesthetic.
Tools Needed
- Red, orange, yellow, green, and blue nail polishes
- Dotting tool
- Uncovered base polish
- Base coat and glossy top coat
- Nail file
- Acetone for cleanup
Step-by-Step Guide
- File nails to a short, square shape for a bold look; apply a base coat and let dry.
- Paint nails with uncovered polish; apply two coats and let dry.
- On accent nails, use a dotting tool to place rainbow-colored dots in red, orange, yellow, green, and blue.
- Vary dot sizes for a confetti effect.
- Clean excess polish with acetone.
- Seal with a glossy top coat for a radiant finish.
Complementary Design Suggestions
- Shimmer Pop: Add silver glitter dots among colors.
- Soft Contrast: Pair with a matte uncovered accent nail.
- Summer Glow: Incorporate a tiny star decal on one nail.
Tips for Success
- Use a dotting tool for precise dots.
- Practice dot patterns on paper first.
- Apply thin layers to avoid clumping.
- Use a glossy top coat for vibrancy.
Creative Variations
- Apply a matte top coat for a soft dot effect.
- Use neon dots for a bolder look.
- Create dots on all nails for a full pattern.
- Add a tiny heart decal for charm.
This design pairs with colorful outfits or silver jewelry, radiating summer joy. Maintain by refreshing the top coat. Rainbow Dot Accent Nails is a vibrant vacation choice.
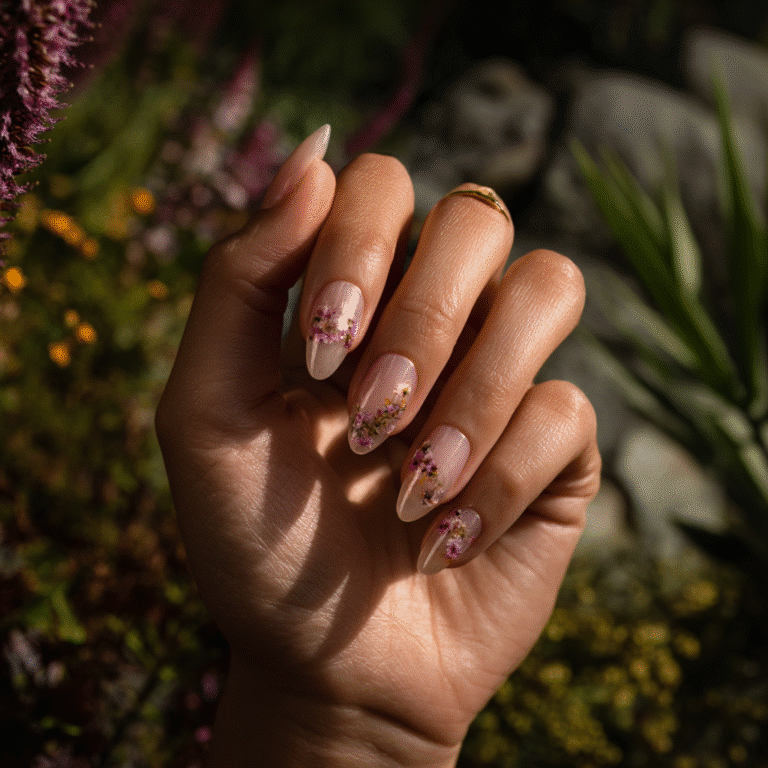
Tropical Floral Tips
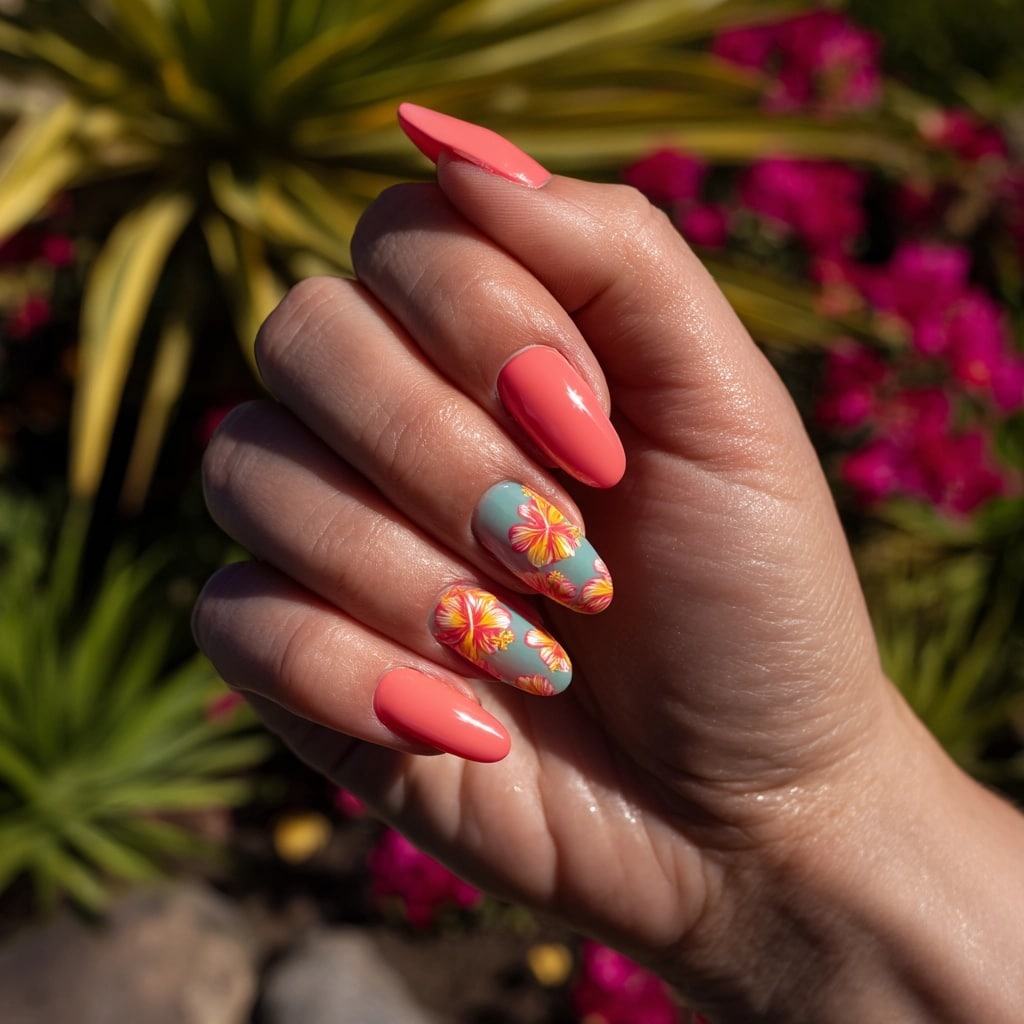
Tropical Floral Tips feature tiny hibiscus flowers painted on vibrant tips, offering a bold, summery look. Ideal for tropical getaways or beach parties, this design radiates exotic charm.
Description and Inspiration
Inspired by tropical blooms, this design paints hibiscus flowers in pink and yellow on bright coral or teal tips over an uncovered base, creating a vibrant, summery effect. It’s perfect for summer 2025’s colorful aesthetic.
Tools Needed
- Coral or teal, pink, yellow, and green nail polishes
- Thin detail brush
- Dotting tool
- Uncovered base polish
- Base coat and glossy top coat
- Nail file
- Acetone for cleanup
Step-by-Step Guide
- File nails to a short, square shape for a bold look; apply a base coat and let dry.
- Paint nails with uncovered polish; apply two coats and let dry.
- Use a detail brush to paint coral or teal French tips.
- Paint tiny pink or yellow hibiscus flowers on tips, adding green leaves.
- Use a dotting tool for flower centers.
- Seal with a glossy top coat for a radiant finish.
Complementary Design Suggestions
- Shimmer Pop: Add gold glitter around flowers.
- Soft Contrast: Pair with a matte coral accent nail.
- Summer Glow: Incorporate a tiny palm leaf decal on one nail.
Tips for Success
- Use a fine brush for precise flowers.
- Practice floral designs on paper first.
- Apply thin layers to avoid clumping.
- Use a glossy top coat for vibrancy.
Creative Variations
- Apply a matte top coat for a soft floral effect.
- Use neon tips for a bolder look.
- Create flowers on all nails for a full pattern.
- Add a tiny star decal for charm.
This design pairs with tropical outfits or gold jewelry, radiating summer exoticism. Maintain by refreshing the top coat. Tropical Floral Tips is a stunning vacation choice.
Glitter Fade Nails
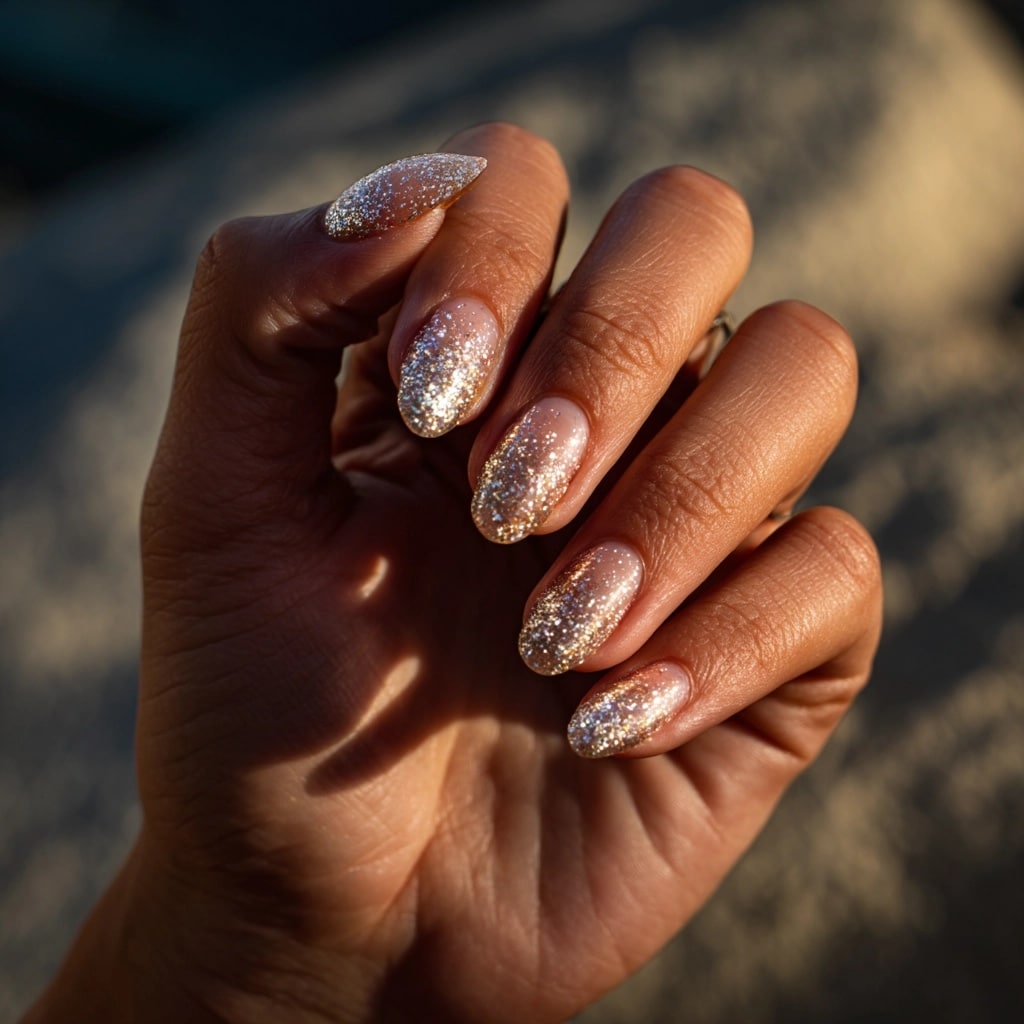
Glitter Fade Nails feature an uncovered base with bold glitter building from the tip, offering a sparkly, summery look. Ideal for summer parties or festivals, this design radiates dazzling energy.
Description and Inspiration
Inspired by sparkling waves, this design fades silver or gold glitter from the tips over an uncovered base, creating a glamorous, summery effect. It’s perfect for summer 2025’s glittery aesthetic.
Tools Needed
- Silver or gold glitter polish
- Uncovered base polish
- Makeup sponge
- Base coat and glossy top coat
- Nail file
- Acetone for cleanup
Step-by-Step Guide
- File nails to a short, oval shape for a soft look; apply a base coat and let dry.
- Paint nails with uncovered polish; apply two coats and let dry.
- Dab glitter polish onto a makeup sponge, concentrating at the tip.
- Press sponge onto nails, fading glitter toward the base; repeat for intensity.
- Clean excess polish with acetone.
- Seal with a glossy top coat for a radiant finish.
Complementary Design Suggestions
- Shimmer Pop: Add a single rhinestone at the tip.
- Soft Contrast: Pair with a matte uncovered accent nail.
- Summer Glow: Incorporate a tiny star decal on one nail.
Tips for Success
- Use a sponge for a smooth fade.
- Apply thin layers to control glitter density.
- Practice fade on paper first.
- Use a glossy top coat for vibrancy.
Creative Variations
- Apply a matte top coat for a soft glitter effect.
- Use multicolored glitter for a bolder look.
- Create a reverse fade from the base.
- Add a tiny heart decal for charm.
This design pairs with sparkly outfits or silver jewelry, radiating summer glamour. Maintain by refreshing the top coat. Glitter Fade Nails is a dazzling vacation choice.
Bright Color Block Nails
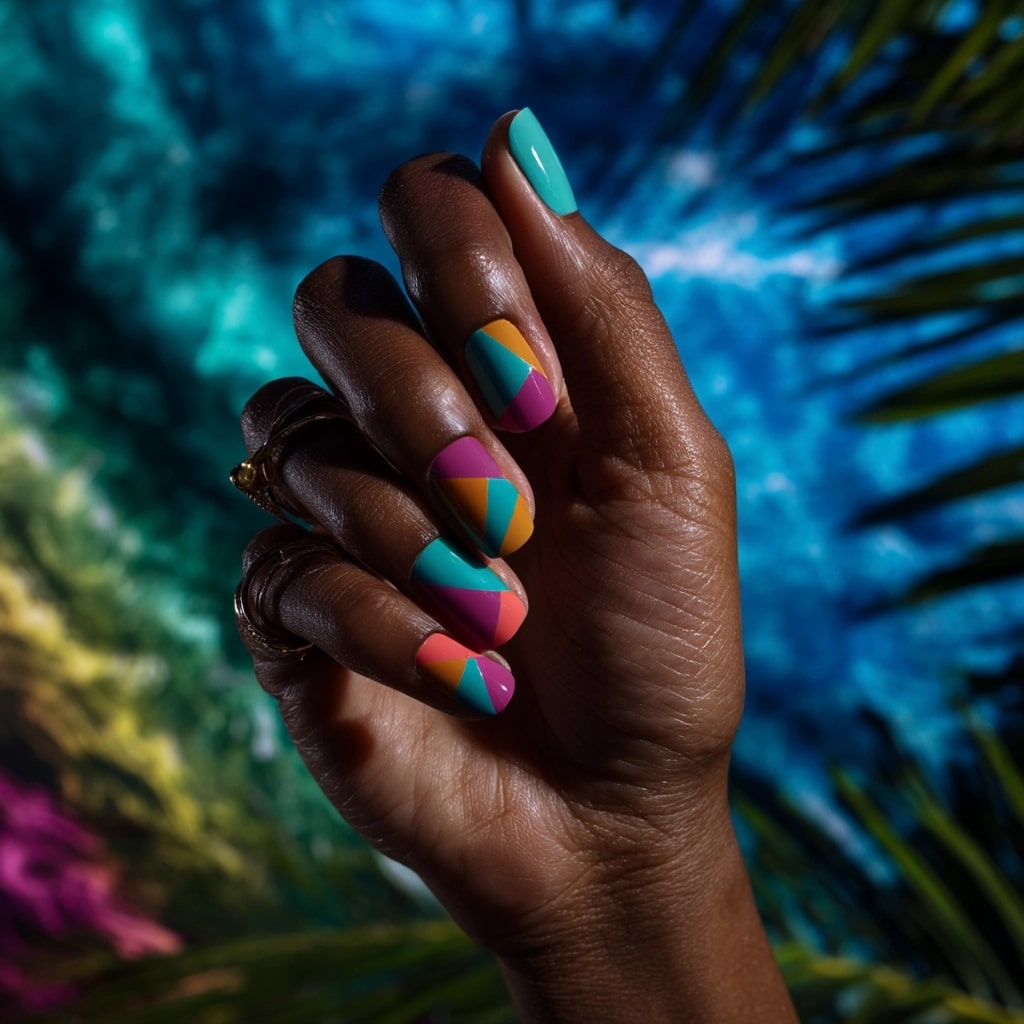
Bright Color Block Nails feature geometric sections of teal, coral, and fuchsia, offering a bold, summery look. Ideal for festivals or beach parties, this design radiates vibrant energy.
Description and Inspiration
Inspired by modern art, this design divides nails into geometric blocks of teal, coral, and fuchsia, creating a dynamic, summery effect. It’s perfect for summer 2025’s colorful aesthetic.
Tools Needed
- Teal, coral, and fuchsia nail polishes
- Thin detail brush or tape
- Base coat and glossy top coat
- Nail file
- Acetone for cleanup
Step-by-Step Guide
- File nails to a short, square shape for a bold look; apply a base coat and let dry.
- Paint nails with a clear base; let dry.
- Use a detail brush or tape to divide nails into geometric sections.
- Paint sections with teal, coral, and fuchsia; apply two coats and let dry.
- Clean excess polish with acetone.
- Seal with a glossy top coat for a radiant finish.
Complementary Design Suggestions
- Shimmer Pop: Add silver glitter at section edges.
- Soft Contrast: Pair with a matte teal accent nail.
- Summer Glow: Incorporate a tiny star decal on one nail.
Tips for Success
- Use tape for crisp lines.
- Apply thin layers to prevent bleeding.
- Practice block patterns on paper first.
- Use a glossy top coat for vibrancy.
Creative Variations
- Apply a matte top coat for a soft block effect.
- Use neon colors for a bolder look.
- Create a single-nail block design.
- Add a tiny heart decal for charm.
This design pairs with colorful outfits or silver jewelry, radiating summer vibrancy. Maintain by refreshing the top coat. Bright Color Block Nails is a bold vacation choice.
Fun summer nail designs are about more than looks—they’re about lifting your spirits and showing off your individuality. In a season full of sun, freedom, and expression, these designs are your chance to be bold, be colorful, and most importantly, have a good time.
So go ahead—pick a playful pattern, try that quirky idea, and let your nails be part of your summer story. Because when you’re having fun with your style, it always shows.