The Timeless Appeal of Red Spring Nails: A Fresh Take for the Season
As the chill of winter fades and nature begins to bloom, our personal styles shift to reflect the warmth and vibrancy of spring. Fashion turns lighter, fabrics become breezier, and beauty routines take on a renewed sense of brightness and fun. One subtle yet striking way to embrace this seasonal shift is through our nails—and there’s no color more classic, bold, and versatile than red. While red nails have long been associated with elegance and confidence, in springtime they can become a fresh canvas for creativity, brightness, and a nod to blooming nature. From soft cherry reds to deeper crimson tones, this season invites us to rethink red not just as a timeless staple, but as a vivid celebration of spring’s spirit.
Why Red Nails Work So Well for Spring
Red is a color that transcends seasons, but it gains a particularly lively quality in spring. It stands out against softer pastels and mirrors the blossoming reds found in tulips, roses, and budding trees. Unlike winter reds, which tend to lean towards rich wines and berries, spring reds are fresher—think bright cherries, glossy scarlets, and even translucent jelly-like finishes that catch the sunlight.
Another reason red nails shine in the spring is their incredible adaptability. Whether paired with floral art, minimalist designs, or a playful ombré, red becomes more than just a bold color—it becomes an expression of seasonal joy. The saturation of the color adds energy to your overall look, especially when worn with spring’s trending colors like mint green, lilac, or soft peach.
Why I Love Styling Red Nails in Spring
There’s something inherently uplifting about a beautifully done red manicure as the weather warms. Personally, I find red nails in spring act as a visual mood booster—like carrying a little bit of sunshine on your fingertips. They’re bold without being overwhelming, timeless without being boring, and chic no matter your personal style.
I love how red nails can straddle both elegance and playfulness. A glossy crimson manicure can look just as appropriate at a wedding as it does at a picnic. Add a tiny floral detail or a creative tip design, and suddenly your nails tell a story of renewal, of color returning to life after a grey winter.
Plus, red is empowering. It draws the eye and complements every skin tone. In spring, when everything is about refreshment and lightness, red offers a visual spark that energizes not just your look, but your mindset.
Stylish Red Nail Art Designs for Spring
Spring calls for bold, vibrant manicures, and red nails are a timeless choice that can be reinvented with seasonal flair. Below, explore 10 unique red nail art designs, each crafted to be stylish, approachable, and perfect for spring. These ideas use accessible tools and techniques, blending red’s intensity with spring’s fresh, playful aesthetic. Each design is detailed with steps, color suggestions, and creative variations to inspire your next manicure.
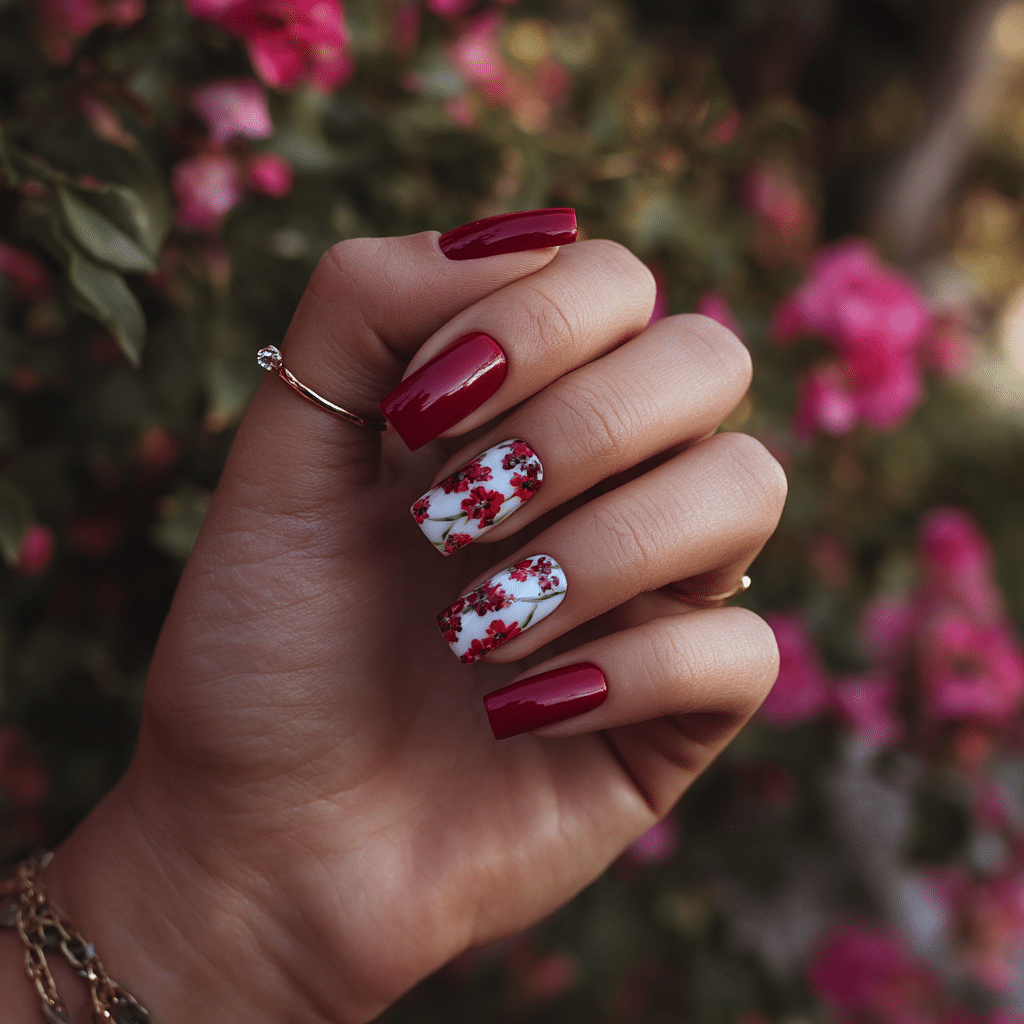
Cherry Red with Floral Accents
Cherry red nails burst with energy, and adding floral accents creates a blooming spring vibe. This design balances bold color with delicate details, making it ideal for seasonal celebrations or everyday wear.
Tools Needed
- Cherry red nail polish
- White or yellow nail polish for flowers
- Dotting tools and fine nail art brushes
- Base coat and top coat
- Acetone and brush for cleanup
Step-by-Step Guide
- Apply a base coat to protect nails and let dry.
- Paint all nails with cherry red polish, applying two coats for opacity; let dry.
- Select an accent nail (e.g., ring finger) for floral details.
- Using a dotting tool, create a small dot in white or yellow for the flower’s center.
- Add petal shapes around the center with a fine brush or larger dotting tool, forming daisies or tulips.
- Optionally, add green leaves with a fine brush for contrast.
- Clean excess polish with acetone and a brush.
- Seal with a glossy top coat for shine.
For beginners, floral nail stickers can simplify the process: apply them on the accent nail and seal with a top coat.
Color Suggestions
- Classic Spring: White flowers on cherry red for a clean look.
- Bright Pop: Yellow flowers with green leaves for vibrancy.
- Subtle Contrast: Pastel pink flowers for a softer touch.
Tips for Success
- Practice flower shapes on paper to build confidence.
- Use thin polish layers to avoid smudging.
- Keep floral designs small for elegance.
- Apply a top coat every few days to maintain shine.
Creative Variations
- Add glitter to flower centers for sparkle.
- Use a matte top coat on red nails, keeping flowers glossy.
- Place flowers on multiple nails for a fuller look.
- Incorporate negative space around flowers for a modern twist.
This design is bold yet feminine, perfect for spring events. For a floral tutorial, check Mylee.
Red French Tips
Red French tips offer a chic twist on the classic French manicure, pairing a sheer base with bold red tips. This elegant design is versatile, suiting both professional and casual settings.
Tools Needed
- Sheer nude or pink nail polish
- Red nail polish
- Striping tape or French tip guides
- Base coat and top coat
- Acetone for cleanup
Step-by-Step Guide
- Apply a base coat and let dry.
- Paint nails with a sheer nude or pink base, using two coats for evenness; let dry.
- Place striping tape or French tip guides near the nail tips to mark the tip area.
- Apply red polish to the tips, ensuring clean lines.
- Carefully remove tape or guides before polish dries.
- Clean excess polish with acetone and a brush.
- Seal with a glossy top coat.
Color Suggestions
- Soft Elegance: Nude base with cherry red tips.
- Bold Contrast: Pale pink base with deep red tips.
- Warm Tones: Peach base with coral-red tips.
Tips for Success
- Use thin tape or guides for precise lines.
- Apply red polish in thin layers to avoid streaks.
- Practice tip placement on paper for consistency.
- Use a quick-dry top coat to prevent smudging.
Creative Variations
- Add glitter to red tips for sparkle.
- Create double red tips for a layered look.
- Use metallic red for a glamorous effect.
- Paint tips on accent nails only.
This design is sophisticated and spring-ready. See Glamour for French manicure inspiration.
Glossy Crimson with Gold Foil
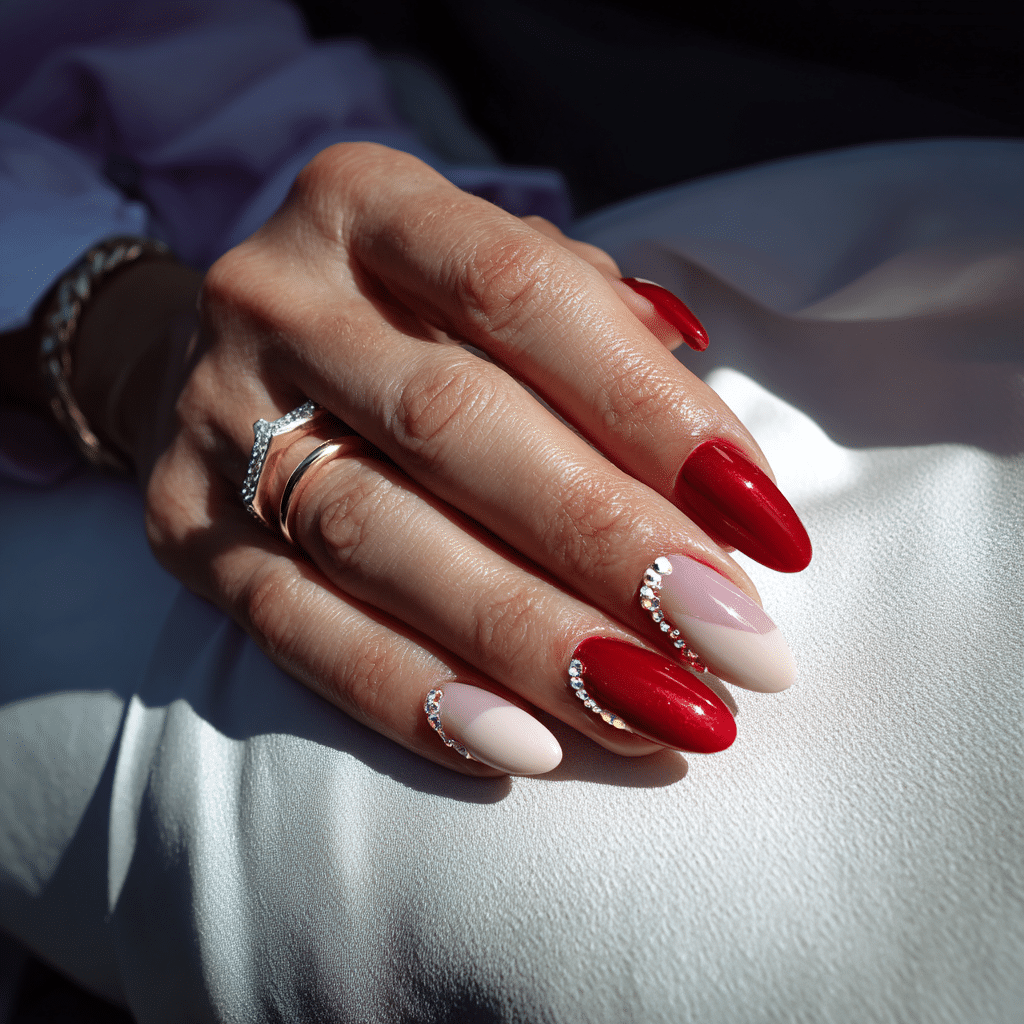
Glossy crimson nails exude glamour, and gold foil accents add a luxurious spring touch. This design is perfect for those seeking a bold yet refined manicure.
Tools Needed
- Crimson red nail polish
- Gold foil sheets and foil glue
- Tweezers
- Base coat and top coat
- Acetone for cleanup
Step-by-Step Guide
- Apply a base coat and let dry.
- Paint nails with glossy crimson polish, using two coats for richness; let dry.
- Select one or two accent nails (e.g., ring and middle fingers).
- Apply a thin layer of foil glue to the accent nails in desired patterns.
- Wait until glue is tacky, then press gold foil onto the glue using tweezers.
- Gently peel back foil to reveal the design.
- Clean excess polish or glue with acetone.
- Apply a glossy top coat to seal.
Color Suggestions
- Classic Glam: Crimson with gold foil.
- Warm Twist: Coral-red with rose gold foil.
- Bold: Deep red with silver foil.
Tips for Success
- Apply foil glue sparingly for clean designs.
- Practice foil placement on paper.
- Use a glossy top coat to enhance shine.
- Avoid overhandling foil to prevent tearing.
Creative Variations
- Use foil in geometric shapes like triangles.
- Apply foil to all nails for a dramatic look.
- Pair with a matte crimson base for contrast.
- Add tiny rhinestones near foil for extra bling.
This design is eye-catching and perfect for spring soirées. Explore Byrdie for foil ideas.
Red and Coral Ombre
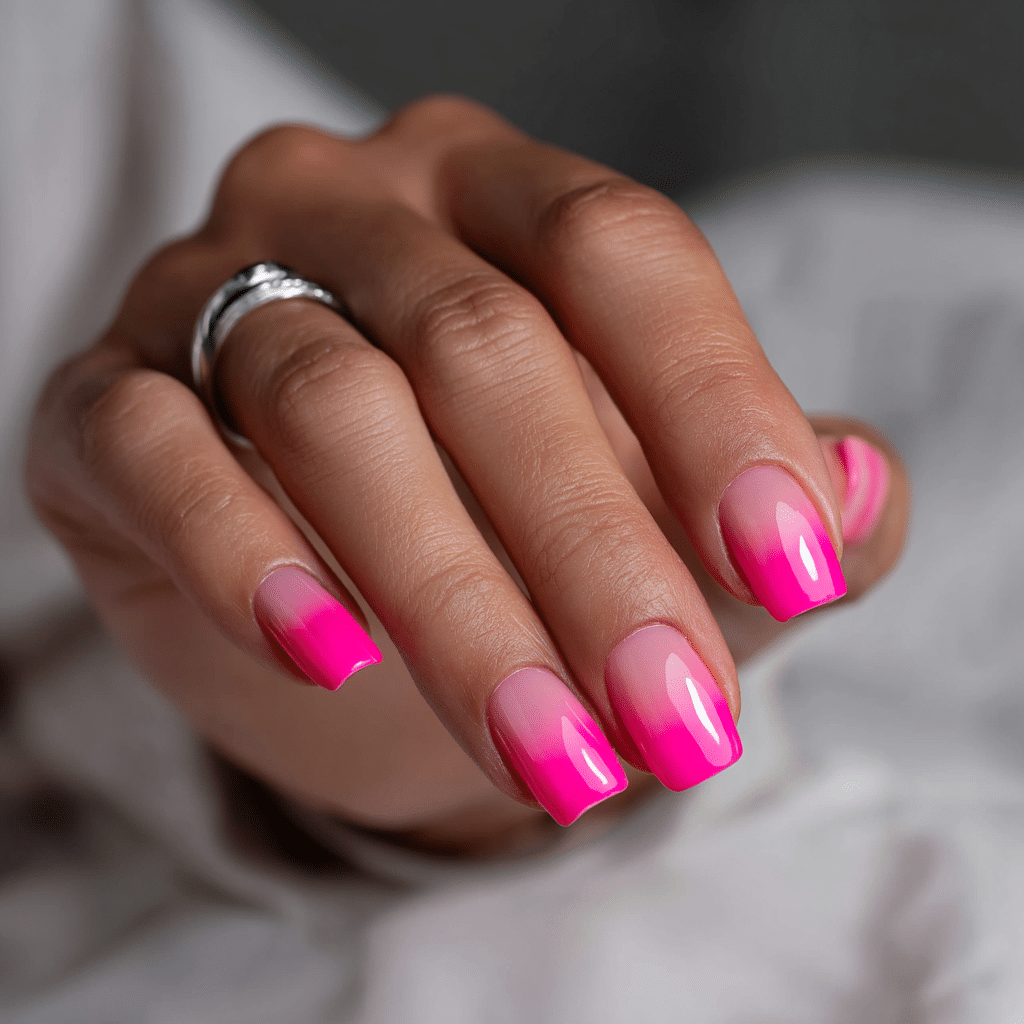
Red and coral ombre nails create a warm, sunset-like gradient, capturing spring’s vibrant energy. This design is bold yet approachable, blending seamlessly for a stunning effect.
Tools Needed
- Red and coral nail polishes
- Makeup sponge or angled brush
- Base coat and top coat
- Acetone for cleanup
Step-by-Step Guide
- Apply a base coat and let dry.
- Paint nails with a light base color (e.g., nude or white) for opacity; let dry.
- Pour small amounts of red and coral polish onto a palette or foil.
- Dab a makeup sponge into both colors, overlapping slightly for blending.
- Press the sponge onto nails, moving from base to tip or vice versa.
- Repeat until the gradient is smooth, then let dry.
- Clean excess polish with acetone and a brush.
- Seal with a glossy top coat.
For precision, use an angled brush to blend colors directly on the nail, starting with red at the base and coral at the tip.
Color Suggestions
- Sunset Glow: Deep red to bright coral.
- Soft Blend: Cherry red to peach.
- Bold Twist: Red to orange for vibrancy.
Tips for Success
- Practice blending on paper for smooth transitions.
- Use thin polish layers to avoid clumps.
- Apply a top coat every few days for longevity.
- Start with two colors for easier blending.
Creative Variations
- Add glitter polish in the gradient’s middle.
- Use a chrome top coat for a holographic effect.
- Create a diagonal ombre for a modern look.
- Incorporate gold foil at the tips.
This design is vibrant and beginner-friendly. Check Teen Vogue for gradient tutorials.
Matte Red with Geometric Art
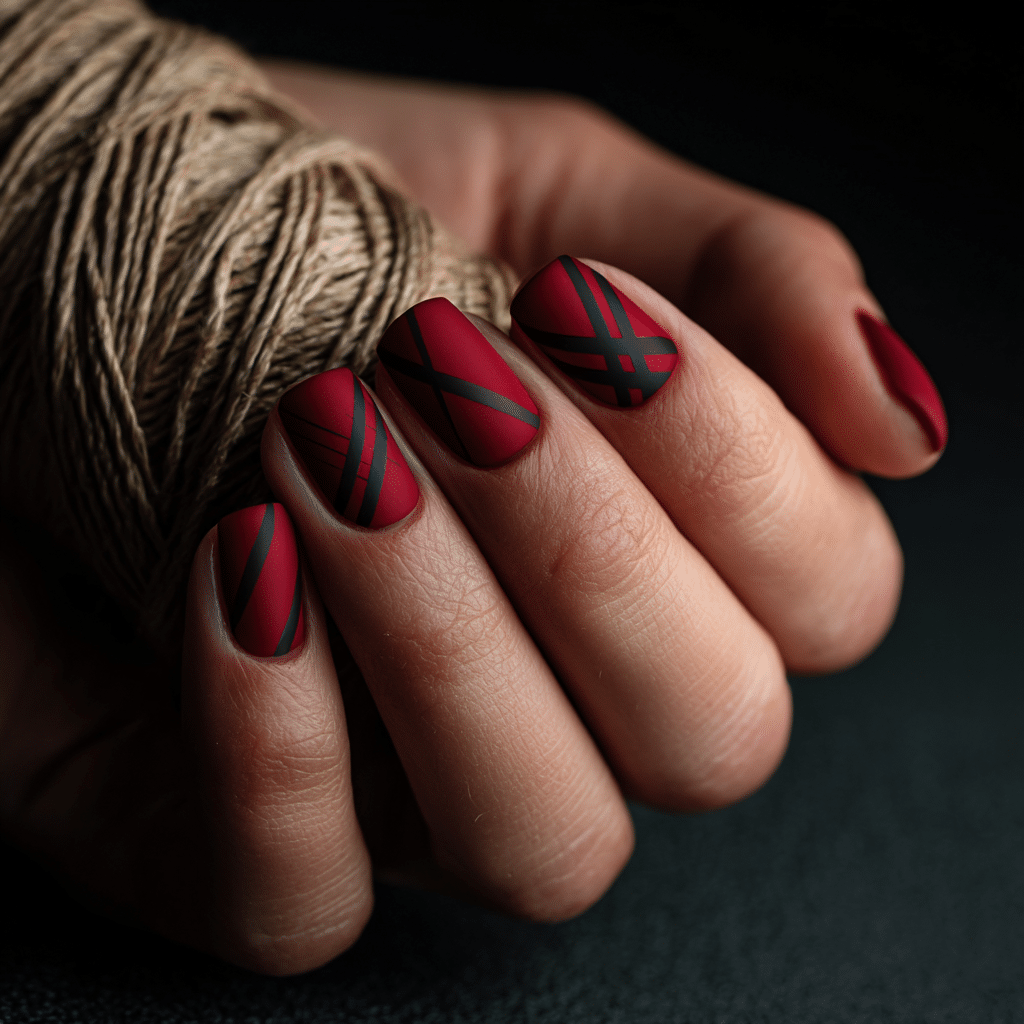
Matte red nails with geometric art offer a modern, minimalist look, using white or black shapes to add a spring-appropriate edge. This design is sleek and fashion-forward.
Tools Needed
- Matte red nail polish
- White or black nail polish
- Fine nail art brush or striping tape
- Base coat and matte top coat
- Acetone for cleanup
Step-by-Step Guide
- Apply a base coat and let dry.
- Paint nails with matte red polish, using two coats; let dry.
- Select one or two accent nails for geometric designs.
- Use a fine brush or striping tape to create shapes like triangles, lines, or squares in white or black.
- If using tape, paint over it and remove carefully before polish dries.
- Let dry and clean excess polish with acetone.
- Seal with a matte top coat for a velvety finish.
Color Suggestions
- Minimalist: Matte red with white shapes.
- Bold Contrast: Matte red with black shapes.
- Soft Edge: Matte red with pastel shapes.
Tips for Success
- Practice shapes on paper for precision.
- Use thin polish layers for clean lines.
- Ensure matte polish is fully dry before adding designs.
- Use a matte top coat to maintain the finish.
Creative Variations
- Add metallic shapes for shine.
- Create overlapping shapes for complexity.
- Use negative space for a modern twist.
- Paint shapes on all nails for a cohesive look.
This design is chic and perfect for spring’s modern aesthetic. See Glamour for geometric inspiration.
Red Jelly Nails
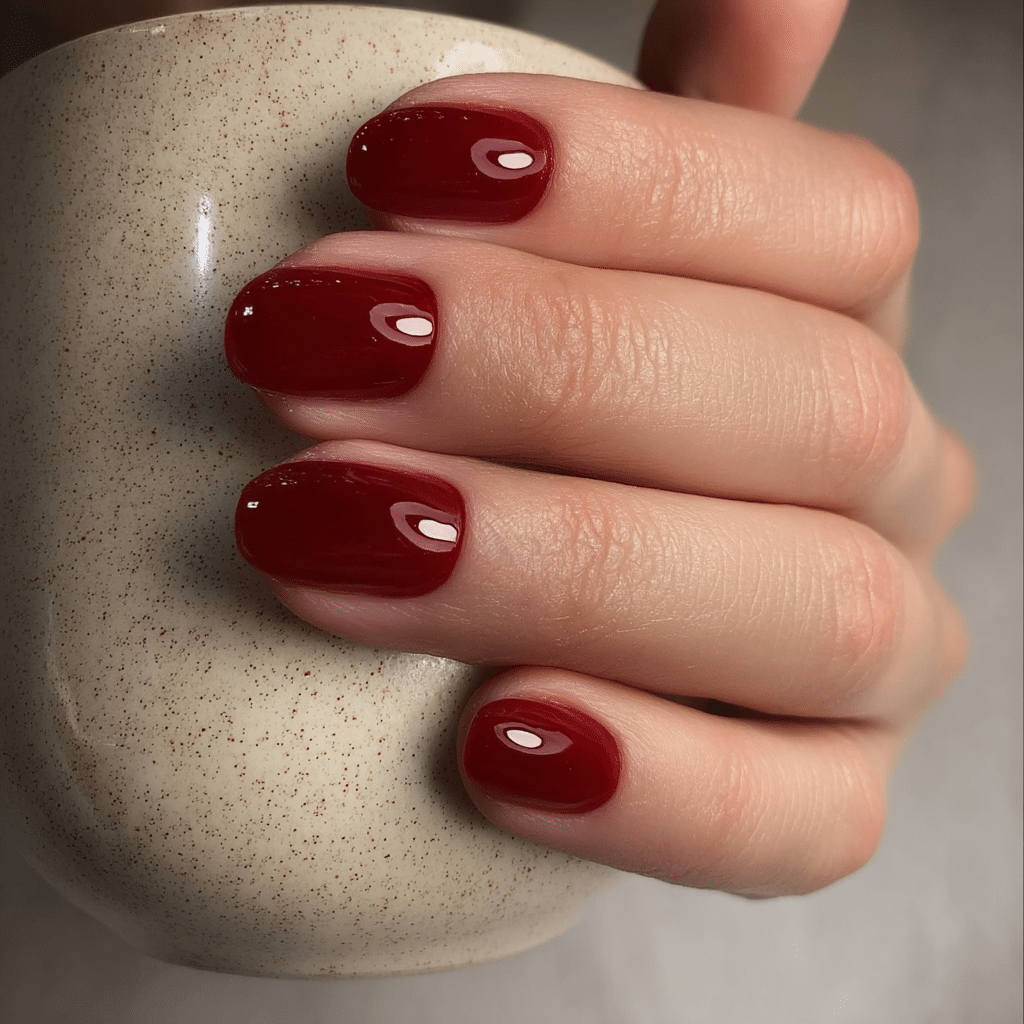
Red jelly nails create a translucent, juicy effect, offering a fun and trendy look for spring’s warmer days. This glassy design is playful and eye-catching.
Tools Needed
- Translucent red nail polish (jelly finish)
- Base coat and glossy top coat
- Acetone for cleanup
- Optional: glitter polish
Step-by-Step Guide
- Apply a base coat and let dry.
- Paint nails with translucent red jelly polish, using 2-3 thin coats for depth; let dry between coats.
- Optionally, add a layer of fine glitter polish for sparkle.
- Clean excess polish with acetone.
- Seal with a glossy top coat for a glass-like finish.
Color Suggestions
- Classic Jelly: Bright red jelly polish.
- Soft Glow: Coral jelly for a lighter look.
- Bold Shine: Deep red jelly with gold glitter.
Tips for Success
- Use thin coats to maintain translucency.
- Ensure polish is fully dry between layers.
- Use a high-shine top coat for the jelly effect.
- Clean cuticles carefully for a polished look.
Creative Variations
- Add tiny rhinestones for embellishment.
- Layer with a gradient jelly effect.
- Use jelly polish on accent nails only.
- Combine with solid red nails for contrast.
This design is trendy and simple, perfect for spring. Explore Byrdie for jelly nail ideas.
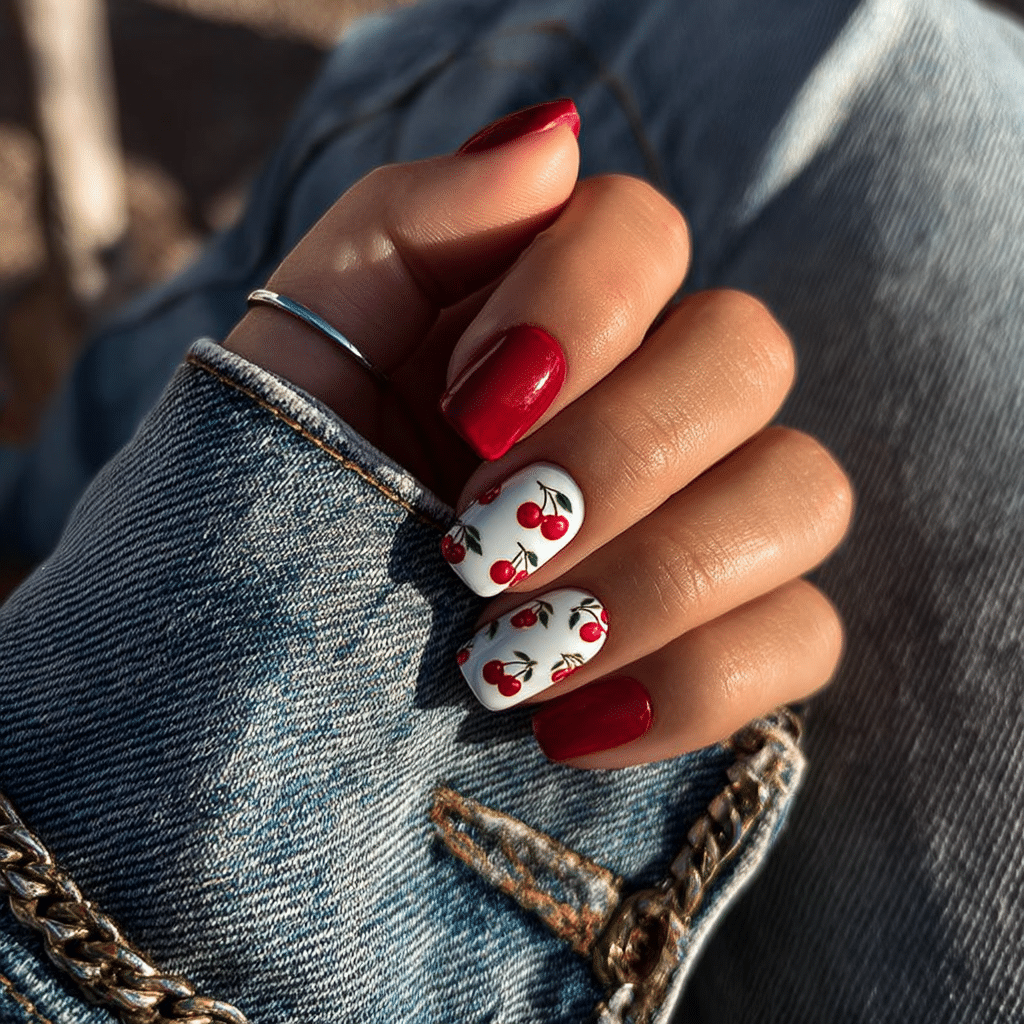
Red with Dainty White Polka Dots
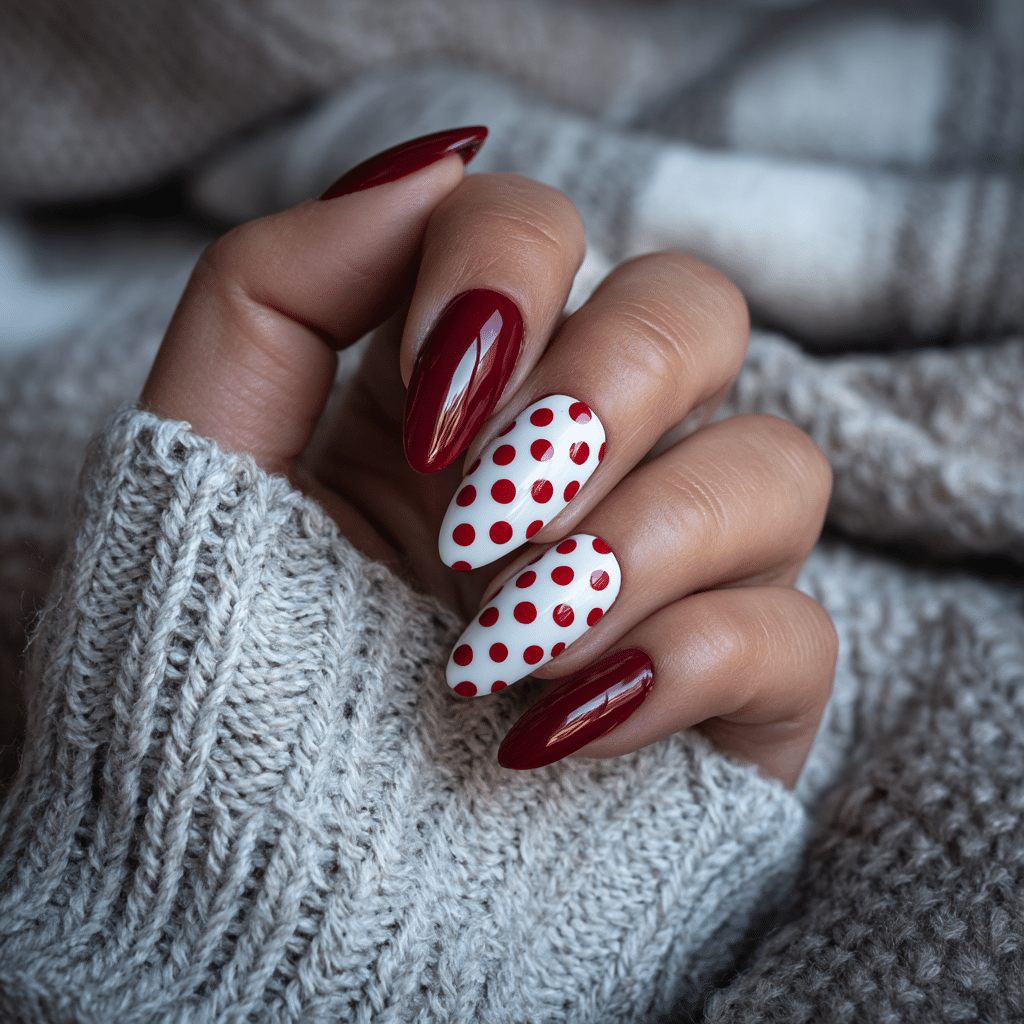
Red nails with white polka dots offer a playful, vintage-inspired look, ideal for spring’s lighthearted vibe. This design is easy and endlessly customizable.
Tools Needed
- Red nail polish
- White nail polish
- Dotting tool, toothpick, or bobby pin
- Base coat and top coat
- Acetone for cleanup
Step-by-Step Guide
- Apply a base coat and let dry.
- Paint nails with red polish, using two coats; let dry.
- Dip a dotting tool or toothpick into white polish.
- Gently touch the nail to create small, evenly spaced dots.
- Arrange dots randomly or in patterns like rows or clusters.
- Let dry and clean excess polish with acetone.
- Seal with a glossy top coat.
Color Suggestions
- Vintage Chic: True red with white dots.
- Soft Contrast: Coral-red with pastel dots.
- Bold Pop: Deep red with black dots.
Tips for Success
- Practice dotting on paper for consistency.
- Use thin polish layers to avoid clumps.
- Wait for dots to dry before adding more.
- Use a glossy top coat for shine.
Creative Variations
- Mix dot sizes for a dynamic look.
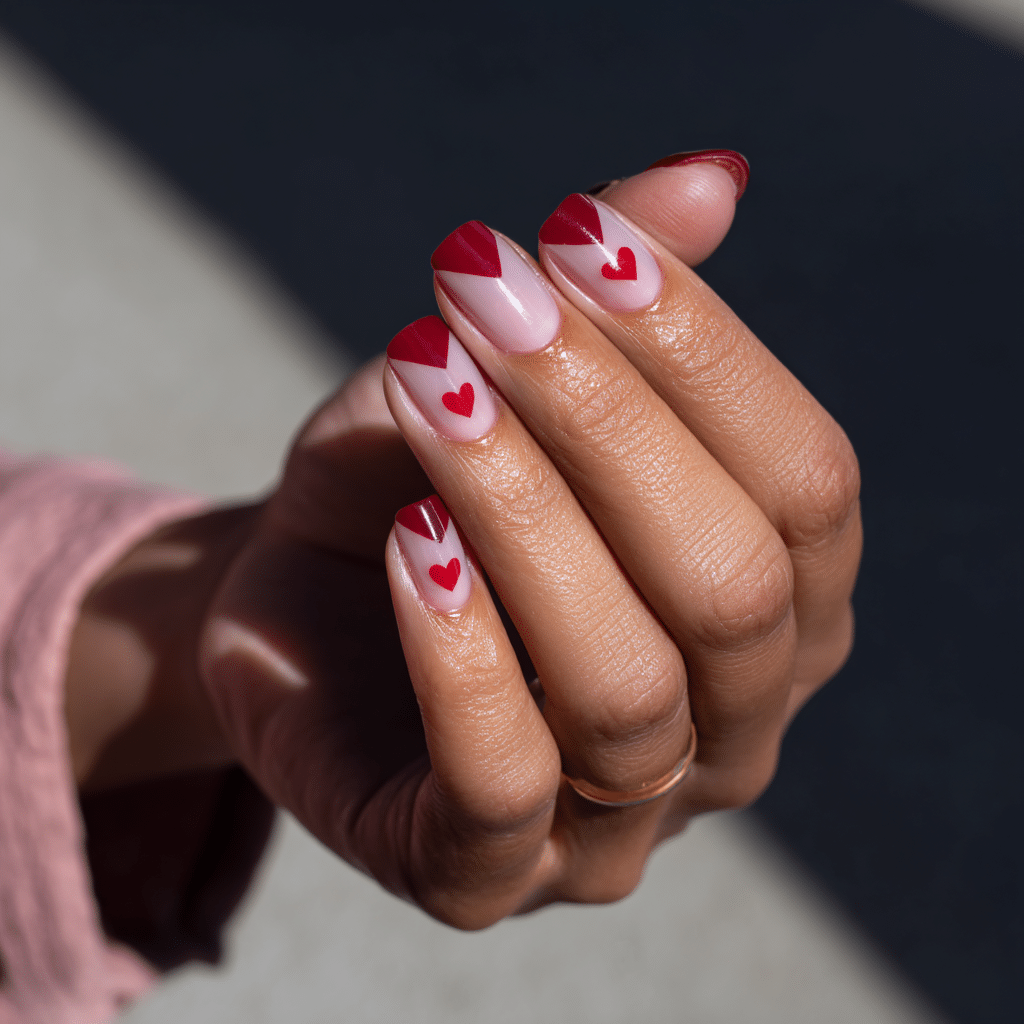
- Create heart-shaped dot clusters.
- Use glitter dots for sparkle.
- Combine with stripes or flowers.
This design is beginner-friendly and charming. Check Paper and Stitch for polka dot tutorials.
Red with Pastel Accents
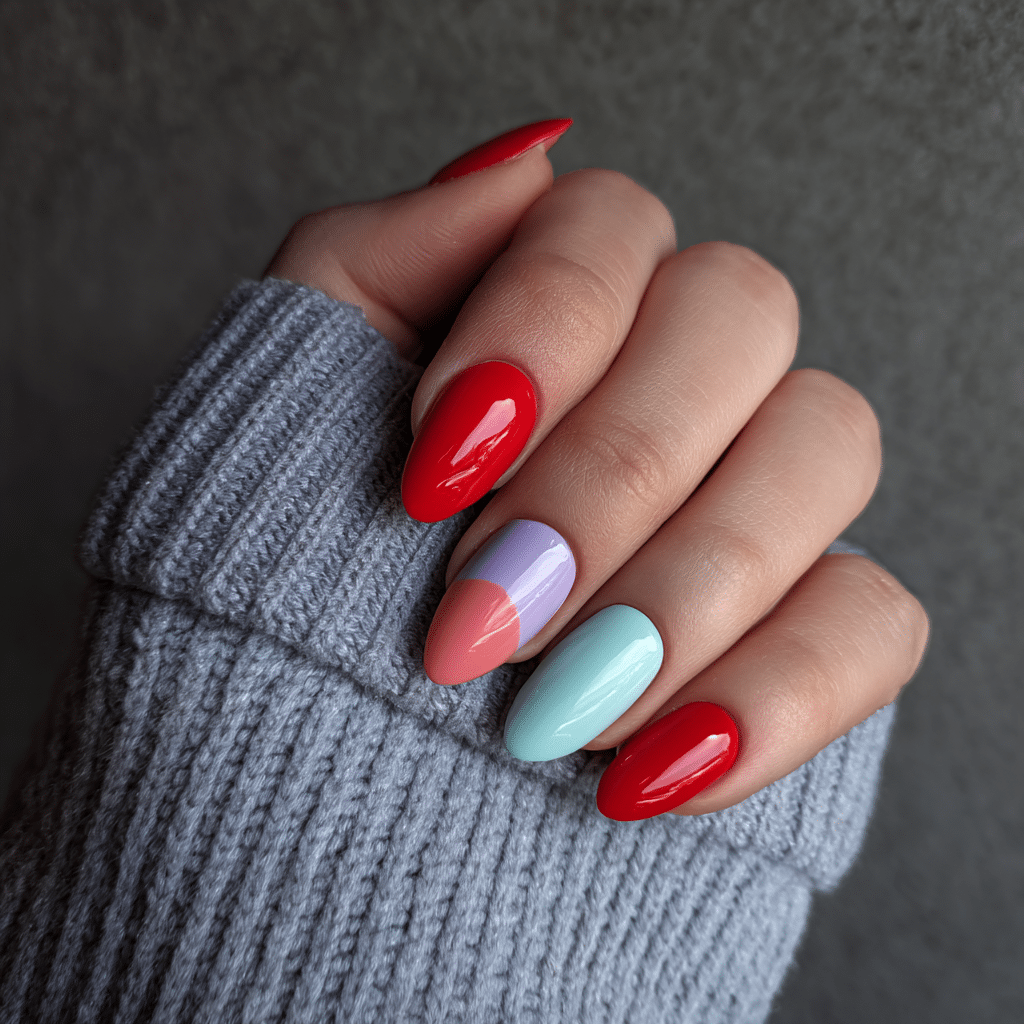
Red nails with pastel accents blend bold and soft tones, keeping the manicure light and spring-ready. This design mixes solid red nails with pastel-painted accent nails for balance.
Tools Needed
- Red nail polish
- Pastel nail polishes (lavender, mint, baby blue)
- Base coat and top coat
- Acetone for cleanup
Step-by-Step Guide
- Apply a base coat and let dry.
- Paint most nails (e.g., 3-4 per hand) with red polish, using two coats; let dry.
- Paint one or two accent nails (e.g., ring and middle fingers) with a pastel color like lavender or mint.
- Ensure even coverage with two coats of pastel polish; let dry.
- Clean excess polish with acetone.
- Seal with a glossy top coat.
Color Suggestions
- Spring Fresh: Red with mint accents.
- Soft Blend: Red with lavender accents.
- Bright Pop: Red with baby blue accents.
Tips for Success
- Choose pastels that complement red tones.
- Apply thin polish layers for evenness.
- Use a quick-dry top coat to prevent smudging.
- Keep cuticles clean for a polished look.
Creative Variations
- Add glitter to pastel nails for sparkle.
- Paint pastel tips on red nails.
- Use a gradient from red to pastel on accent nails.
- Incorporate floral details on pastel nails.
This design is vibrant yet balanced, perfect for spring. See Byrdie for accent nail ideas.
Red and Nude Color Block
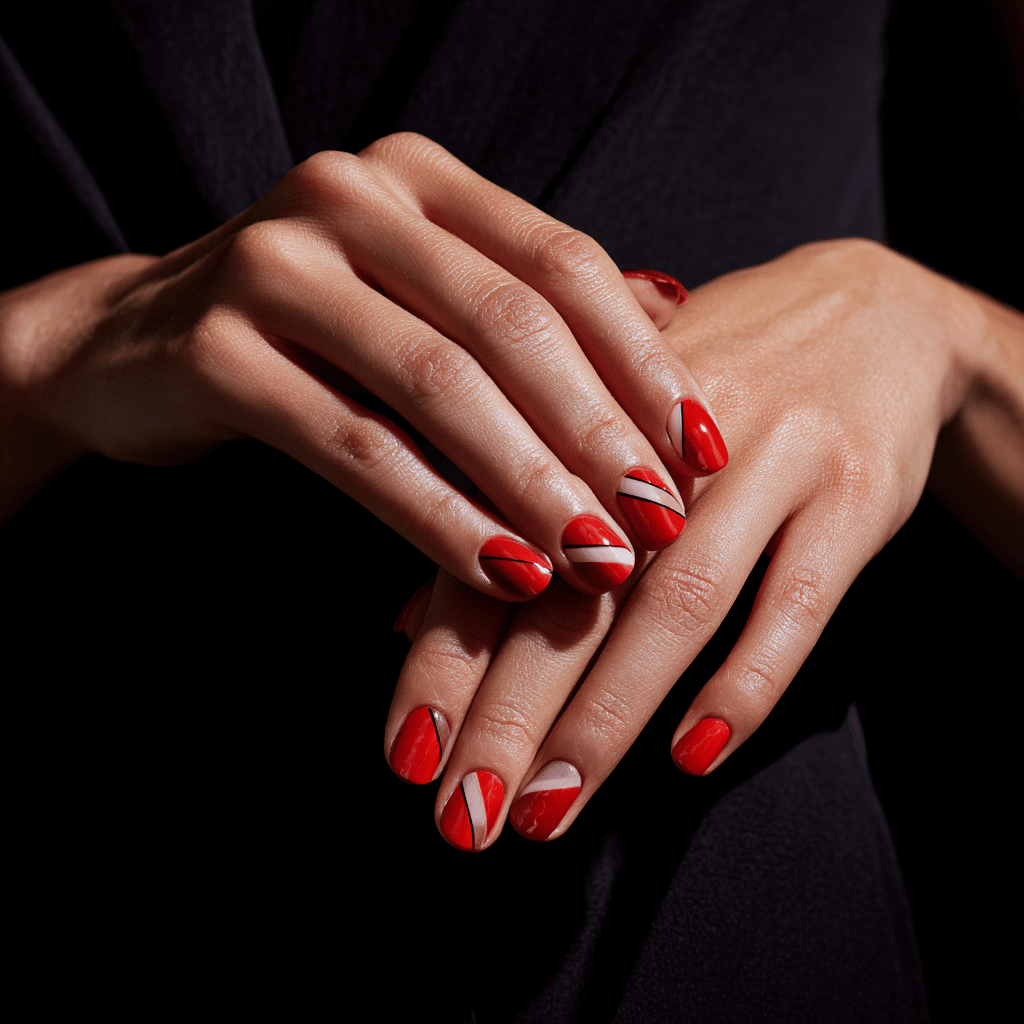
Red and nude color block nails create a sharp, modern look with clean blocks of color. This fashion-forward design is bold yet minimalist, ideal for spring’s contemporary aesthetic.
Tools Needed
- Red nail polish
- Nude nail polish
- Striping tape or nail vinyls
- Base coat and top coat
- Acetone for cleanup
Step-by-Step Guide
- Apply a base coat and let dry.
- Place striping tape or vinyls on nails to create block patterns (e.g., vertical or diagonal splits).
- Paint one section with red polish and the other with nude polish.
- Carefully remove tape or vinyls before polish dries.
- Let dry and clean excess polish with acetone.
- Seal with a glossy top coat.
Color Suggestions
- Classic Contrast: Red and beige nude.
- Soft Modern: Coral-red and pale pink nude.
- Bold Edge: Deep red and taupe nude.
Tips for Success
- Use tape or vinyls for clean lines.
- Apply polish in thin layers to avoid bleeding.
- Practice block patterns on paper.
- Use a glossy top coat for a sleek finish.
Creative Variations
- Create triangular or curved blocks.
- Add metallic lines between blocks.
- Use negative space for a minimalist look.
- Paint blocks on accent nails only.
This design is sleek and stylish, perfect for spring. Explore Glamour for color block inspiration.
Scarlet Base with Leafy Green Details
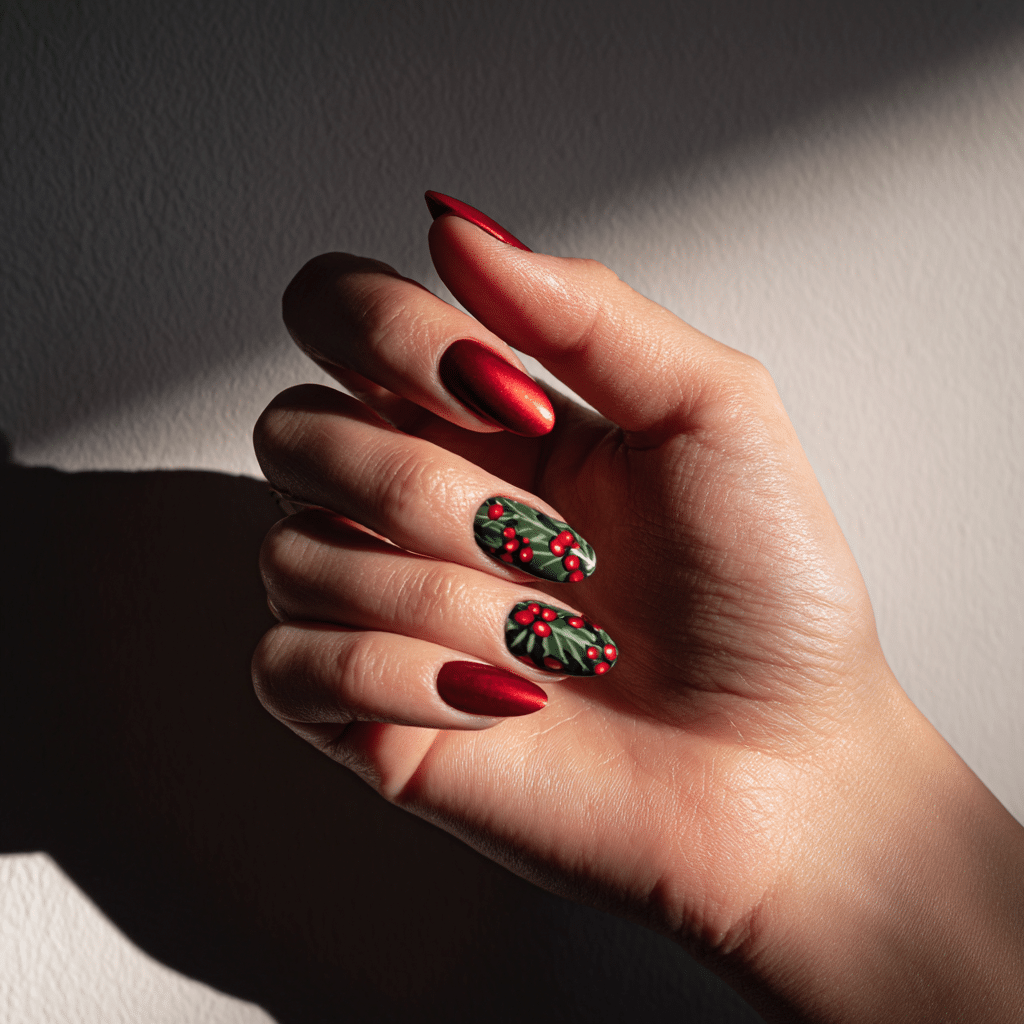
Scarlet nails with leafy green details combine vibrant red with botanical accents, creating a seasonal and unique spring manicure. This design celebrates nature’s renewal.
Tools Needed
- Green nail polish
- Fine nail art brush
- Base coat and top coat
- Acetone for cleanup
Step-by-Step Guide
- Apply a base coat and let dry.
- Paint nails with scarlet red polish, using two coats; let dry.
- Select one or two accent nails for leaf designs.
- Use a fine brush to paint thin green lines for branches or stems.
- Add small, leaf-shaped strokes along the lines.
- Let dry and clean excess polish with acetone.
- Seal with a glossy top coat.
Color Suggestions
- Natural Vibe: Scarlet with olive green leaves.
- Bright Contrast: Scarlet with lime green leaves.
- Elegant: Scarlet with emerald green leaves.
Tips for Success
- Practice leaf shapes on paper for precision.
- Use thin polish layers for detail.
- Keep leaf designs small for subtlety.
- Use a glossy top coat for vibrancy.
Creative Variations
- Add tiny flowers with dotting tools.
- Use metallic green for shine.
- Paint leaves on all nails for a cohesive look.
- Create a gradient scarlet base.
This design is fresh and nature-inspired, perfect for spring. Check Byrdie for botanical inspiration.
| Design | Key Tools | Base Color | Accent Colors | Difficulty |
|---|---|---|---|---|
| Cherry Red with Floral Accents | Dotting tool, brush | Cherry red | White, yellow | Medium |
| Red French Tips | Striping tape | Nude, pink | Red | Easy |
| Glossy Crimson with Gold Foil | Foil, tweezers | Crimson | Gold | Medium |
| Red and Coral Ombre | Sponge, brush | Light base | Red, coral | Medium |
| Matte Red with Geometric Art | Brush, tape | Matte red | White, black | Medium |
| Red Jelly Nails | Jelly polish | Translucent red | Optional glitter | Easy |
| Red with White Polka Dots | Dotting tool | Red | White | Easy |
| Red with Pastel Accents | Pastel polish | Red | Lavender, mint | Easy |
| Red and Nude Color Block | Striping tape | Red, nude | None | Medium |
| Scarlet with Leafy Green Details | Fine brush | Scarlet | Green | Medium |
These 10 red nail art designs offer stylish, vibrant options for spring, blending bold reds with seasonal elements. Whether you prefer minimalist or intricate styles, these ideas are accessible and inspiring for your next manicure.
Red spring nails are more than a beauty trend—they’re a seasonal tradition with endless creative potential. By adjusting the shades, finishes, and design elements, red can feel entirely new each time you wear it. Whether you prefer glossy, matte, minimalist, or artistic designs, red remains a failproof option that thrives in the joyful mood of spring. It’s the perfect blend of classic and contemporary, passion and play, making it a go-to choice for anyone looking to refresh their manicure in style.